Last Updated on February 25, 2024 by Mat Diekhake
The era of touchscreen devices is among us now with many devices that run on Windows 10 having screens that allow you to navigate around the operating system by using your finger if you want, just like if you were to be using a tablet.
Still, there are lots of things worth doing online or with an operating system that are best done with a mouse. A mouse can help you do things quicker, like when I have to go back and edit hundreds of articles and upload more pictures, for example. I couldn’t imagine having to do with with a laptop trackpad let alone my finger on a touchscreen.
Computer mice will probably be with us for a long time to come for that reason, and many people will still find them the more efficient tool for getting a job done.
Each time you use the mouse, you have a pointer or (cursor as they are known to some) helping you keep your place. After all, it would be complicated to use without it.
Windows 10 gives you a default size and style for the mouse pointer, but it can also be changed pretty easily, too. You just have to venture into the Settings application to get it done. You can modify the pointer so that it is larger or smaller, and you can alter the color of it as well if you like.
How to Change Mouse Pointers Using Settings App
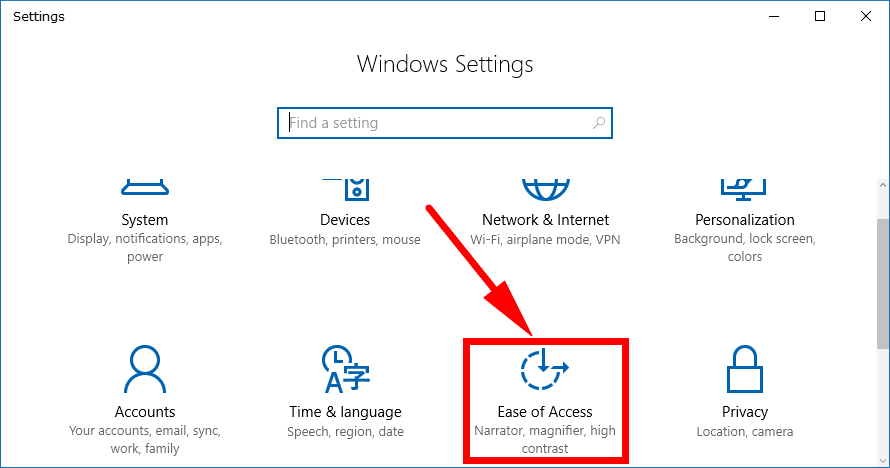
You can change the mouse pointer or mouse cursor by using the Settings application in Windows 10. To get started, head to the Start menu > Settings gear icon from the Start menu’s left side pane and then click on the “Ease of Access” link from the Windows Settings window.
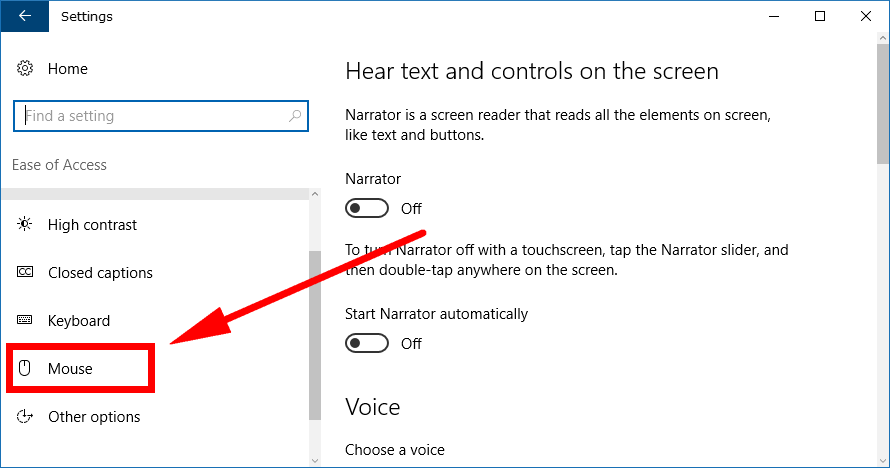
Look in the left side pane for the “Mouse” link and click on it, so you then have all the settings relating to the mouse available in the right side pane.
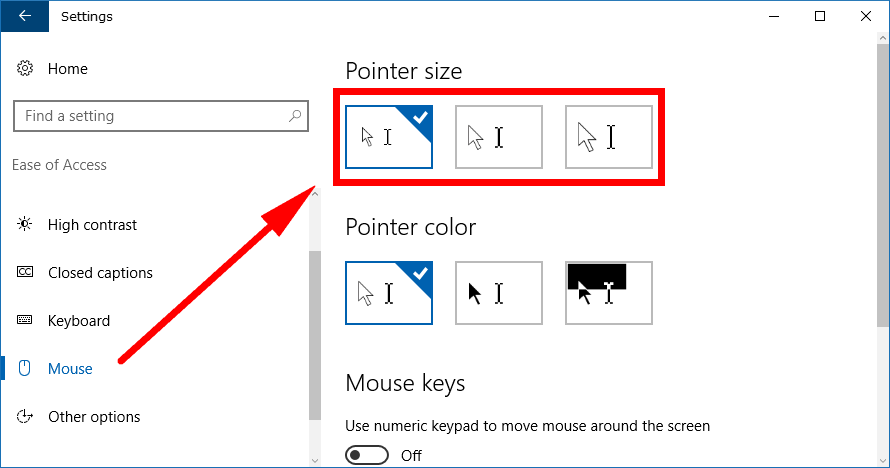
The first thing you’ll see in the right pane is the chance to change the pointer size. It is also by far the most common setting to do with the mouse that people change. If you are struggling to see the pointer on your computer’s display, you might want to make it larger, so it becomes easier, for example.
Note that the pointer’s default size tends to be a pretty good blend between you being able to see it and it being a good size to use when navigating around the operating system. A pointer too large can sometimes make it difficult to navigate when you need to click things, you might want to give it a trial run and remember where to change it again if you want the default size at a later date. There does tend to be some correlation between older people suffering from the worse eye sight as well as a majority of seniors not doing much on Windows outside of using mail apps, documents and using web browsers, so it might still work well for many.
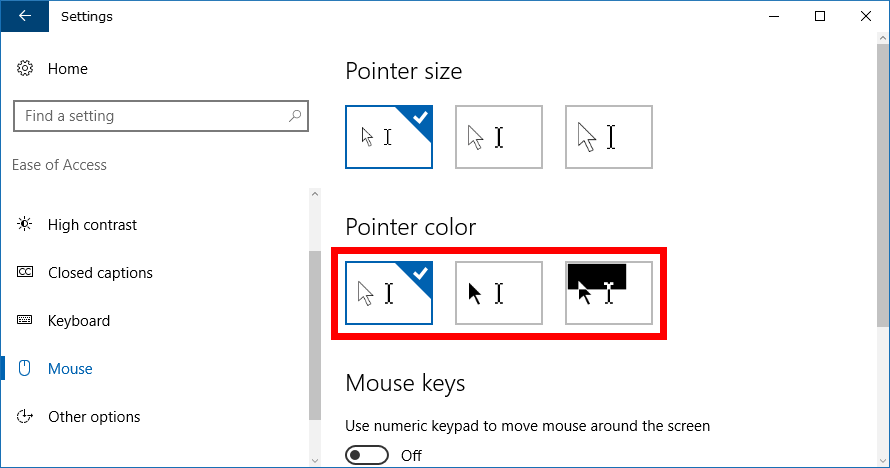
Just below the pointer size is the chance to change the pointer color. Some people like changing the pointer color so they can see it better and others just change it for a bit of fun.
How to Change Mouse Pointers Using Control Panel
You can also get to the mouse settings that allow you to change the mouse pointer by using the Control Panel in Windows 10. To do it this way, open the Control Panel, so it’s showing its classic view with the smaller icons and then click on the “Mouse” link.
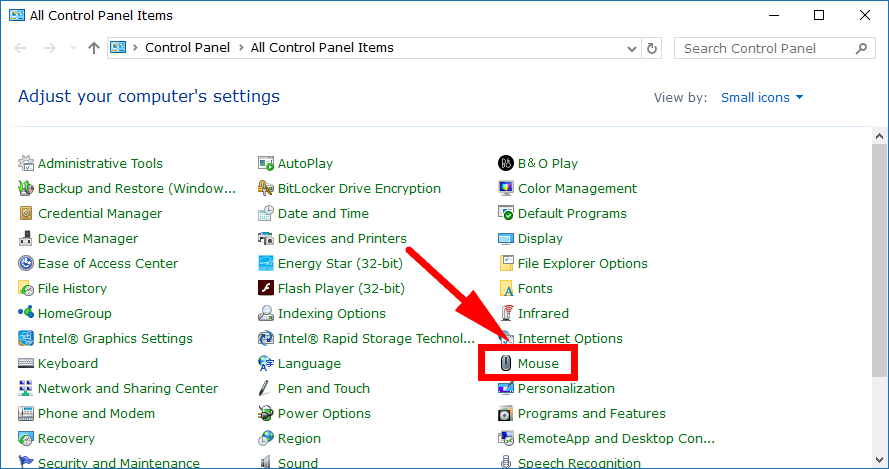
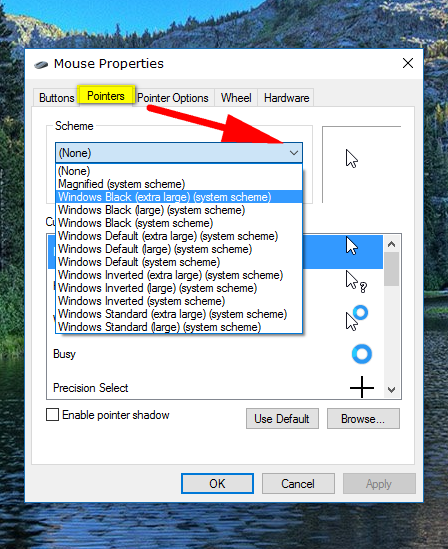
It then opens up to the Mouse properties dialog box where you can change just about anything you would’ve likely imagined to do with your mouse. The only problem with this method is that the dialog box itself is pretty small and makes it hard to see what’s available from the drop-down menu with any kind of certainty that you know what you’ll be getting when you select it. To help you out a little bit, the first bracket for each option in the drop-down menu represents the size of the icon. For example, the one that we have highlighted in the picture says “Extra large” in brackets which is suggesting it will offer the extra large pointer size when selected.
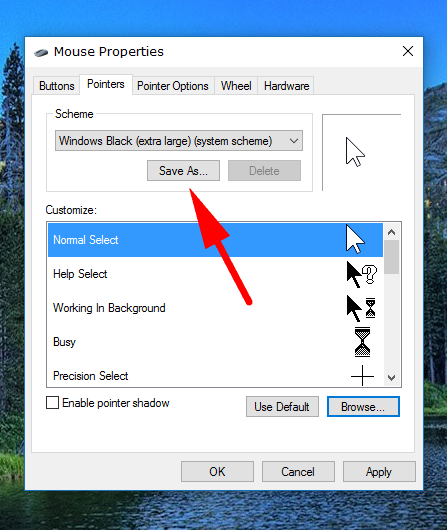
You’ll need to click on the “Save as” button beneath the drop-down menu when you are happy with your new pointer.
How to Change Mouse Pointers Using Registry Editor
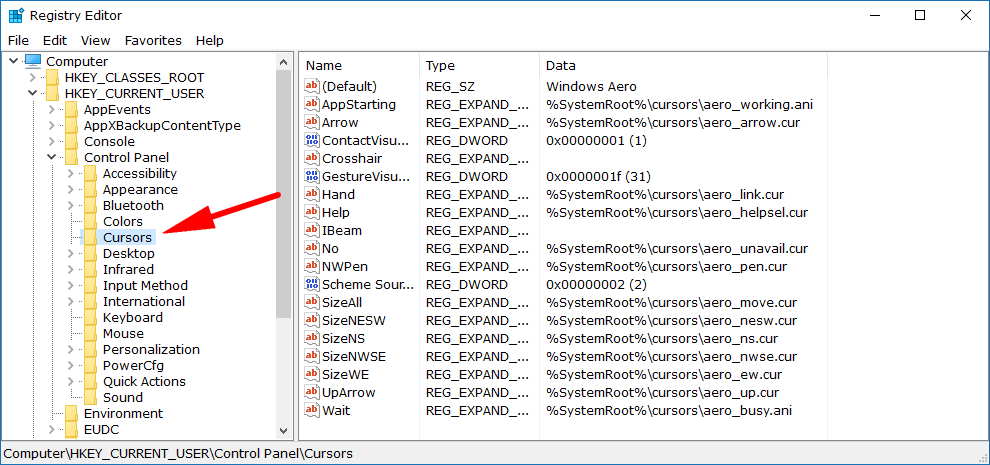
Anyone with the administrative permissions will also be able to venture into the Registry Editor and change the mouse pointer from there. To do it this way, you need to type “Regedit” into the search field that’s available in the taskbar and then click on the “Regedit Run command” that shows up under the best match section.

Now you need to navigate to the following path using the keys in the left pane: HKEY_CURRENT_USER\Control Panel\Cursors and you’ll then see lots of different options relating to your mouse in the right side pane. You can then double-click on each link in the right pane to change its default string value.
If you’ve ever had to ask yourself the question “where is my mouse pointer” because you couldn’t see it on the screen, then checking out what you can do about it might not be a bad idea. Older versions of Windows operating systems would’ve made something like this a nightmare to try to do—and to be fair, they still have those options available, too. But the added inclusion of the mouse settings to the Settings application is s very welcomed additional that makes things very straightforward.
Related Tutorials