Last Updated on April 9, 2025 by Mat Diekhake
Windows Terminal is Microsoft’s new command-line app. It allows for multiple tabs, and from each tab you also have the option of opening either the Windows PowerShell, Command Prompt, Azure Cloud Shell, or the plain PowerShell. Additionally, it is also preconfigured to run SSH and WSL. Windows Terminal can run any command-line app which includes all Windows terminal emulators.
The Windows Terminal app, otherwise known as the new Windows PowerShell, is the long-awaited app many Windows enthusiasts had been waiting for thanks to its ability to do far more than the typical command line which had become outdated. Interestingly, the Windows Terminal was initially available as a separate app that needed to be downloaded from the Microsoft Store; however, if you were to go to the Microsoft Store to download it now you would be prompted that it is already on your computer. You haven’t got memory issues; as stated above in recent Windows 10 updates you would now find the app on your computer as an Inbox app.
When you first open the Windows Terminal app, you are given the Windows PowerShell as the default shell profile; however, this can be changed to the Command Prompt or Azure Cloud Shell if you prefer. It would be wisest to set the default shell to be the one you plan on using most; and for a considerable number that may mean the Command Prompt; for others it may also be Azure Cloud Shell.
While there is no way for Microsoft to somehow automatically detect what it is you want to be set as the default shell, they have at least made it as simple as possible to change the default setting. The settings that can be altered here are available in the Settings app itself, and the Windows Terminal app guides you here directly in just a few clicks.
The following tutorial demonstrates how to change the default shell profile in the Windows terminal app when you are using a version of the Windows 10 operating system.
How to Change Default Profile in Windows Terminal app in Windows 10
You can change the default shell that opens by default upon opening the Windows Terminal app from the Windows Terminal settings which is available from the Windows terminal app itself and will direct you through to a unique group of Settings that has been created for Windows Terminal in Windows 10. Here is how to do that:
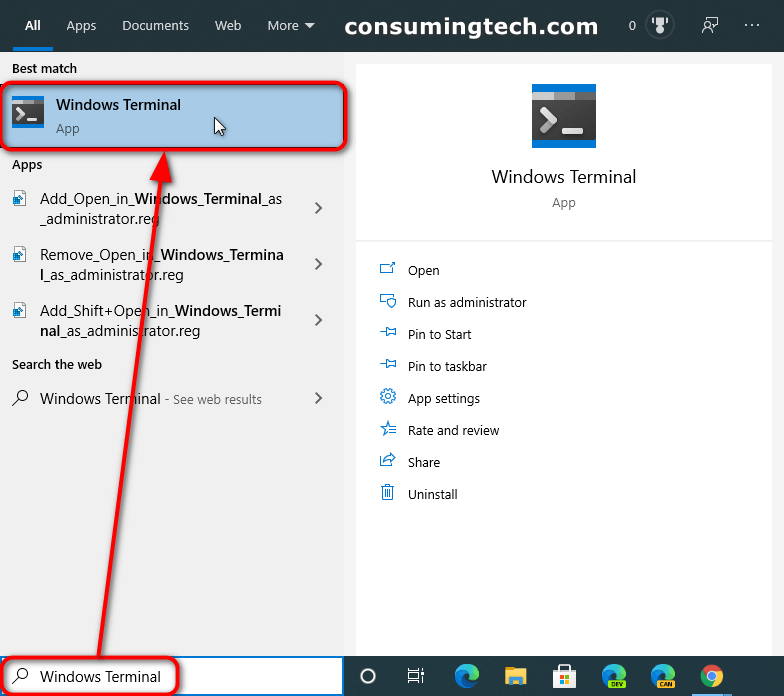
1. Open the Windows Terminal app. (Click to enlarge the screenshot below.)
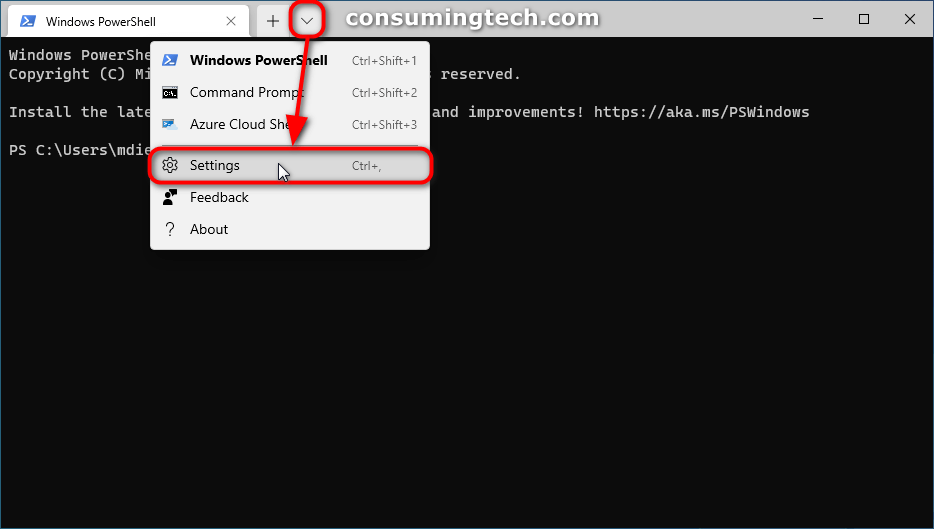
2. Next to the tabs, click on the down-facing arrow to bring up the Windows Terminal menu and then click on the Settings link. (Click to enlarge the screenshot below.)
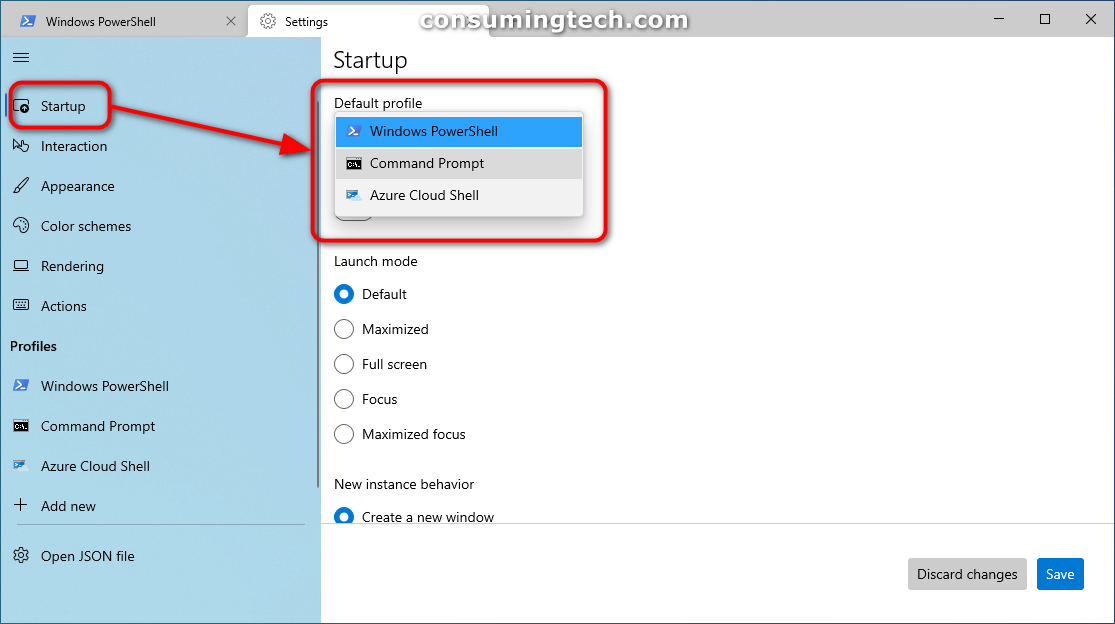
3. Under Startup, click on the Default profile drop-down menu and select the default shell profile you would prefer, i.e., the Command Prompt. (Click to enlarge the screenshot below.)
Note: If this is your first time using the Windows Terminal app, you may wish to note the left menu that opens in the Settings app so you can navigate here in future without opening the Windows Terminal. The blue line next to the menu names shows that it is the Startup section that is open.
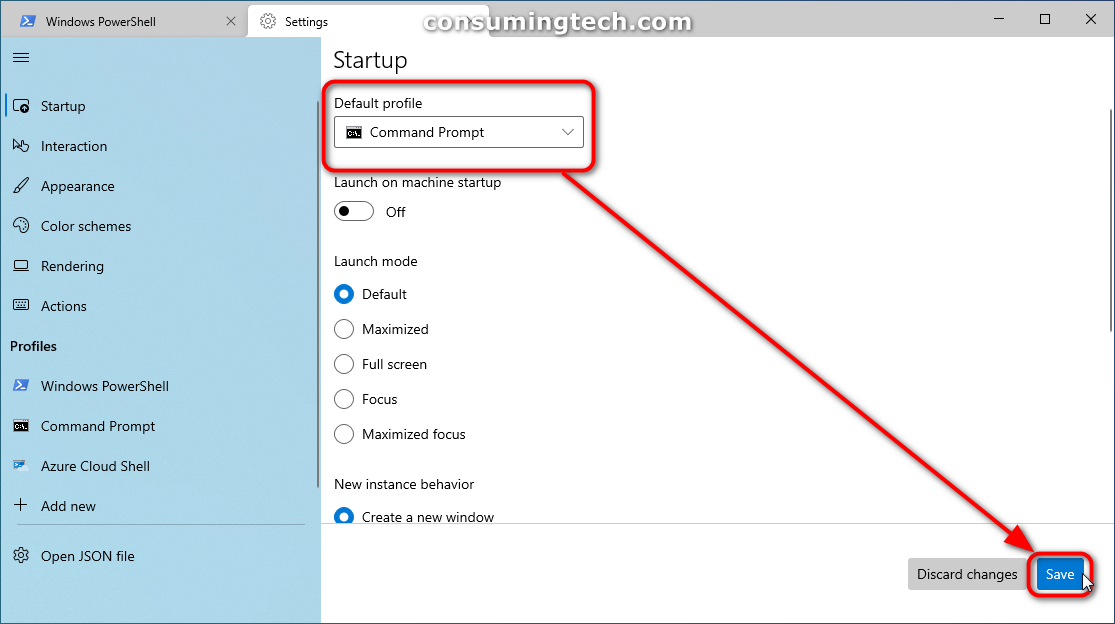
4. After selecting the new default profile, click on the Save button at the bottom of the Settings page. (Click to enlarge the screenshot below.)
Note: While it looks like you are in the traditional Settings app Windows 10 offers, this is an entirely unique Settings interface purely designed for the Windows Terminal app. Subsequently, there are some differences between it and the Settings. One of the more obvious changes is the fact that you may need to click on a Save button rather than have the altered setting be automatically saved when you make an adjustment.
You can close the Windows Terminal settings and continue using the computer.
In conclusion, that is how to change the default shell profile in the Windows terminal app in Windows 10.
Related Tutorials
- How to Create Custom Font with Microsoft Font Maker App in Windows 10 [Tutorial]
- How to Install Media Feature Pack for N Editions of Windows 10 [Tutorial]
- How to Install Active Directory Users and Computers in Windows 10 [Tutorial]
- How to Use Windows 10 Sticky Notes Online via OneNote Online [Tutorial]
- How to Open Windows Mobility Center in Windows 10 [Tutorial]
- How to Install PowerShell Core on Windows [Tutorial]
- How to Read by Sentence in Narrator in Windows 10 [Tutorial]
- How to Remove Programs from ‘Open with’ in Context Menu in Windows [Tutorial]
- How to Disable All Apps from Microsoft Store in Windows 10 [Tutorial]
- How to Enable Windows Mobility Center on a Desktop Windows PC [Tutorial]