Last Updated on December 24, 2022 by Mathew Diekhake
Windows Terminal is Microsoft’s new command-line app. It allows for multiple tabs, and from each tab you also have the option of opening either the Windows PowerShell, Command Prompt, Azure Cloud Shell, or the plain PowerShell. Additionally, it is also preconfigured to run SSH and WSL. Windows Terminal can run any command-line app which includes all Windows terminal emulators.
The Windows Terminal app, otherwise known as the new Windows PowerShell, is the long-awaited app many Windows enthusiasts had been waiting for thanks to its ability to do far more than the typical command line which had become outdated. Interestingly, the Windows Terminal was initially available as a separate app that needed to be downloaded from the Microsoft Store; however, if you were to go to the Microsoft Store to download it now you would be prompted that it is already on your computer. You haven’t got memory issues; as stated above in recent Windows 10 updates you would now find the app on your computer as an Inbox app.
The Windows Terminal app automatically creates a profile for Windows Subsystem for Linux (WSL) and PowerShell shells. These being in the one profile means you can open various shells from the same location without having to search for other executable files.
Nevertheless, staying true to its highly customizable self which has always had an emphasis on really giving users everything they could ever ask for, you can also create new profiles from within the Windows Terminal app as well. This will mean you can customize your settings even further by putting certain clusters of settings within the one profile. For instance, if you wanted different colors and fonts for one profile to open immediately, you could do that.
The following tutorial demonstrates how to add and remove profiles in the Windows Terminal application when using a version of the Windows 10 oeprating system.
How to Add/Remove Profiles in Windows Terminal App in Windows 10
You can choose to add an remove profiles from the Windows Terminal app’s settings menu. Here is how to do that:
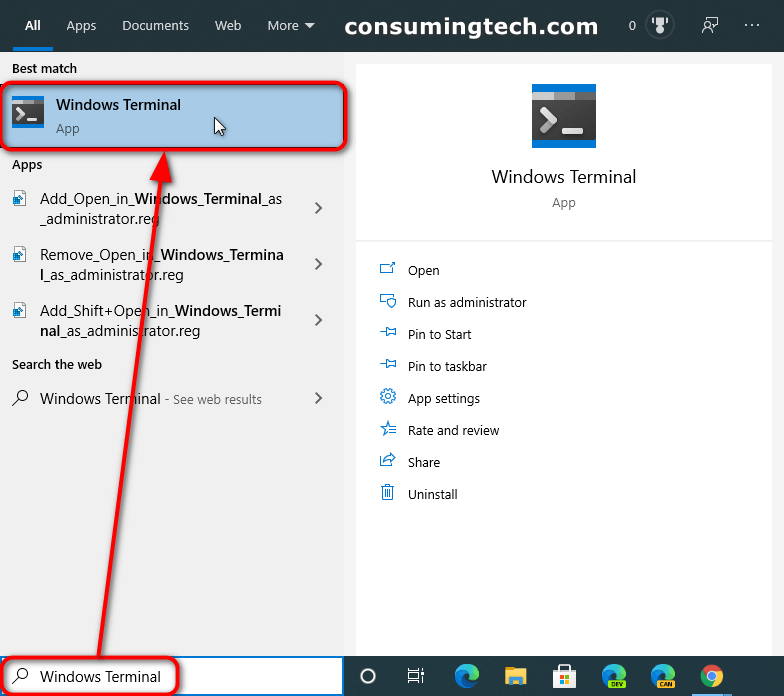
1. Open the Windows Terminal app. (Click to enlarge the screenshot below.)
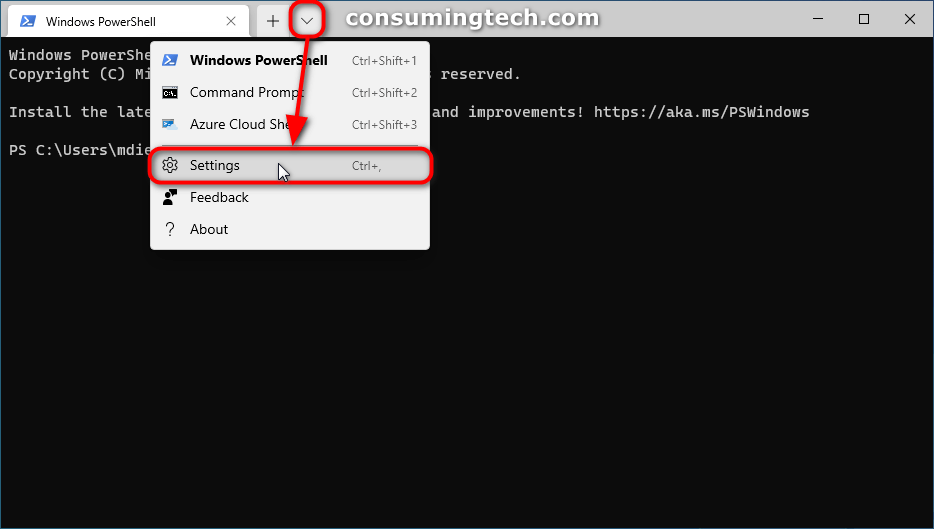
2. Next to the tabs, click on the down-facing arrow to bring up the Windows Terminal menu and then click on the Settings link. (Click to enlarge the screenshot below.)
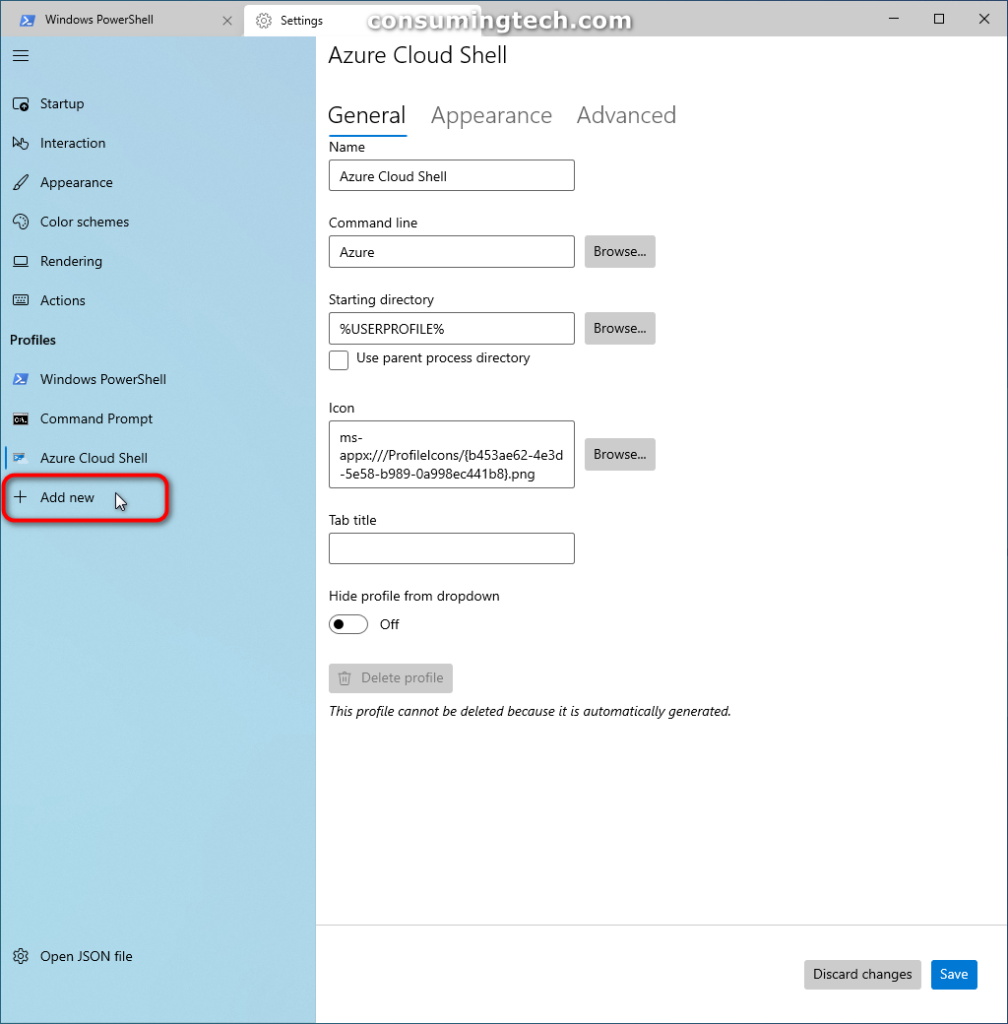
3. Under the Profiles heading in the left pane, click on the + Add new button.
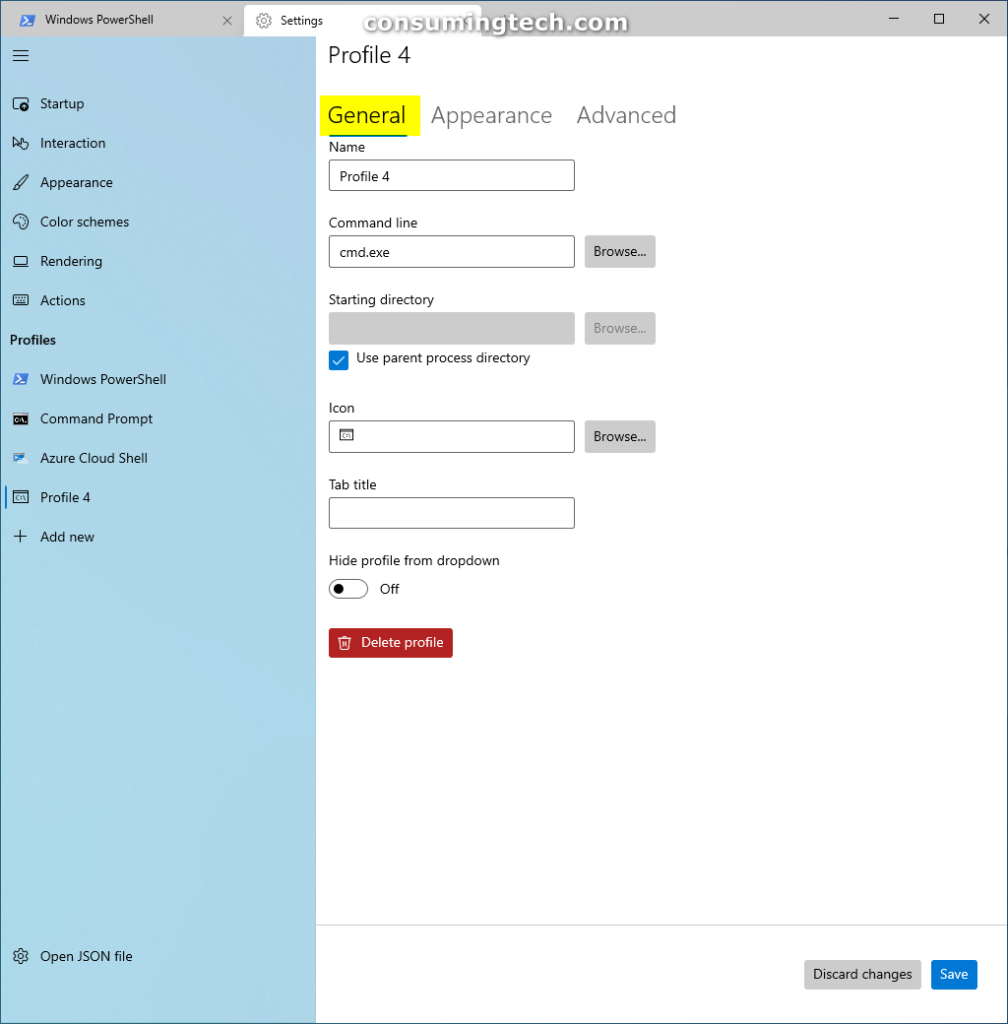
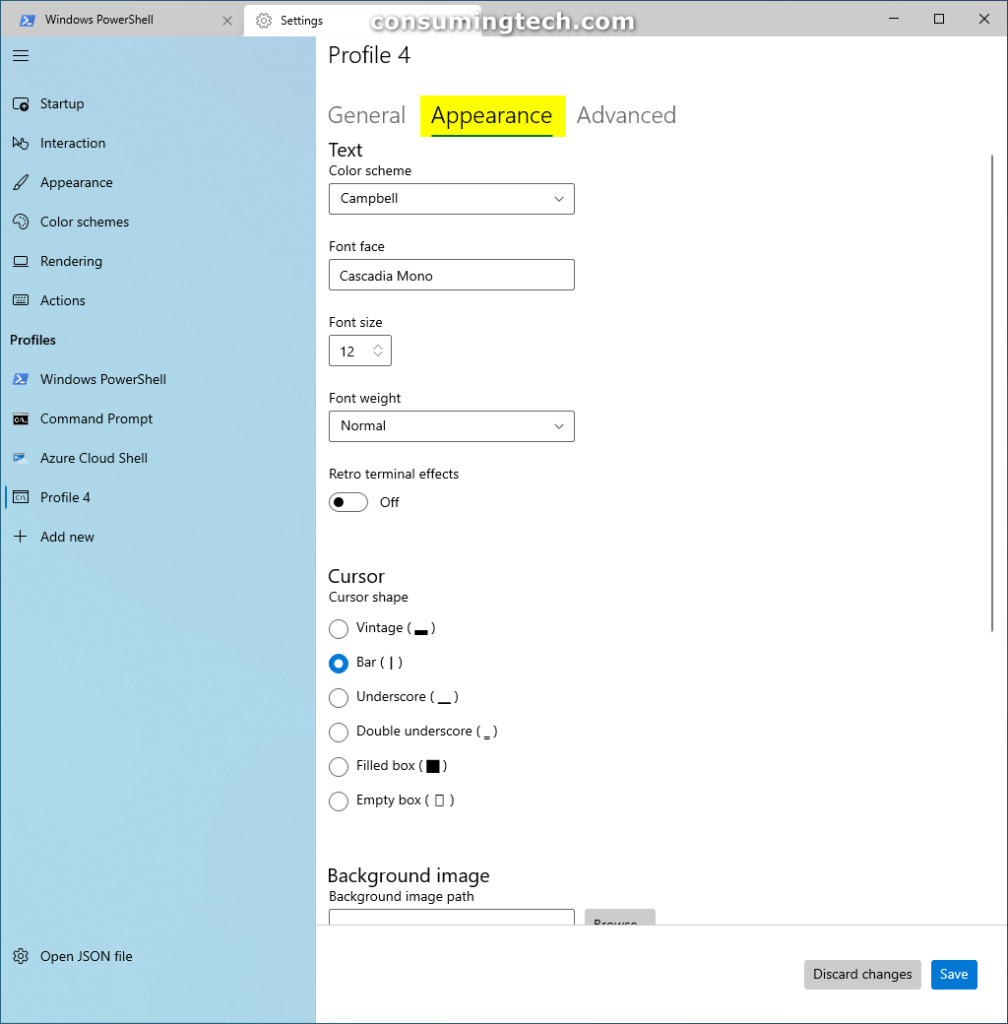
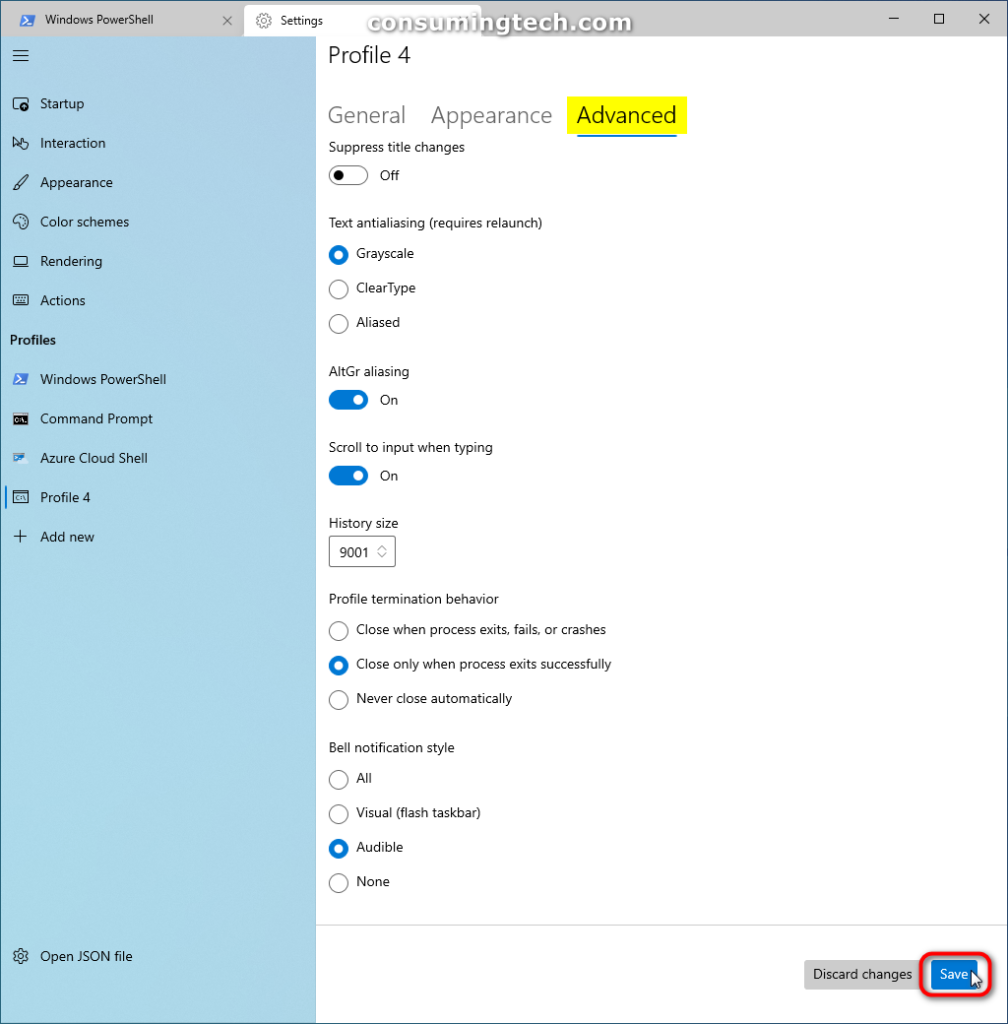
4. Click on the General, Appearance, and Advanced heading in the right side of the same window and then fill out the details for the new profile before clicking on the Save button to save the new profile changes.
General tab
-
- Name
- Command line
- Starting directory
- Icon
- Tab title
- Hide profile from dropdown
Appearance tab
-
- Text color scheme
- Text font face
- Text font size
- Text font weight
- Text retro terminal effects
- Cursor shape
- Background image
- Acrylic
- Window
- Scrollbar visibility
Advanced tab
-
- Suppress title changes
- Text antialiasing (requires relaunch)
- AltGr aliasing
- Scroll to input when typing
- History size
- Profile termination behavior
- Bell notification style
You can close the Windows Terminal settings and continue using the computer.
In conclusion, that is how to add and remove profiles in the Windows Terminal app in Windows 10.
Related Tutorials
- How to Turn On/Off Use Active Tab Title on Windows Terminal Title Bar [Tutorial]
- How to Reset Windows Terminal Settings to Default in Windows 10 [Tutorial]
- How to Enable/Disable ‘Always Show Tabs’ in Windows Terminal in Windows 10 [Tutorial]
- How to Hide/Show Profile from Dropdown in Windows Terminal in Windows 10 [Tutorial]
- How to Change Tab Width Mode in Windows Terminal App in Windows 10 [Tutorial]
- How to Change New Instance Behavior of Windows Terminal in Windows 10 [Tutorial]
- How to Set Dark/Light Theme in Windows Terminal in Windows 10 [Tutorial]
- How to Hide/Show Title Bar for Windows Terminal App in Windows 10 [Tutorial]

