Last Updated on December 24, 2022 by Mathew Diekhake
Windows operating systems have a computer maintenance feature called Disk Clean-up (cleanmgr.exe) which is designed to help you clean up disk space by removing all unnecessary files. Disk Clean-up gives you the choice of removing some file locations while retaining others; thus giving you ample flexibility regarding which files will be kept and which ones will help you regain the disk space you want.
The most common files to remove from Disk Cleanup are your temporary files. A temporary file is a file that is temporarily created to retain information while another one is being created. All temporary files are put into a Temp folder, which is how Windows makes it easy to distinguish where your temp files are that can be deleted.
The following tutorial demonstrates how to use the Disk Cleanup utility in Windows Vista.
How to Use Disk Cleanup in Vista
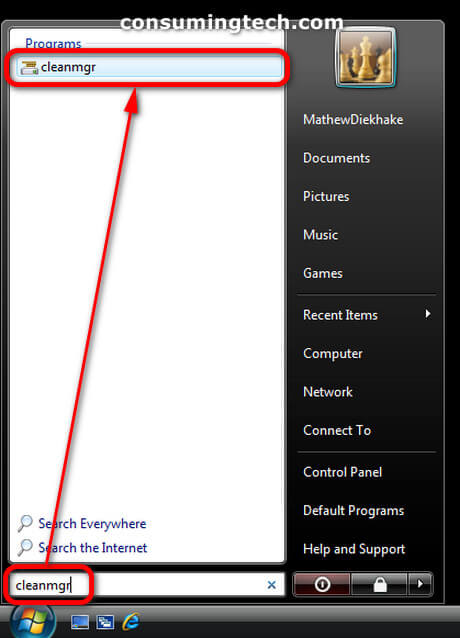
1. Open the Start menu and type cleanmgr into the search field, and then click on the cleanmgr link under the list of programs. Alternatively, you can open the Start menu and navigate to All Programs > Accessories > System Tools folder > Disk Cleanup. (Click to enlarge the screenshot below.)
Do steps 3 or 4 depending on whether you want to clean up your files only or files from all users on this computer.
3. To Clean My Files Only
a. If you are prompted by User Account Control regarding the Disk Space Cleanup Manager for Windows, click on the Continue button. (Click to enlarge the screenshot below.)
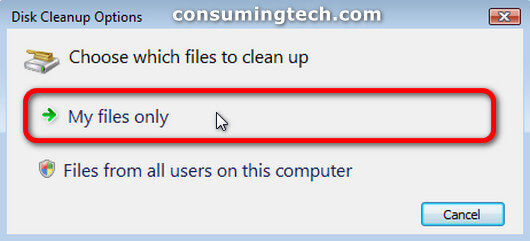
b. When you get to the Disk Cleanup Options screen, click on My Files only to clean up the files for your user account only. (Click to enlarge the screenshot below.)
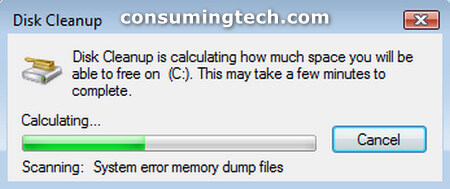
c. Wait for Disk Cleanup to finish calculating how much space it could save your computer and which files are available to be deleted should you wish to delete them. (Click to enlarge the screenshot below.)
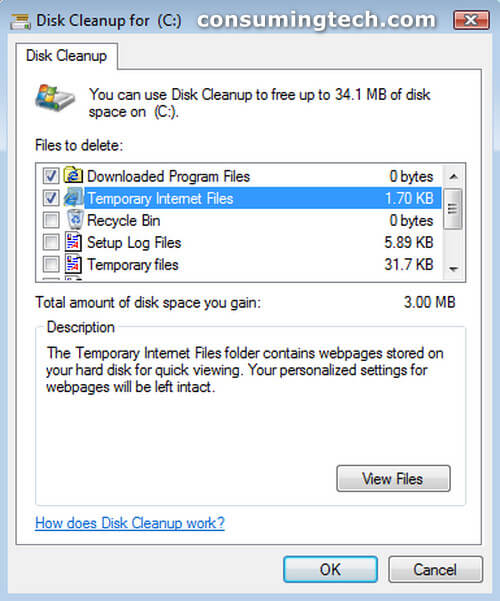
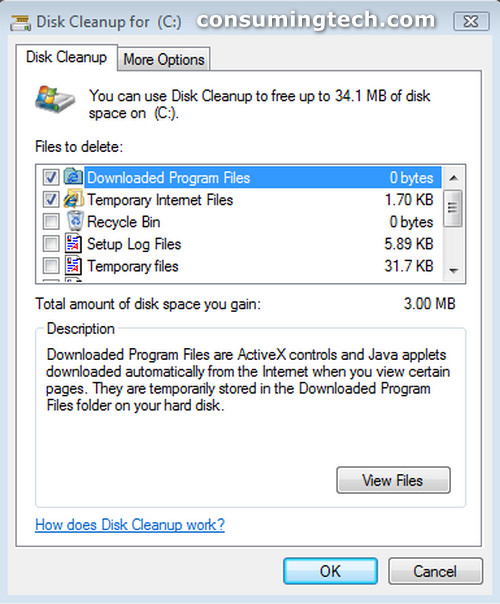
d. When Disk Cleanup loads, scroll down the list and check as many of the available checkboxes as you would like to see as folders that get deleted to free up disk space. (Click to enlarge the screenshot below.)
Note: You can also see the size of the folders to the right side of the Files to delete window. If you are not sure about whether you should delete a particular folder or not and it shows you there is not much available disk space from it anyway, then you may want to decide against deleting that folder.
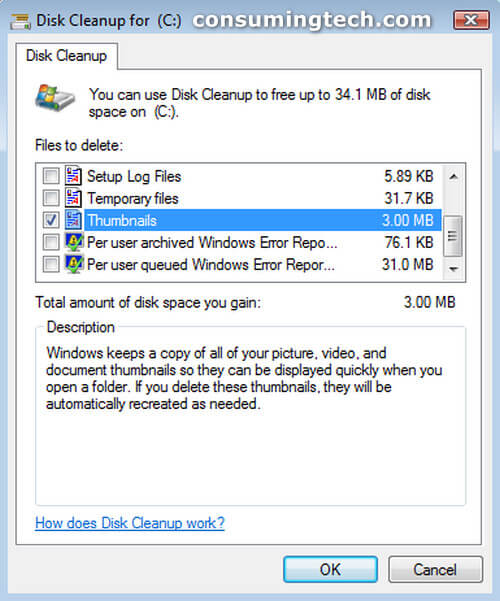
e. Scroll down the list of files to delete using the scroll bar on the right side of the window and continue to check the other boxes that you may wish to include in the cleanup. If you are not much of a computer administrator, one of the more obvious boxes you can check is the Thumbnails box; it also can fast become one of the folders that takes up the most space, too. (Click to enlarge the screenshot below.)
4. To Clean Up Files from All Users on This Computer
a. If you are prompted by User Account Control regarding the Disk Space Cleanup Manager for Windows, click on the Continue button. (Click to enlarge the screenshot below.)
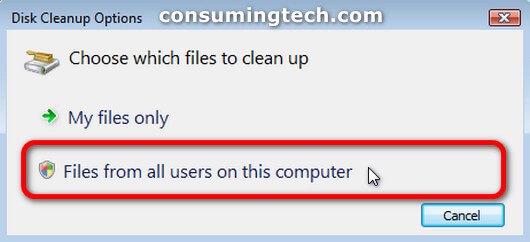
b. When you get to the Disk Cleanup Options screen, click on Files from all users on this computer to clean up the files for every user account that has been created on the computer. (Click to enlarge the screenshot below.)
Note: Only use this option if you have some control over all users on the computer and you know for sure that you will not be deleting any files that someone else may have needed.
c. When Disk Cleanup loads, scroll down the list and check as many of the available checkboxes as you would like to see as folders that get deleted to free up disk space. (Click to enlarge the screenshot below.)
Note: You can also see the size of the folders to the right side of the Files to delete window. If you are not sure about whether you should delete a particular folder or not and it shows you there is not much available disk space from it anyway, then you may want to decide against deleting that folder.
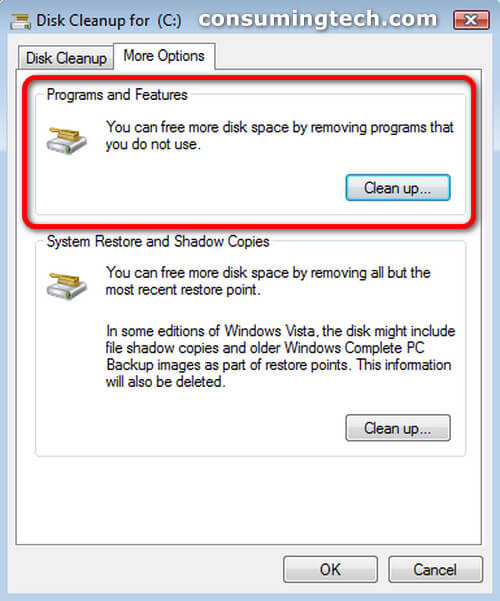
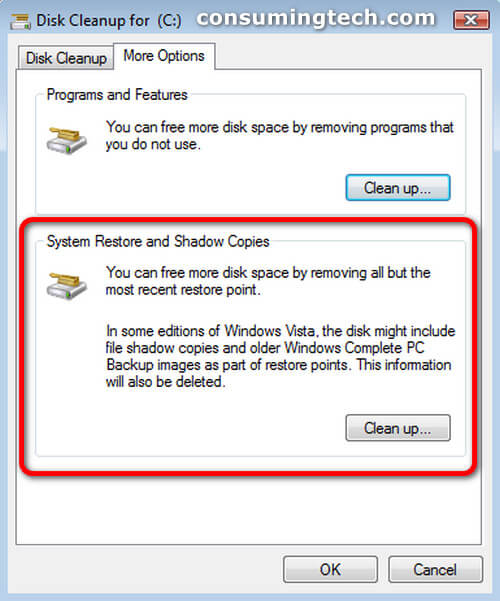
d. Because you choose to clean up files for all users on this computer, you get an additional More Options tab. This tab includes gateways to cleaning up Programs and Features, which directs you through to where you can uninstall previously installed programs, and the chance to clean up System Restore and Shadow Copies. (Click to enlarge the screenshot below.)
e. To clean old restore points and shadow copies, which can take up a lot of disk space, click on the Clean up button under the System Restore and Shadow Copies heading. (Click to enlarge the screenshot below.)
f. Windows will then show you another Disk Cleanup dialog that this time asks: Are you sure you want to delete all but the most recent restore point, to which you would click on the Delete button. (Click to enlarge the screenshot below.)
That’s all.
Related Tutorials
- How to Fix Program Installation Errors in Windows Vista [Tutorial]
- How to Change Menu Show Delay Time in Windows Vista [Tutorial]
- How to Stop XP Dual Boot Deleting System Restore Points [Tutorial]
- How to Fix Cannot Delete a File or Folder Due to Corrupt Recycling Bin [Tutorial]
- How to Switch Windows Media Player to 64 Bit in Windows Vista [Tutorial]
- How to Change Internet Time Synchronization Update Interval in Windows Vista [Tutorial]
- How to Troubleshoot Using Reliability and Performance Monitor in Windows Vista [Tutorial]
- How to Change Recycle Bin Storage Size in Windows Vista [Tutorial]
- How to Adjust Cookie Preferences in Internet Explorer in Windows Vista [Tutorial]
- How to View Boot Information at Startup in Windows Vista [Tutorial]
- How to Open Elevated Command Prompt in Windows Vista [Tutorial]
- How to Setup Event Viewer to Send Email Notifications in Windows Vista [Tutorial]

