Last Updated on January 5, 2023 by Mat Diekhake
Some people prefer having the files, folders, and drives in File Explorer displayed with a checkbox on hover so you can check each item. Checkboxes are turned off by default because most people are satisfied with the blue color in the background once an item has been selected, But you can use checkboxes if you wish.
When you have checkmarks turned on, you will see them when accessing File Explorer directly as well as when you open File Explorer from other sources such as when uploading files from one of your File Explorer folders.
You can turn checkboxes for File Explorer on and off from File Explorer and the Folder Options dialog. The slightly quicker method is learning how to do it from File Explorer directly.
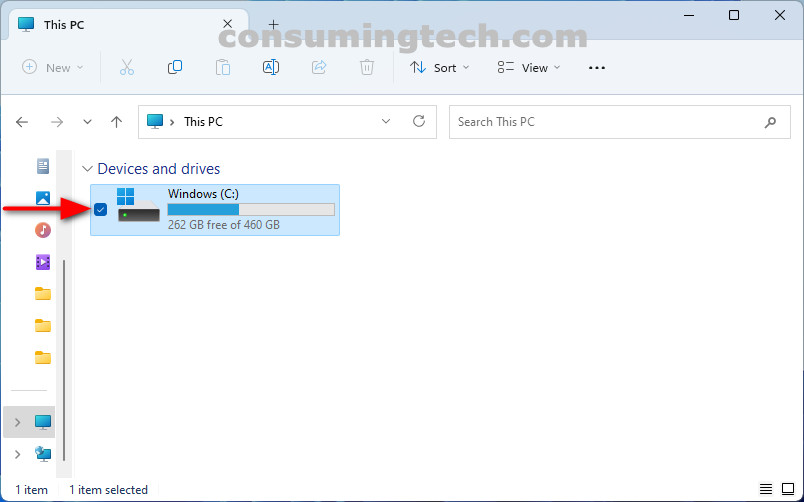
Example of checkboxes in File Explorer turned on:
This tutorial demonstrates how to turn on/off the option to use checkboxes to select items when using a version of the Windows 11 operating system.
1. Turn On/Off Use Check Boxes to Select Items Using File Explorer
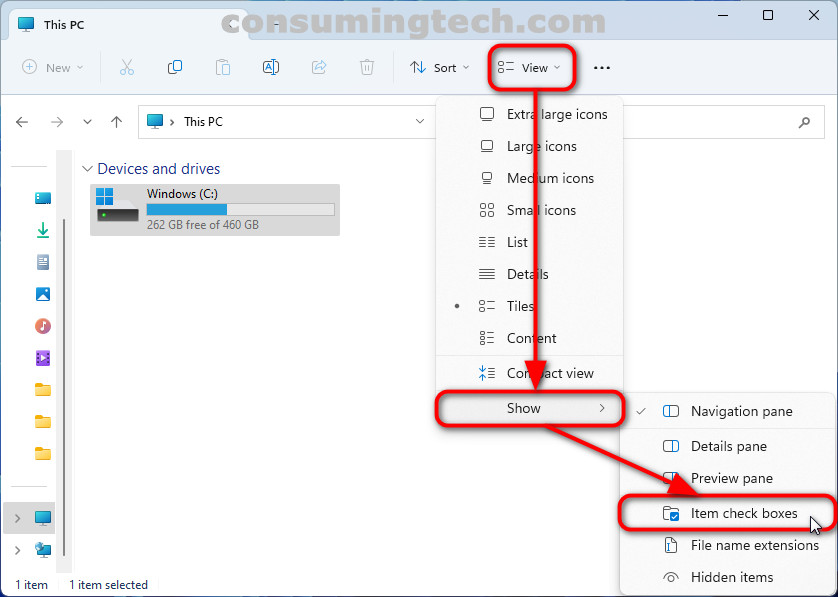
The quickest method for turning on or off checkboxes for File Explorer is from the View menu in File Explorer. Here is how to do it:
- Open File Explorer via the search field in the taskbar.
- Click View > Show > Item check boxes.
Note: The tick next to Item check boxes lets you know if it is turned on or not.
2. Turn On/Off Use Check Boxes to Select Items Using File Explorer Options
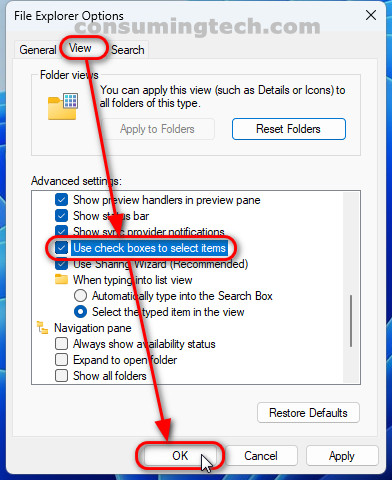
You can also use Folder Options to turn on and off the File Explorer checkboxes. Here is how to do it:
- Open File Explorer Options via search in the taskbar.
- Click View.
- Scroll down and check/uncheck Use check boxes to select items.
- Click OK.
In conclusion, that is how to use check boxes to select items in Windows 11.