Last Updated on January 1, 2023 by Mat Diekhake
By default, the “most used” apps section is turned off. You can enable it from the Settings app. Once enabled, you have the “most used” apps available from the “all apps” list in the Start menu.
This tutorial demonstrates how to show/hide the most used apps list on the Start menu when using a version of the Windows 11 operating system.
How to Show/Hide Most Used Apps List on Start Menu Using Settings App
1. Open the Settings app via the search field.
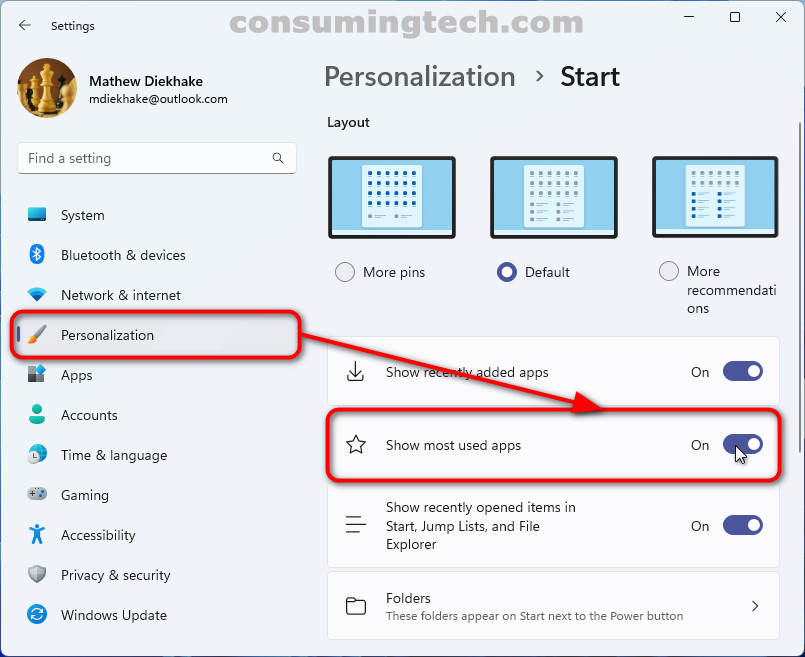
2. Click Personalization > Start.
3. Toggle on or off Show most used apps.
How to Force Show/Hide Most Used Apps List on Start Menu Using Local Group Policy Editor
Administrators can also force the “most used” apps section to be shown or hidden on the Start menu with a group policy in the Local Group Policy Editor. Here is how:
1. Open the Local Group Policy Editor via the search field.
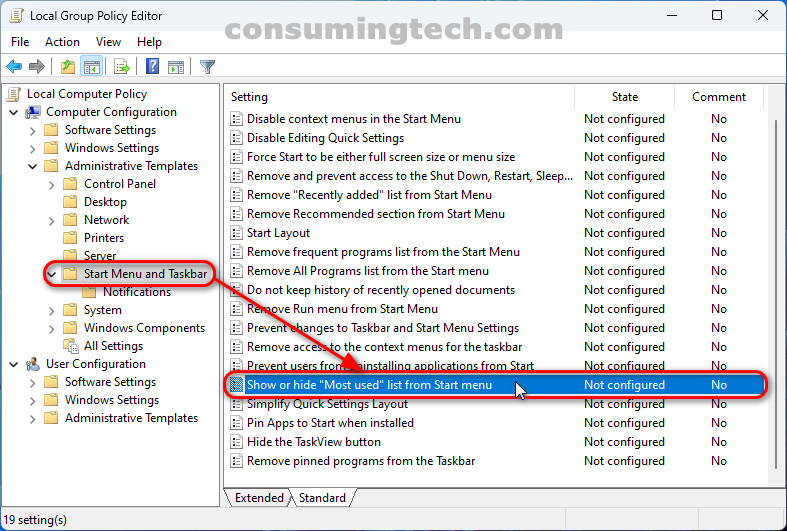
2. Using the keys in the Local Group Policy Editor’s left pane, click through to the following path:
Computer Configuration > Administrative Templates > Start Menu and Taskbar
3. Double-click on the policy Show or hide “Most used” list from Start menu.
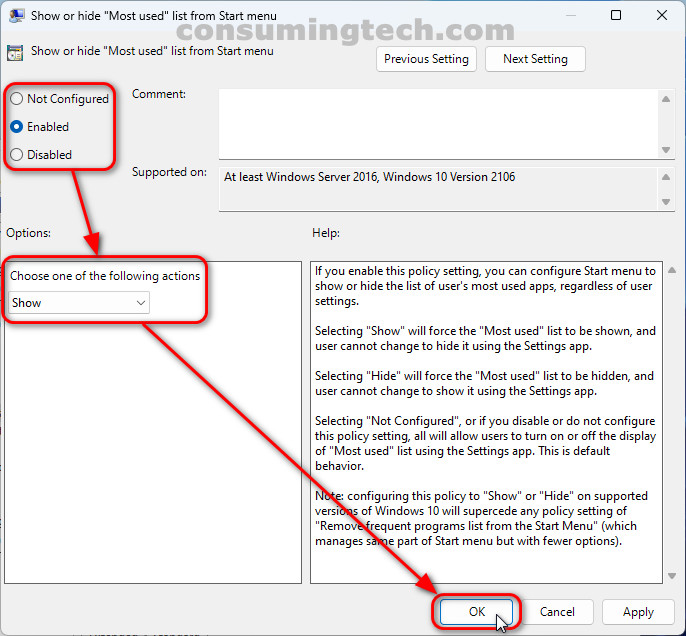
4. Select dot Enabled and then from the drop-down menu select Show or Hide and then click OK.
Note: Selecting Disabled will not allow admins to force show or hide. Selecting Not Configured means anyone can show or hide from the Settings app.
In conclusion, that is how to show or hide the “most used” list on the Start menu in Windows 11.