Last Updated on January 12, 2019 by Mat Diekhake
One of the things that many people have lately become addicted to is selfies. Whether you are about to give a speech at a college or you are spending your holidays in Australia, a selfie is something that everyone takes no matter what they are doing or where they are.
Mostly, people use their smartphones to take selfies, but you should know that even your Mac can help you with taking selfies. I understand that Macs are quite large and arduous for taking a selfie, but they can get the job done in case you do not have your phones with you.
The following guide shows how you can go about taking a selfie using the webcam available on your Mac.
Taking a Selfie on Your Mac
To do the task, all you need is the Photo Booth app which comes preinstalled on most Macs. So, let’s go and start taking selfies with the camera of your Mac.
First of all, you need to open the Photo Booth application on your Mac. There are two ways you can do that. The first and my recommended method is to click on the Launchpad in your Dock and search for and click on “Photo Booth, ” and that launches the app on your Mac.
Another way to do that is to open the “Application”s folder using Finder and then find the app in the list and double-click on it to open it.
The app should open on your Mac, and you should be able to see yourself on your Mac’s screen as the app starts the camera as soon as it is launched.
Now that you can see yourself on your screen, you can adjust yourself or the Mac to ensure a good selfie can be captured. Once you find the right angle and everything is just perfect, you can click the red icon in the app, and it captures a photo using the webcam of your Mac.

Not only one but you can keep on pressing the red button, and it will capture as many selfies as you want on your Mac.
Once you have taken all the selfies you wanted, you can then export these selfie images to a folder on your Mac. If you do not export them, the selfies will remain in the Photo Booth app, and you will not have access to their image files. That way, if you ever wish to view a selfie, you have to launch the Photo Booth app and click on the selfie to be able to view it.
On the other hand, if you export a selfie using the same app, you get an image file that can be stored anywhere on your Mac and you can even share it with others using email or any other forms of communication. Since the result of the export is an image file, you can do whatever you want with it as you would do with other files on your Mac.
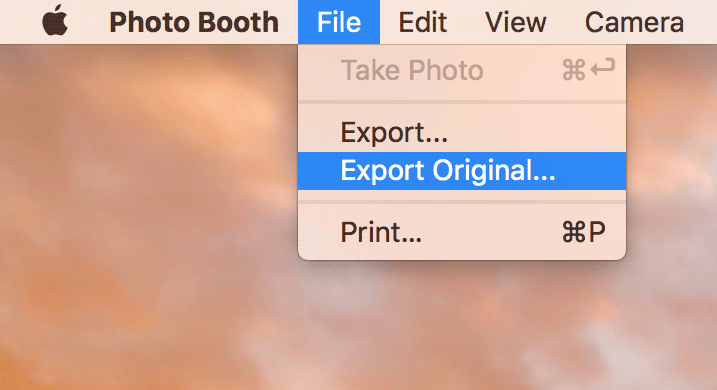
To export an image from the Photo Booth app, click on the “File” menu at the top and then select the option that says “Export Original.” You will notice there are two options to export: “Export” and “Export Original.” If you select the latter one, the original quality image will be exported to your Mac rather than a low-quality image that you get with the former option.
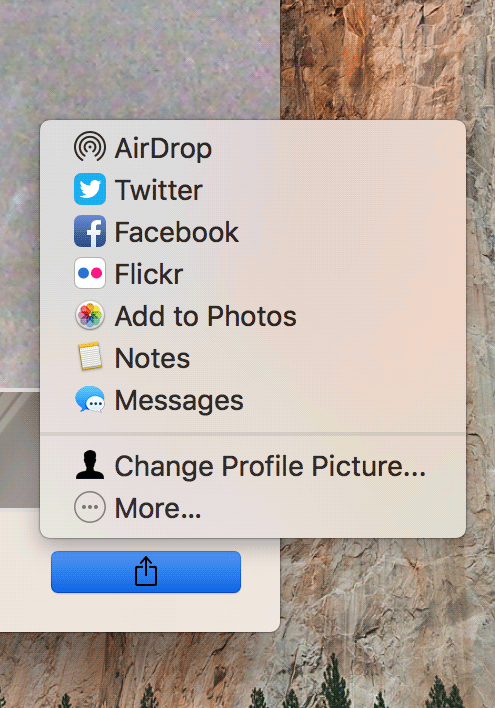
Besides exporting the image, you can share the picture right from the Photo Booth app by clicking on the share icon and then choosing a method of sharing such as AirDrop or Twitter or whatever it is that you want.
So, that was how you could take selfies on your Mac.