Last Updated on December 26, 2022 by Mat Diekhake
One of the worst memories I have of owning my older laptop that was running Windows XP was the fact that it would randomly have the incorrect time and date set when I would turn it on sometimes. I failed to find out why that kept happening to my laptop but was able to find the solution that I needed to implement every time something went wrong.
My newer versions of Windows that are running on more modern gadgets haven’t given me nearly as much grief, but the same issue does come up now and then. I think most people who use the Windows operating system enough probably have experienced it too.
If you are running on a version of the Windows 10 operating system and are experiencing an incorrect time and date, then you can follow the guide below to find out how to fix that problem for you.
Having the correct time and date isn’t always about fixing faults, though, so you need to work out why the computer is not showing the correct time and date which could mean a few different things. There’s a chance that you just haven’t set the exact time and date yet for your time zone, and that is all you need to do to fix the issue. Conversely, if you have an issue, you will need to do further investigating.
The guide below first runs through what you need to do in order to set the time zone that you want, so your computer is displaying the right time and date for where you are in the world, and the rest of the guide goes through what you need to do to troubleshoot the reasons for the correct time and date not showing up when you do have the right time zone entered in the operating system.
Sidenote: there is one issue that cannot be addressed by following a how-to guide of this nature, and that is if your CMOS battery is drained and needs replacing. The CMOS battery can also be responsible for not showing the right time and date on the computer that is running on a version of the Windows 10 operating system. You will likely need to send in your computer to a repair shop or refer to your computer’s user manual to repair the CMOS battery if that is your problem. It’s a good idea to look into the CMOS battery after trying the methods below. Most people have the time and date displaying wrongly for the reasons covered in the guide and not because of the CMOS battery.
Settings the correct time and date when using a version of the Windows 10 operating system
Adjusting the timezone from the settings
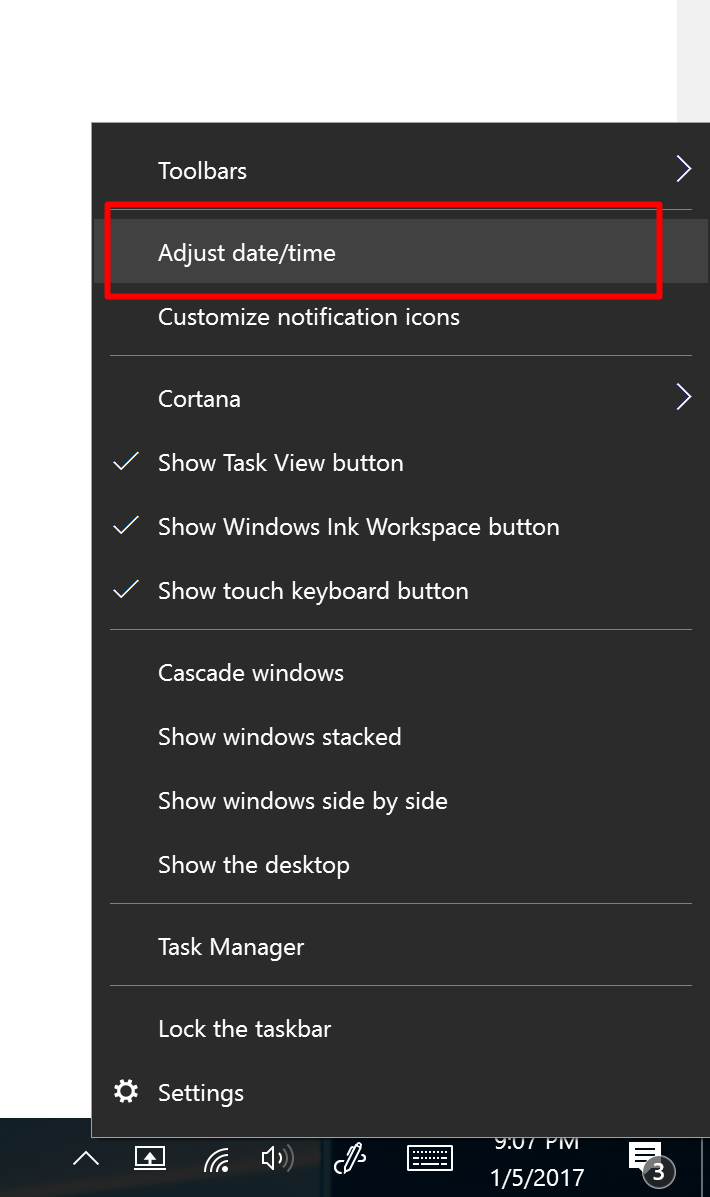
Right-click the mouse or touchpad on the time that is available from the right-hand side of the taskbar.

Click on the “Adjust date/time” option that is available from the menu.

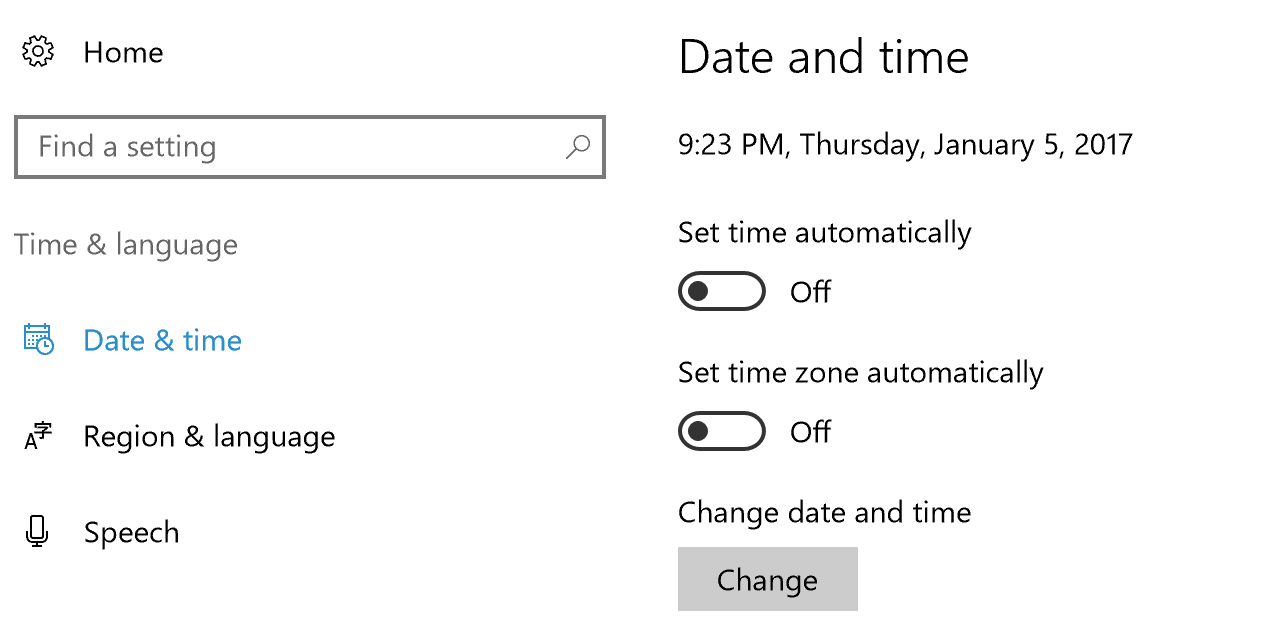
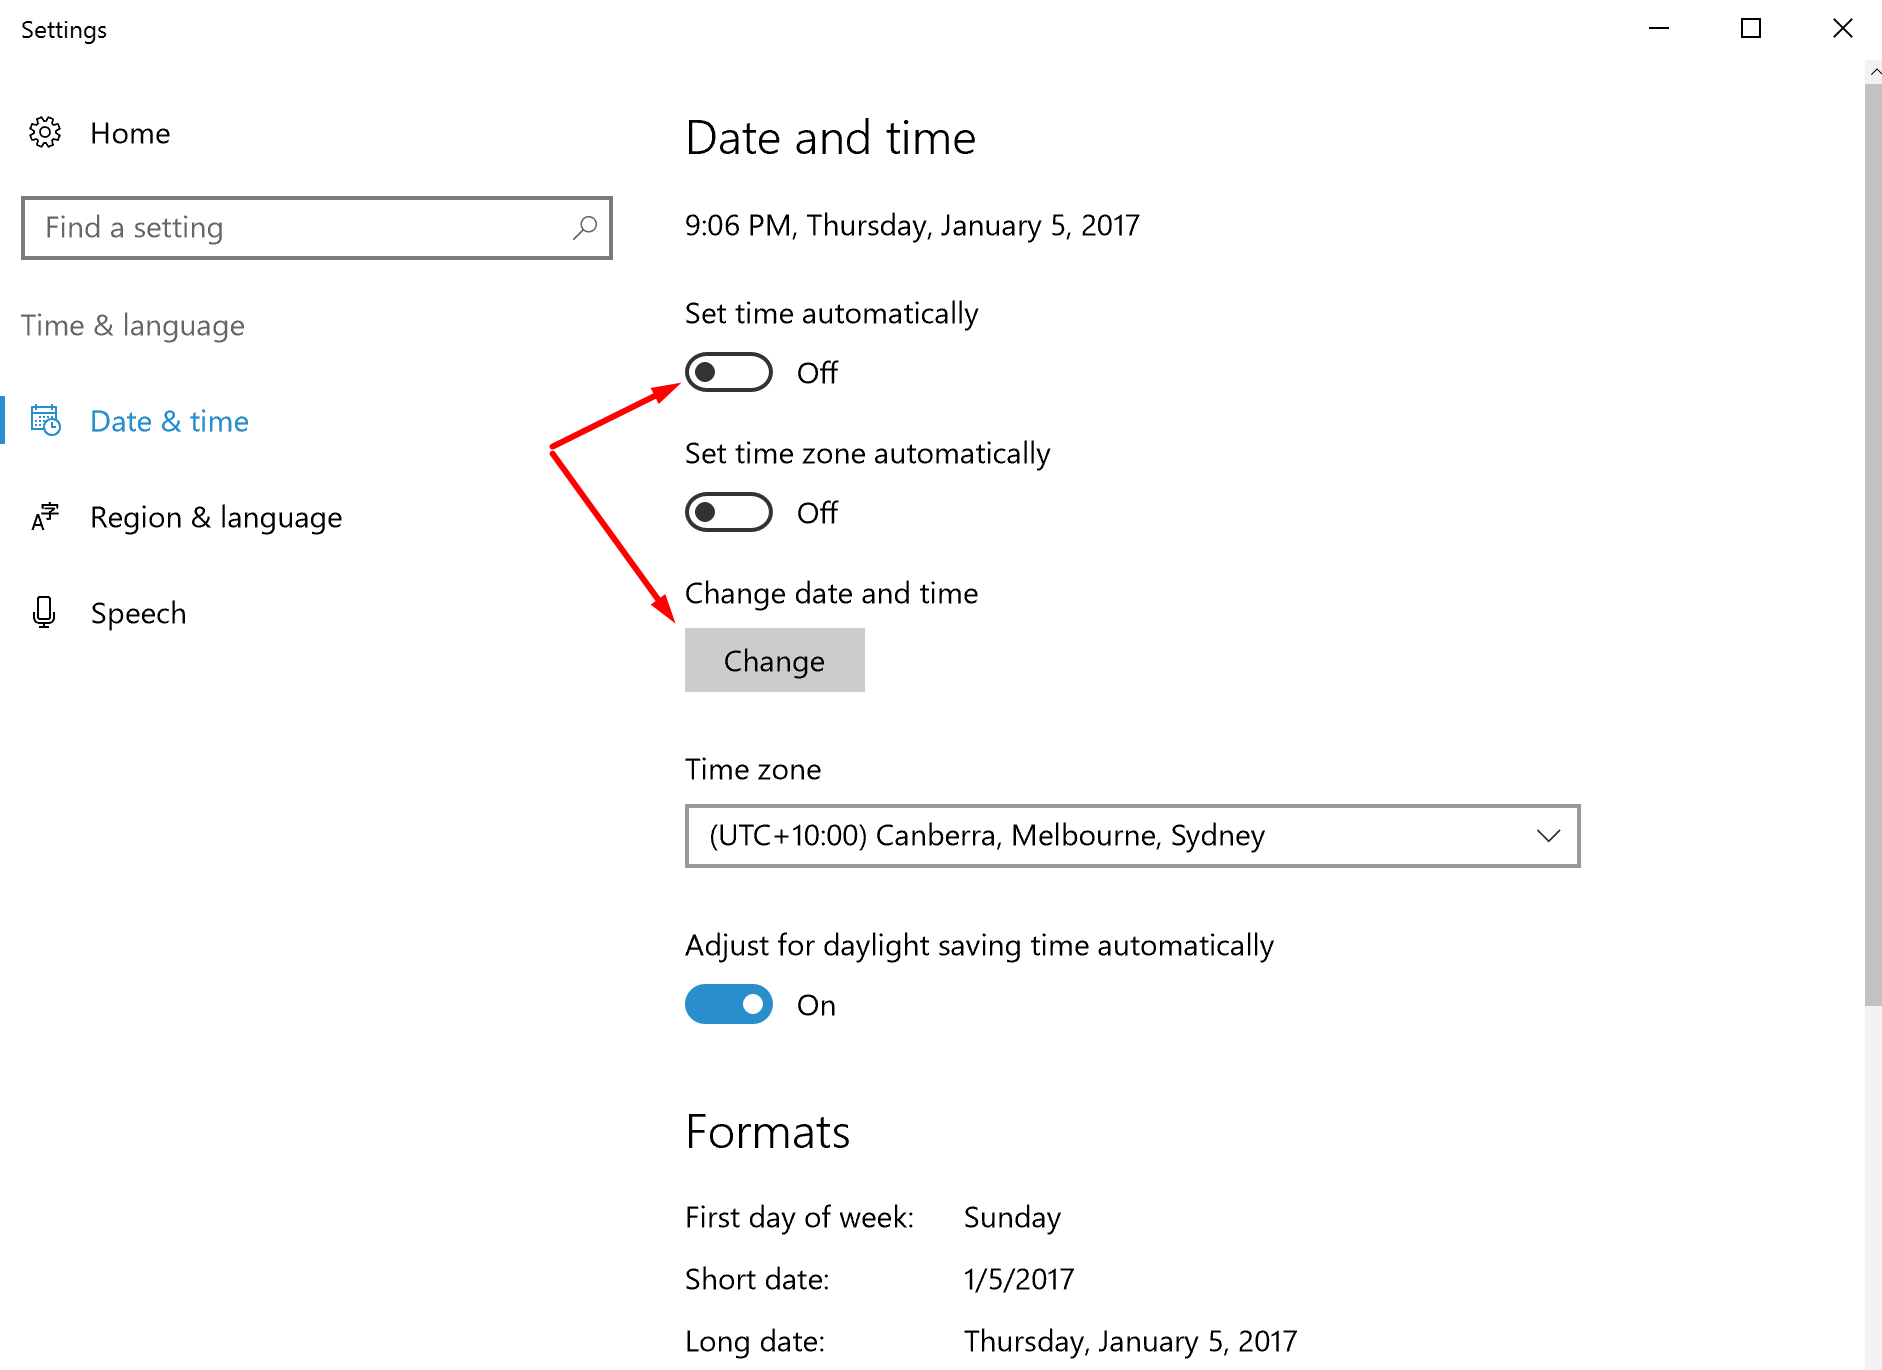
Choose your time zone from the drop-down menu that is available underneath where it says “date and time.”
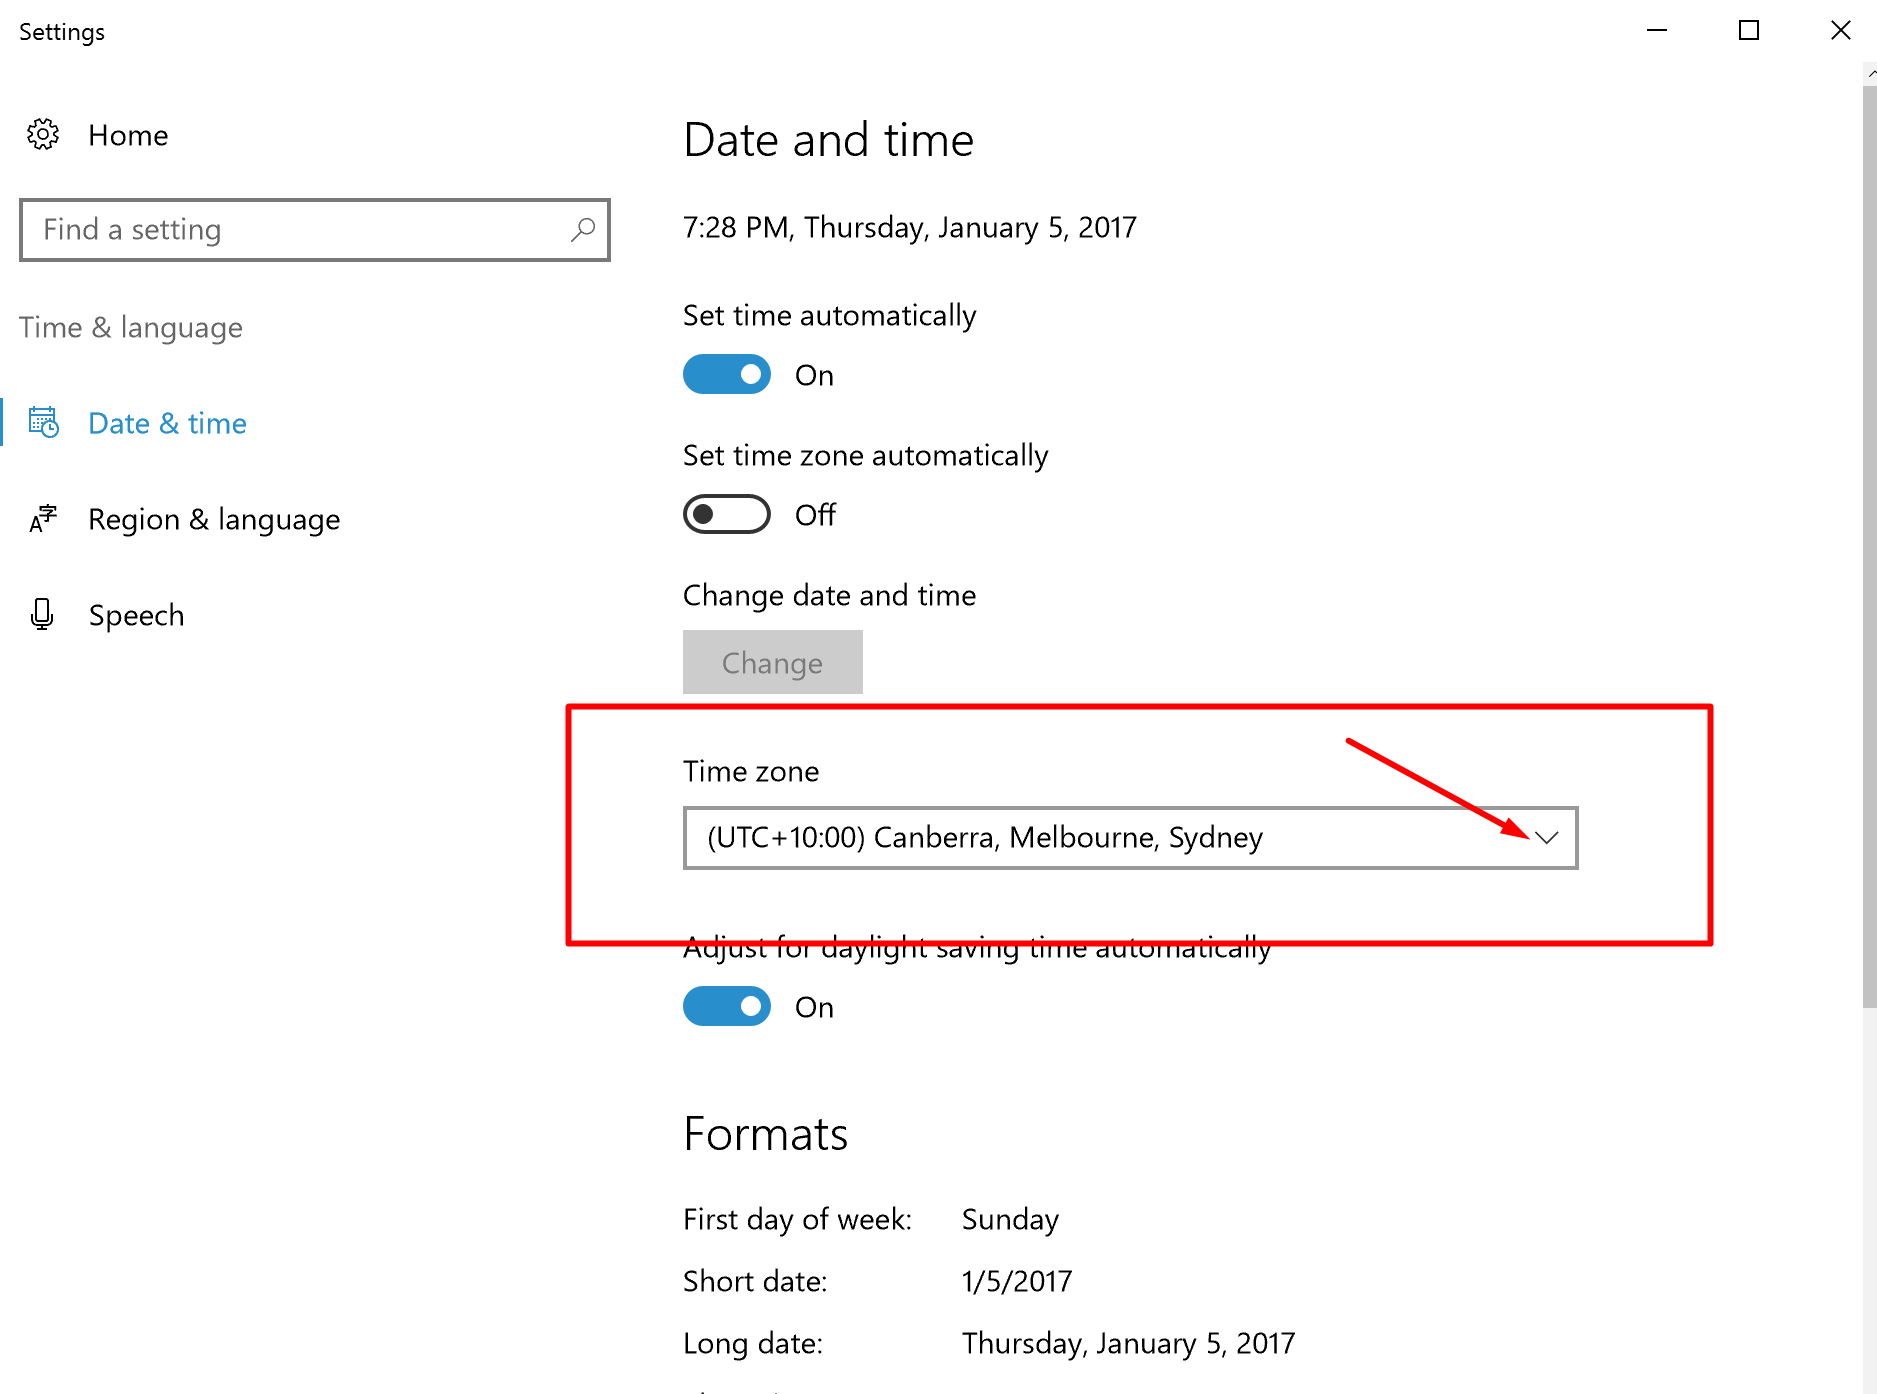
The Windows 10 operating system is smart enough to know where you are in the world even if you have not turned on the location services option. If you want the Windows OS to automatically set the time based on where the computer is in the world (handy for people who travel), then you need to have the “set time automatically” switch toggled to the on position which you can see available from the screenshot above.
Starting the Windows Time Service
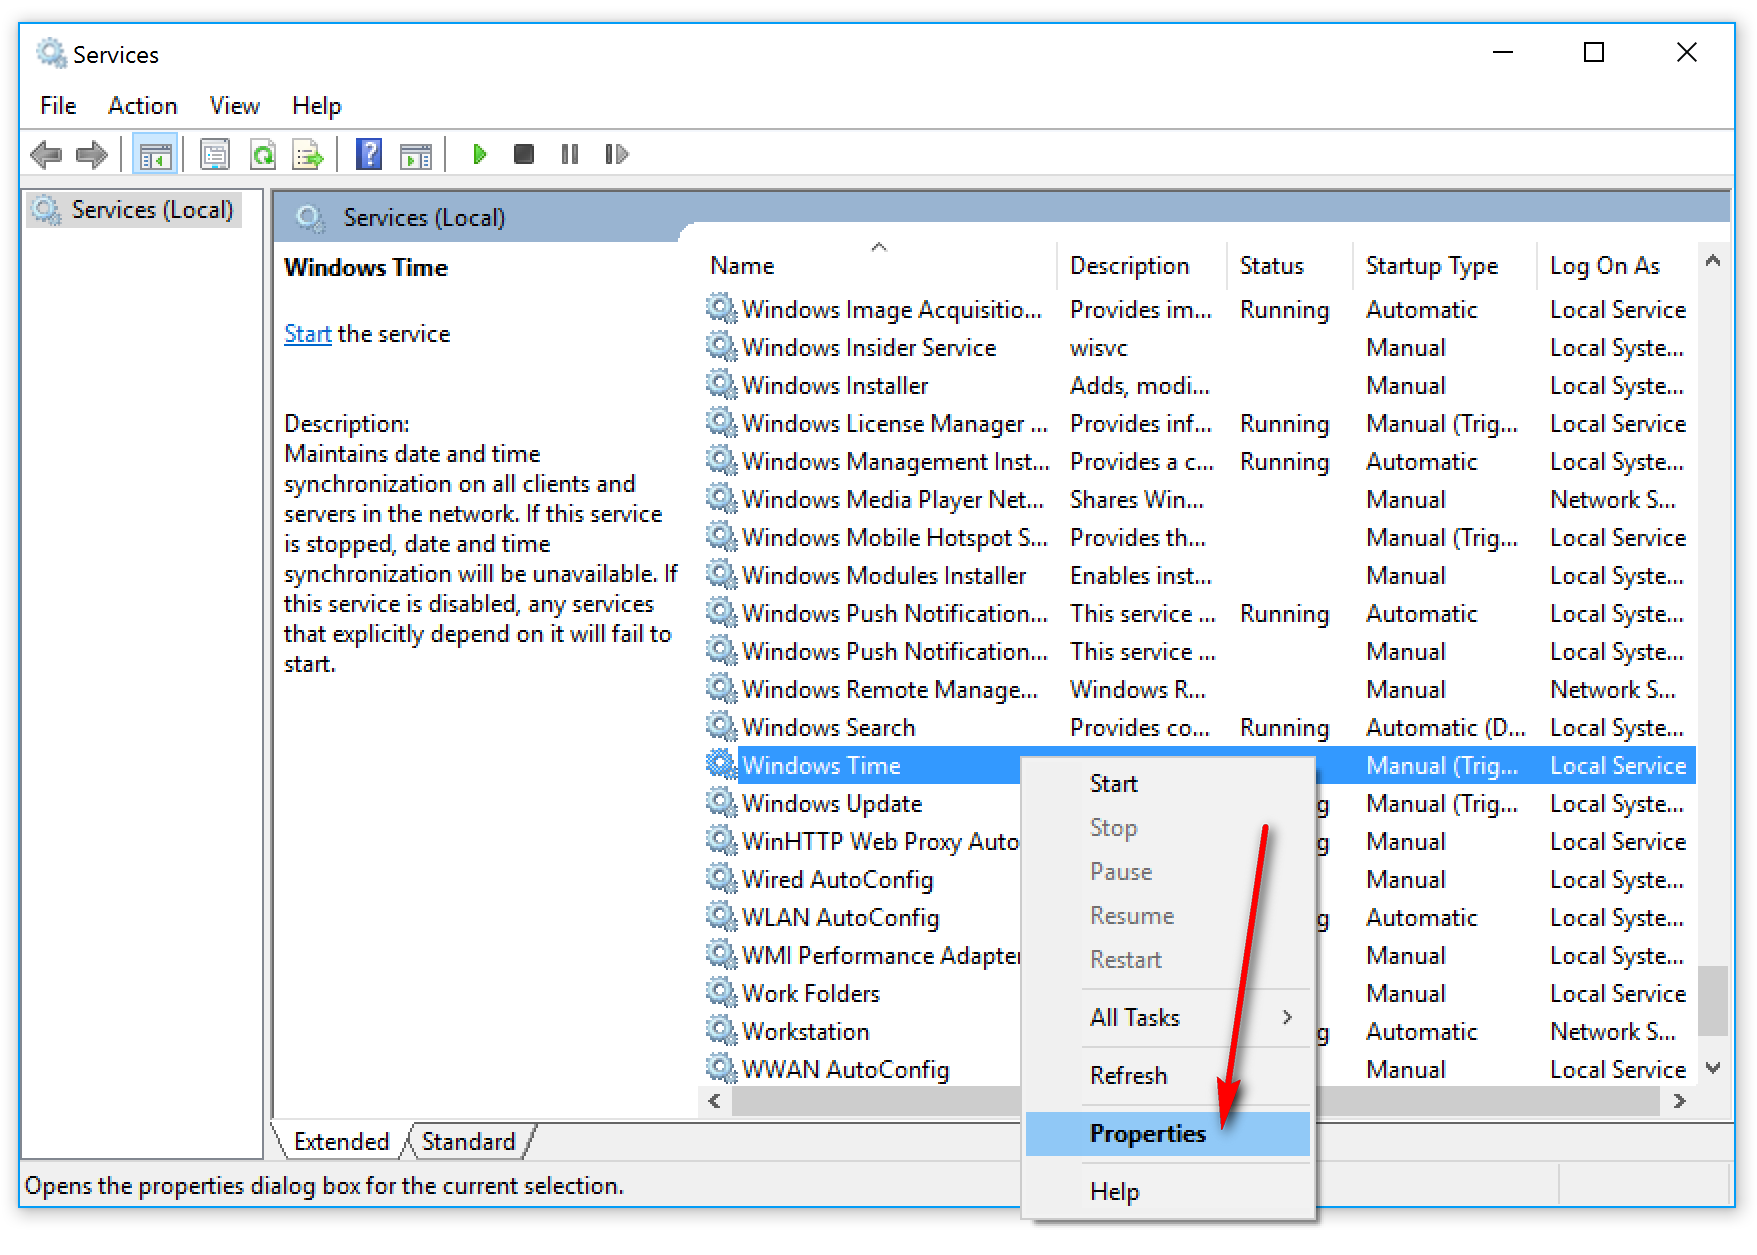
Click the mouse or touchpad in the search box that is embedded into the taskbar and then type “services” to bring up the Services desktop application that you then need to click on to open.

Scroll down the list until you get to the “Windows Time” entry that is close to the bottom of the list because it is in alphabetical order.

Right-click on the entry and then select the “Properties” dialog box.
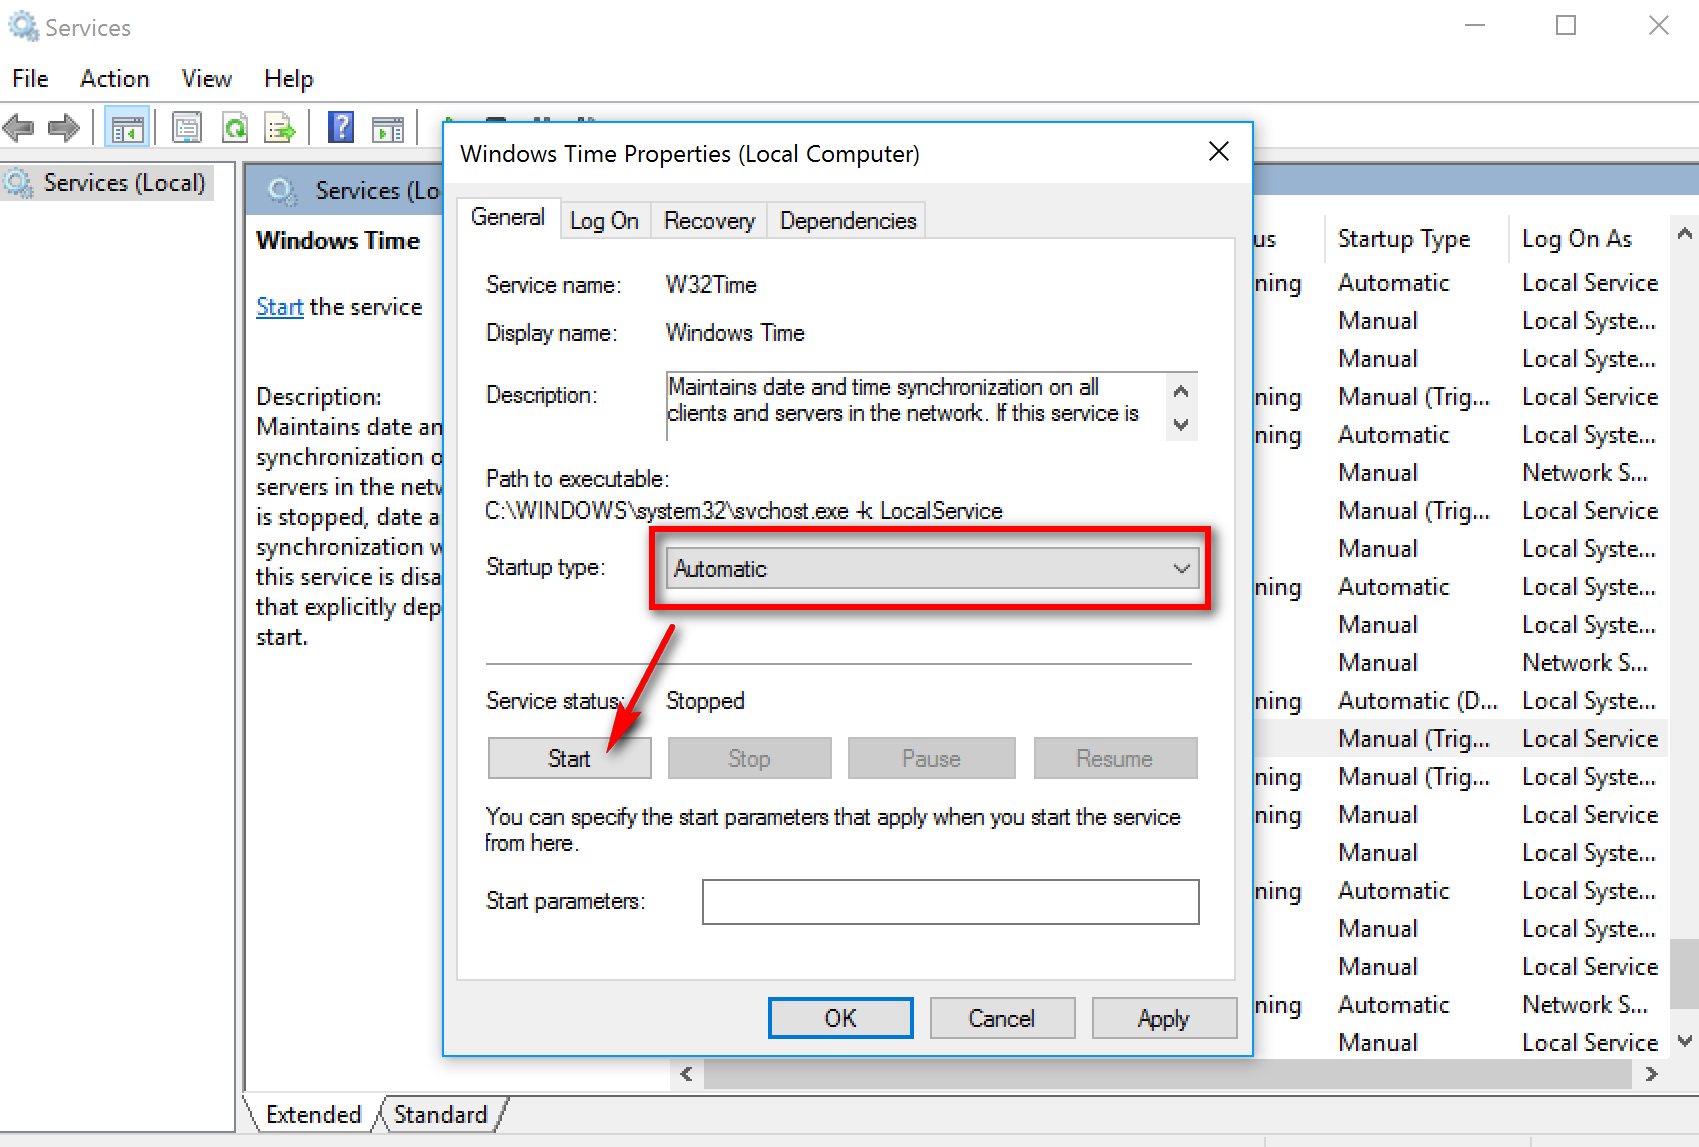
Look where it says the “Startup type” and click on the drop-down menu to select the “Automatic” option. Once that is done, click on the “Start” button, and it then starts the service without the need of your clicking on the “OK” or “Apply” buttons at the bottom.
That has now made the Windows 10 operating system automatically update your computer with the time and date to the world clock that you are currently living with based on where your gadget is located in the world.
Manually settings the time and date
Those who prefer doing things manually instead of automatically can do that also because Windows 10 loves giving people lots of options to do things as they please—perhaps even too many options at times. Adjusting the time and date manually in Windows 10 is done from the same settings page that you accessed earlier in the guide where we showed you the time zone drop-down box. Here is what we mean:
Click on the time from the right-hand side of the taskbar once again to bring up the menu related to the things that are available from the taskbar that includes the time and date.

Click on the “Adjust date/time” option from the menu.
Under the “Date and time” heading, toggle the switch for the “Set time automatically” to the off position. When that is done, click on the “Change” button where it says “Change date and time” to manually adjust the date and time.
The time and date on the computer that is running on a version of the Windows 10 operating system should now be sorted and showing the right information. From checking to see whether your computer is showing the correct time zone to finding out how to fix it automatically and manually, everyone’s computer running Windows 10 should now have the time and date mystery solved.
You might also be interested in:
- How to Add Another Email Account to Outlook in Windows 10
- How to Install a Portable Version of the Vivaldi Web Browser
- How to Sign Out of a Microsoft Account in Windows 10
- How to Improve the Windows 10 Security with Win10 Security Plus
- How to Change the Default Download Folder in the Microsoft Edge Browser
Have something to say? You can contribute to this tech article by leaving a comment below.