Last Updated on November 12, 2024 by Mat Diekhake
Most people are brought up using the Windows operating system but would agree that Mac operating systems make things look right with their design. Correspondingly, most individuals who install the Windows operating system typically leave things looking pretty close to the stock version of Windows without making very many adjustments. That is because they aren’t aware of the tweaks that are available out there for them to use, plus the simplicity that it takes to install them.
If you liked the way the Mac cursor looks, particularly in the Mac El Capitan version of the OS, then you can have that same cursor design running on the Windows 10 operating system.

There are a bunch of tweaks you can make to the mouse cursor in Windows 10 by default, just by accessing the main.cpl from the Run dialog box or the search field from the taskbar, but everything available there is unique to Windows. In order to use something like the cursor that comes on a Mac, you need to rely on third-party developments.
Installing the Mac mouse cursor on your Windows 10 operating system
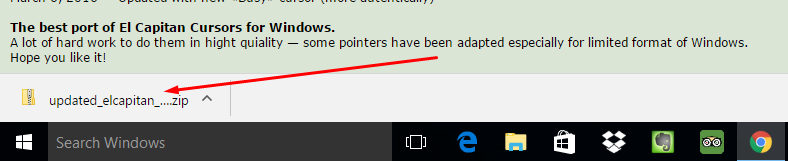
Head over to the Deviant Art page and download the Mac El Capitan mouse cursor. (The link is available on the right side of the screen.)

Once you click on the download link, the file starts downloading directly above the taskbar. Wait for the file to finish downloading and then click on it.
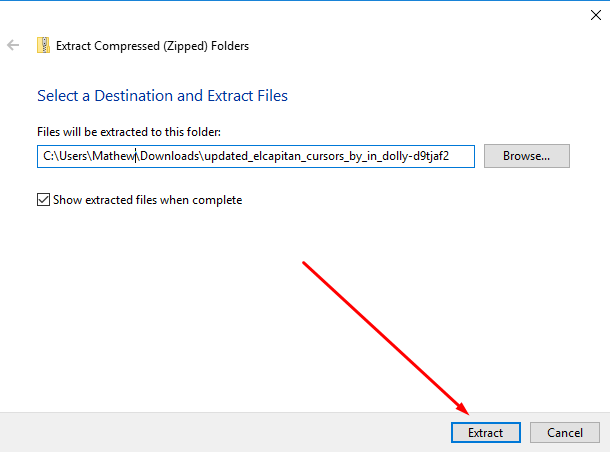
Doing so directs you to the same as is available in the screenshot below. Click on the “Extract all” button that is available at the top of the page to extract the cursor file so that you can use it.

Choose the folder destination to extract the file. That is where your file is going to end up being stored on the computer. By default the program has it set on the “Downloads” folder which is where most people want to have the things that they download. You can keep it on that same default setting if you don’t have any other preference.
Look for the “Install” file that is available on the list of things after the extraction is complete.
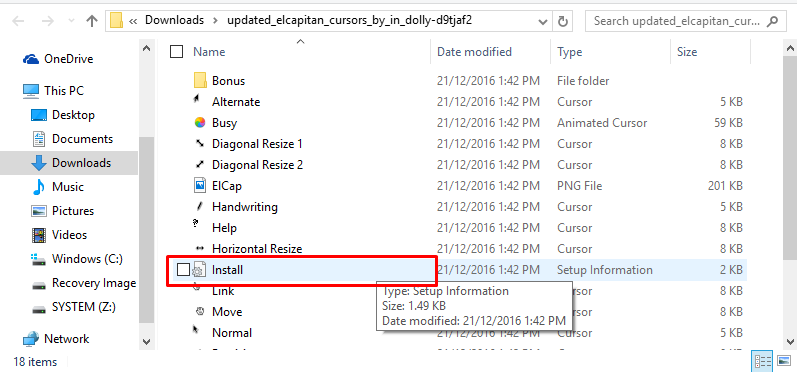
Right-click on the “Install” file and then click on the “Install” option from the menu to have it installed on the computer.

Click on “Open” to complete the installation.

Go to your “Search Windows” search box from the taskbar and search for “Main.cpl” and then click on the application when it becomes available to enter the area where you can adjust your mouse settings.
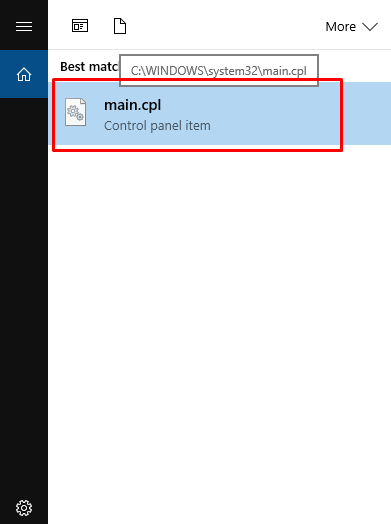
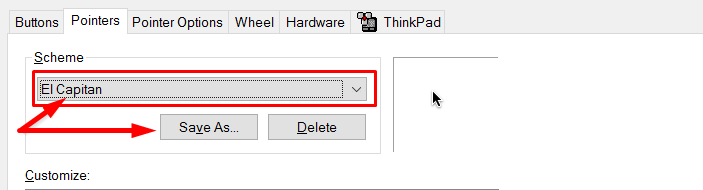
By default, it shows you the “Buttons” tab at the top of the page. Change it over by clicking on the “Pointers” tab and then click on the “Scheme” drop-down menu and find the El Capitan option that should now be there since you just installed it.
That is all you need to install the Mac mouse cursor from the El Capitan Mac operating system on your computer that is running on a version of the Windows 10 operating system.
You might also be interested in:
- How to Manually Update the Windows Defender in Windows 10
- How to Check the Installation Date of Apps and Programs in Windows 10
- How to View the Recently Installed Apps and Programs in Windows 10
- How to Automatically Hide the Taskbar in Tablet Mode in Windows 10
- How to Enter the Tablet Mode in Windows 10
Have something to say? You can contribute to this tech article by leaving a comment below.