Last Updated on October 9, 2022 by Mat Diekhake
Do you want to update your Samsung Galaxy Note 3 Neo So you can install custom ROMs that could give you access to a newer firmware? If so then we are about to light up your life after you follow just a simple tutorial to gain access to the hidden world that was previously locked away.
The Neo comes in two main model numbers, in SM-N750 and SM-N7505. However, both those devices can be on many different firmware version of Android 4.3 jelly Bean. All of the firmware options that can be used for this guide include the N7505XXUBND2, N7505XXUANB4, N7505XXUANB1, N7505XXUANB2, N7505XXUANAD, N7505ZHUANC1, N7505XXUANB5, N7505ZHUAND1, N750UBUANB1, N750XXUANB4, N750XXUANAD, N750UBUANA7, N750XXUANB3, N750XXUANB2. If you can see your software inside of that list from OTA updates or by manual updates then you are good to go. Go to Menu > Settings > About Phone > Software Number to check what number you have.
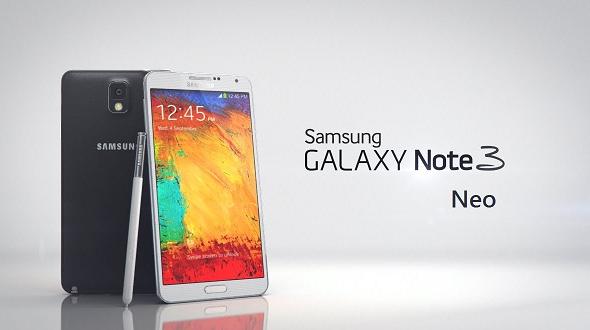
This smart phone came with Android 4.3 TouchWiz UI out of the box so this guide should be covering all of you. Other notable features that distinguish it from the competition include the stylus S-pen and hexa-core Exynos processor.
Odin is an official program made by real Samsung developers. Even though gaining “root” is not official, we use this tool for the procedure just the same. It offers a great platform to go to work and use a stable tool so there is nothing to worry about here. However, we know that the technology can surprise us at any moment.
Details of Note
- With the last point in mind it is time to perform a backup of the EFS, market app, call logs, SMS and MMS texts and more. Applications are often difficult to transfer over and often need a separate process. That is why I like to recommend using the external memory options that are available because they let users transfer everything over together including the apps. After doing some research, this device comes with microSD, microSDHC, microSDXC storage expansion options of up to 64 GB. Many people will also run out of the room to save anything to the internal memory because the built-in storage is only 16 GB. That is nowhere near enough space for most women I know. If you are a chick then go direct to the store and buy the SD card.
- Enable USB Debugging Mode on the phablet because a connection must be established between the phablet, USB cable and the computer system unit. Go to menu > Settings Developer Options and mark the box as “on” the way you would expect.
- They always say what goes up comes straight back down and, unfortunately, for us that is no different here. It is true there are many great advantages that come along with root, but don’t forget that follow this guide will void any existing warranty that you may have left. That happens because of a binary flash counter that gets tripped every time we flash. Recently some friends have pointed us in the direct of the Triangle Away app that reduces this back again so it is undetected. You can try using this at your own risk making the warranty work again.
- After reading all that, don’t start this procedure unless you are sitting in front of a Windows-based computer. By that, I mean the OS. For this tool, we need Windows because Mac or Linux do not support it. Any OS from XP, Vista, Windows 7 and Windows 8 will be fine. However, we advise getting off XP sooner and not later because the Redmond company out of Washington do not support it anymore.
- Deactivate or temporarily disable the security programs such as antivirus. Each brand will have different names for this by accessing the icon from the taskbar you should find it easy enough to put a stop to it whether it is manual or automatically started again the next session. Don’t completely uninstall it because that is not necessary but if you did there are lots of free security options out there such as AVG that works a treat.
- Download and install the Samsung USB drivers.
- The steps listed below are compatible for the Galaxy Note 2 Neo model number N750 and N7505. Do not try to install this on any other device because it will brick it. There is a tool out there that take away bricking but save yourself the hassle of having to go through this task in the first place be making a conscious effort to check the model number.
How To Root Samsung Galaxy Note 3 Neo N750 And N7505 On Android 4.3 Jelly Bean
Download the right file for your device:
– CF-Auto-Root-hl3g-hl3gub-smn750.zip
– CF-Auto-Root-hllte-hlltexx-smn7505.zip
2. Download Odin 3.09
3. Save them to the C: Drive on anything Windows Vista and Up. Save to the desktop for XP. If you saved to the C: Drive go to Start > Start search > type in Odin and the zip file will come up. Double click and follow the steps to unzip and eventually open. They are not hard to find because from Vista up we can type the name and they will show.
4. Click on the AP button and upload the tar.md5 file.
5. Get the USB cable. Many people use it every day to connect the phone charger. If you cannot find yours check there!
6. Open the Odin application. The handset will register if we do it this way. Doing it the other way around may not result in this.
Put the smart phone into download mode by turning it off and holding Power + Home and Volume Down when turning it back on. Don’t let go until the warning message shows on-screen.
7. Make a wired connection with it to the computer.
8. Look for the “added” message showing on Odin.
9. Do not change the default settings. Odin already has the F reset Time and Auto reboot options marked as on. Leave it this way.
10. Click the start button.
11. Wait without touching anything until it finishes. I would not touch the phone, computer or certainly anything inside Odin.
12. It will say “pass” when finished.
13. Click the red “X” in the top right corner to lose Odin.
14. Look near the clock in the bottom right side of the computer screen where the taskbar is and right-click the “safely remove hardware” option. Stop the USB Mass storage device by following the prompts. Now this will prevent data corruption.