Installing the USB Drivers on a computer for a smartphone or tablet is a normal thing to occur, but usually, Windows is programmed to handle that for you, so you don’t need even to think about it. If Windows cannot work out what your device is or it cannot locate the correct drivers that need installing for that device, then it gives up and needs to rely on you to do it instead.
If you are somebody who wants to transfer data to and from the computer with your Motorola mobile device, then it can only happen if you have the correct Motorola USB Drivers installed on the computer first. Additionally, you need to install the drivers when you need to do something on the computer with the smartphone or tablet connected to the computer with the USB cable and it is not working.
There are a few ways one can install the Motorola USB Drivers. The way we are demonstrating in this tutorial is the official way that Motorola recommends you follow. However, there is also another way which makes use of the Universal Windows ADB Driver developed by Koushik Dutta (the found of ClockworkMod Recovery among other things) and that ADB Driver compiles a bunch of the traditional OEM and manufacturer drivers together.
Installing the Motorola Moto E USB Drivers on a Windows computer
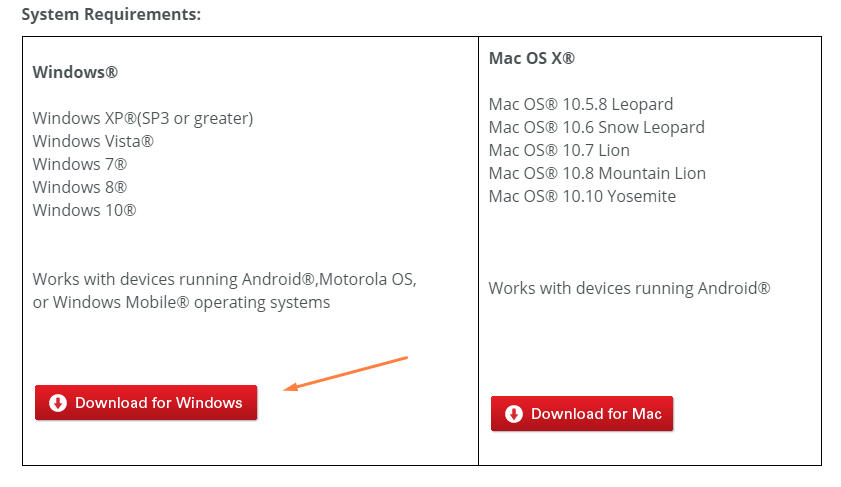
1. Click the link available for the Motorola custom help page and you can then view the screenshot as below. Click on the red button on the left side of the webpage that says “Download for Windows” and it then proceeds to download your driver package to the Windows computer.
2. You can view the download above the taskbar. Wait for that file that is downloading to finish before you click it.
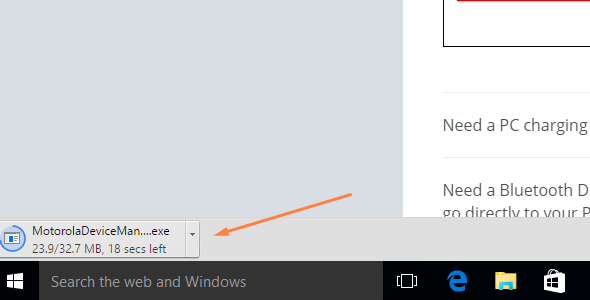
3. Click the mouse or touchpad on the file once you can see the following.
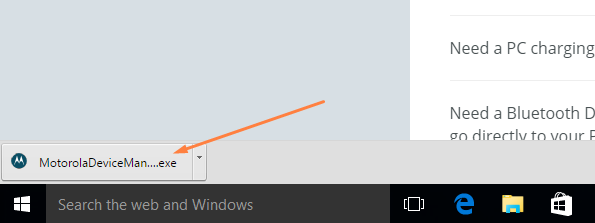
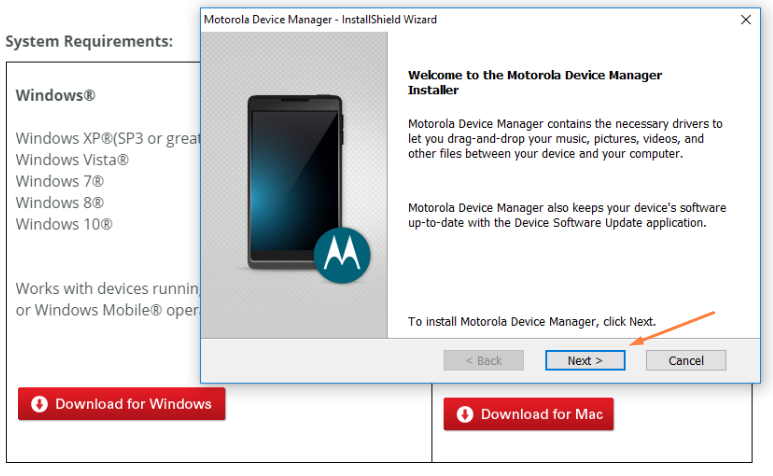
4. Clicking the file opens up the Motorola Device Manager page. Click on the “Next” button on the display to install the Motorola Device Manager which then comes with the USB Drivers for the computer.
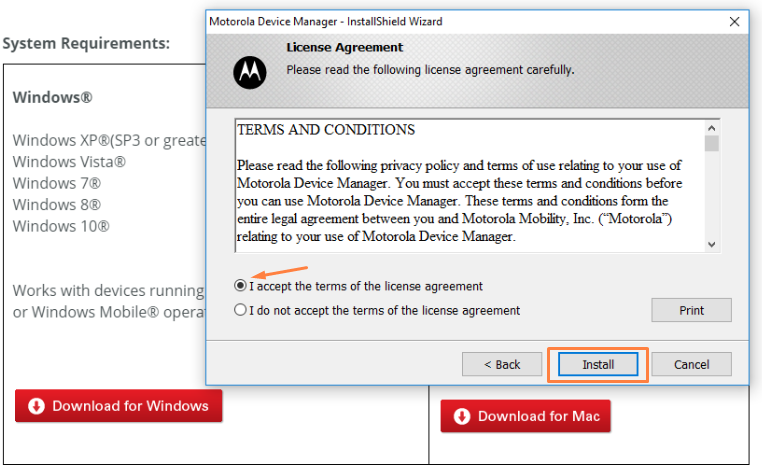
5. You then need to agree to the terms and conditions and then continue by click on the “Install” button.
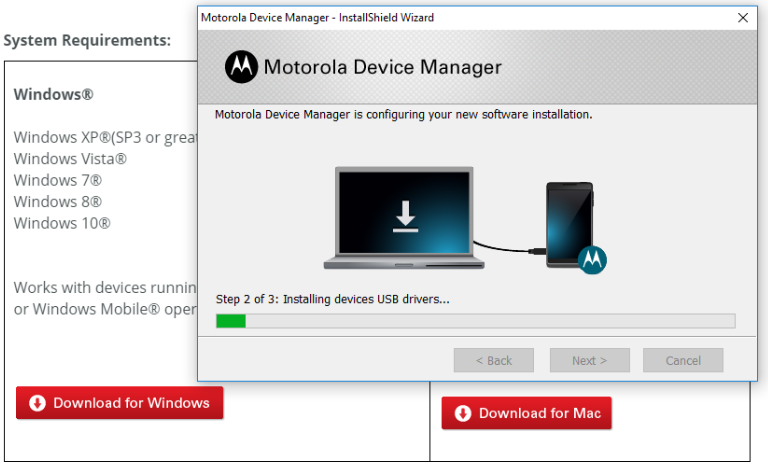
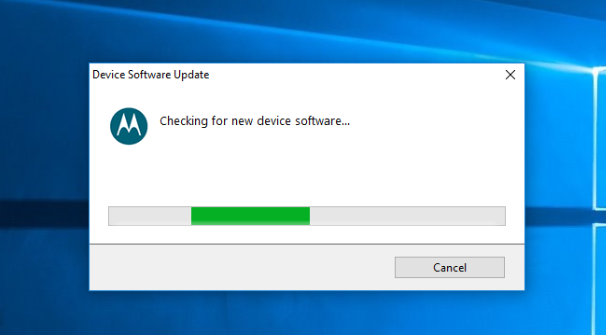
6. The Motorola Device Manager is now installing on the computer. Do not touch any buttons until it is complete.
7. Click on the “Close” button that appears as soon as you can see the congratulations message that is there to let you know that the Motorola Device Manager installation was a success, and the USB Drivers are available.

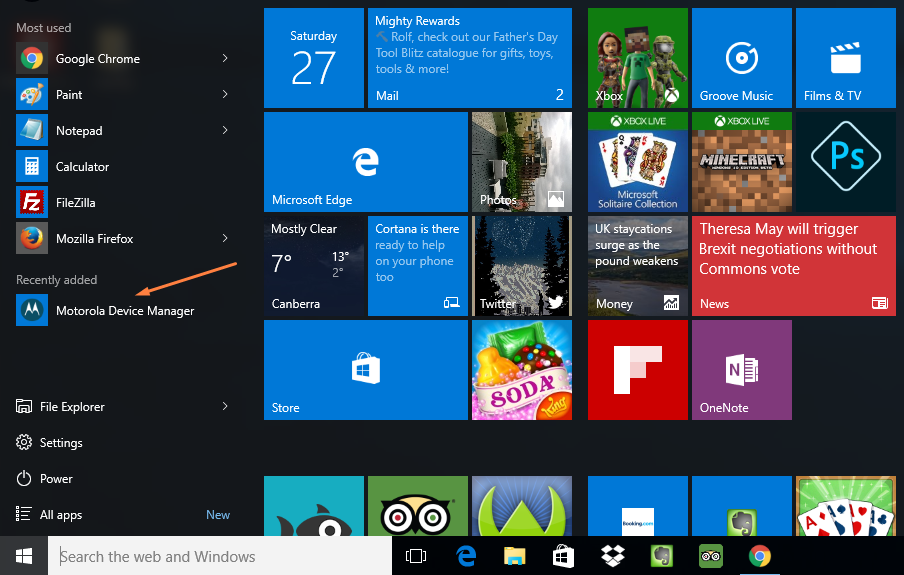
8. If you are running Windows 10, you can see it available from the “Recently Added” section (unless you have disabled the feature) in the left pane from the Start menu.
9. Everyone else can find it available from the Downloads folder by navigating to the Start > File Explorer > Downloads.
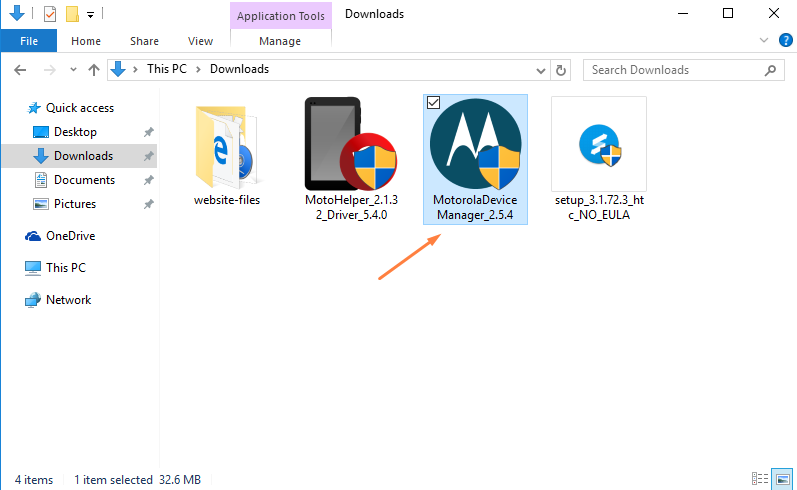
10. Once you click on the Motorola Device Manager executable file, it installs the drivers for you.
In conclusion, that is how to install the Motorola USB Drivers for the Motorola Moto E smartphone. You can connect the Motorola Moto E phone to the Windows computer with the USB cable, and you should have no worries with the correct drivers being installed.