Telnet allows you to connect to remote computers through TCP/IP protocol. In Windows XP, it comes installed automatically. But in Windows 7, by default, it doesn’t come installed. So, you have to install it manually. The process of enabling the Telnet in Windows 7 is easy and takes only a few seconds, depending on your computer speed. The process for this works like Installing a program, such as Photoshop. You just have to follow the simple steps given below to enable telnet in your Windows 7 OS. Here you go:
Enabling Telnet in the Microsoft Windows 7 operating system
1. Go to Start Menu and open Control Panel.
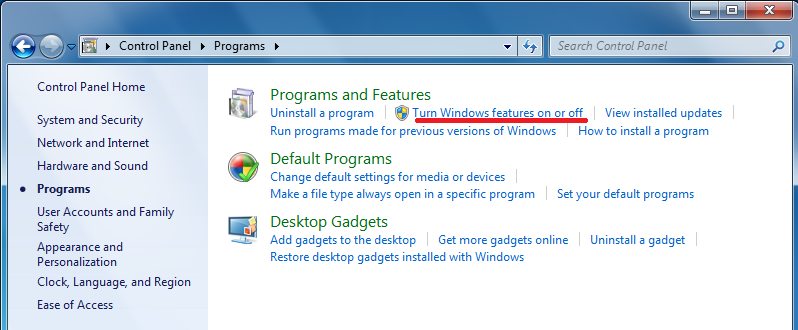
2. In the Control Panel menu, click on Uninstall a program.
3. From the opening window, in the left side options, click on Turn Windows features on or off.
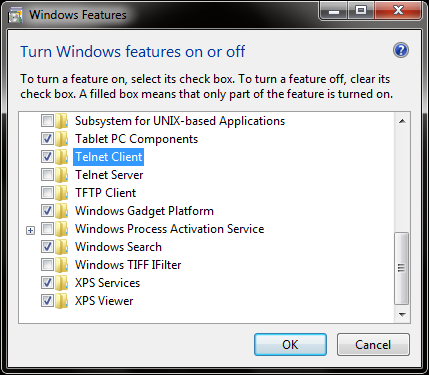
4. It will open a dialog box, just check the Telnet Client option and hit the OK button.
5. That’s it. Windows will now process to enable the Telnet.
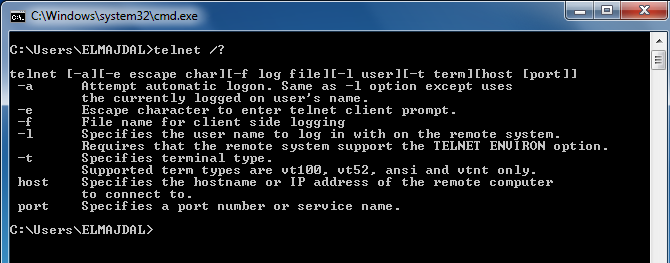
In conclusion, that is all that is required to turn on the Telnet if you are using a version of the Windows 7 operating system by Microsoft. Now, you have successfully enabled Telnet in your Windows 7 OS.