Last Updated on December 26, 2022 by Mat Diekhake
In versions of the Windows operating system past, namely Windows XP, Windows Vista and Windows Server 2003, there was a feature called “AutoRun” that would use mass storage as well as have a validly formatted AutoRun.inf file in the root directory: thumb drives, external hard drives, DVDs, and so on.
The AutoPlay feature is a newer version of the AutoRun, mainly offering an updated name, but there are some differences. For example, you can now simplify the use of more modern peripheral devices such as USB storage devices and memory cards, and that was something that AutoRun just couldn’t do. Think of AutoPlay as AutoRun but with an updated name and updated device compatibility list.
The AutoRun technology is also closely related to the default applications that Windows 10 has on offer for you to change, only the default apps are always with reference to the apps that are already installed on the computer and never peripheral devices.
There are a few things to note about Windows 10’s AutoPlay feature:
AutoPlay Notifications. When you’ve got AutoPlay set on the default “Choose your default” or “Ask me every time,” it’ll give you an AutoPlay notification whenever the AutoPlay feature is working for your device. That way you can at least distinguish when AutoPlay is doing something for your computer and when it is not since those two options are not necessarily asking for AutoPlay to always be working and thus people might not be aware of AutoPlay at those times. In addition, you can press the Shift key on your keyboards when attaching an AutoPlay device to the computer to bring up AutoPlay notifications.
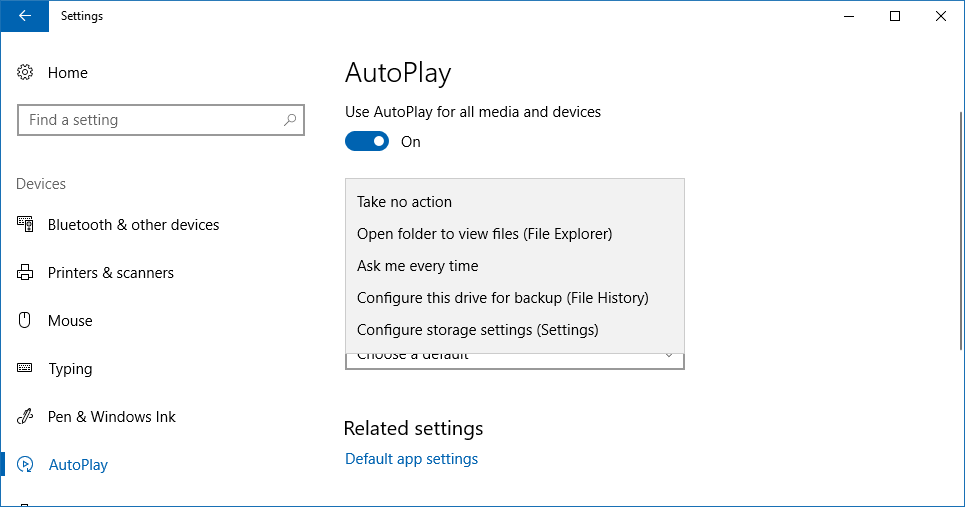
Alternating AutoPlay. If you wanted to have AutoPlay working for some devices but not all, there is no option for that from the Settings application; however, you could choose the “take no action” option as the AutoPlay default for that particular device.
Storage Devices. While the storage devices are compatible with Windows 10’s AutoPlay feature, you won’t see them showing up in the Devices section of AutoPlay. Instead, you’ll need to open up File Explorer, and you’ll see them under the This PC section.
How to Enable and Configure AutoPlay in Windows 10
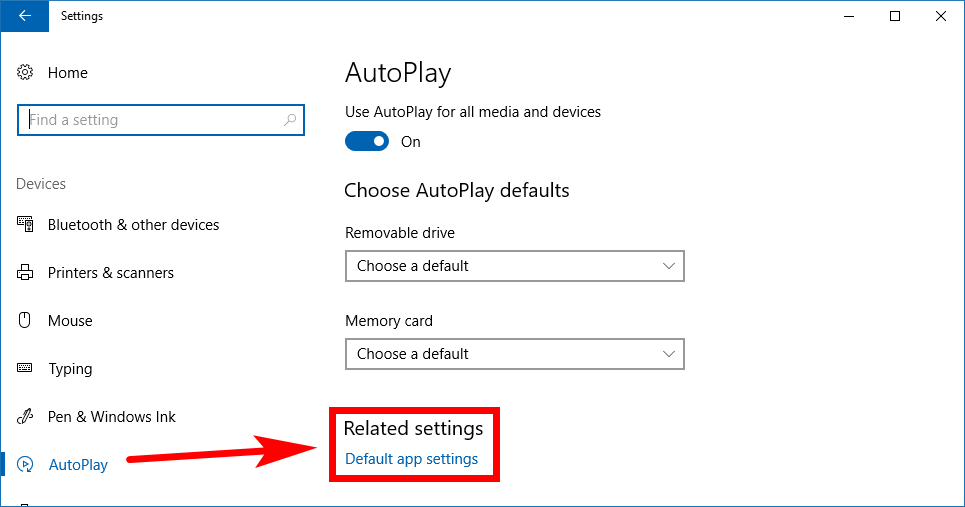
You can turn the AutoPlay feature in Windows 10 on or off by using the Settings application. To get started, navigate to the Start menu > Settings > Device and then look for the “AutoPlay” link in the left side pane. Once you’ve clicked it, look for the AutoPlay heading over in the right side pane because directly beneath it is the toggle you want for turning it off or on.
The next heading down the same page is for choosing the AutoPlay defaults. Click to expand the drop-down menu for the removable drive and choose how you would like the Windows 10 operating system to handle your automatic playing when the media comes from a removable drive.
Likewise, click to expand the drop-down menu for the memory card and choose how you would like the Windows 10 operating system to handle playing stuff that comes from a memory card as well.
You’ll also find a link that navigates through to your default applications on the operating system. While technically not directly related to the AutoPlay feature, these default apps are designed to be the ones that automatically open up when you choose whatever it may be that you’re opening so it’s a feature along similar lines.
For example, if you scroll down to the web browser icon, you can pick which web browser—out of any of the web browsers that you currently have installed on your version of Windows 10—that you want to be the one that opens up by default whenever it may be called upon. That’ll most notably be when you click on a link from the default Mail application and it opens up in a web browser for you to then view the source webpage.
This article was last updated on May 11, 2019.
Related Tutorials


