Last Updated on December 26, 2022 by Mat Diekhake
VPNs (Virtual Private Networks) are becoming ever more popular as time goes on so you can prevent websites from snooping when you browse, use public WiFi securely, get access to region-restricted websites such as torrents that have been blocked by your local governments or the United States Netflix movie and TV programming selection from abroad, and more.
While widespread use of VPNs around the world could create some problems for the internet—who knows how it would support itself and how advertising would work without being able to see people’s locations—it’s probably safe to assume that more people would use one if they knew how. Using one doesn’t make you a bad person either just because it might create some changes to the world, privacy is a right and VPNs are perfectly legal and currently accepted as tools that everyone can use.
When you choose to set up a VPN, if you choose to set one up, you get to pick between signing up to a website’s VPN service and allowing them to do the hosting or hosting a VPN server yourself. Before you can do the hosting yourself though you’ll need actually to have a VPN server in your possession.
If you do choose to go down the route of hosting a VPN server yourself, you’ll need to connect it up to the Windows 10 operating system. You can achieve that by using the guide below. For everyone else, there’s nothing you need to do to the Windows operating system when you sign up to a VPN service coming from someone else’s servers—like if you were to sign up to one of the leading VPN services online and use their website for example. In those cases, you will be using that companies VPN servers instead, and very little is required on your end.
How to Add/Remove a VPN Connection in Windows 10
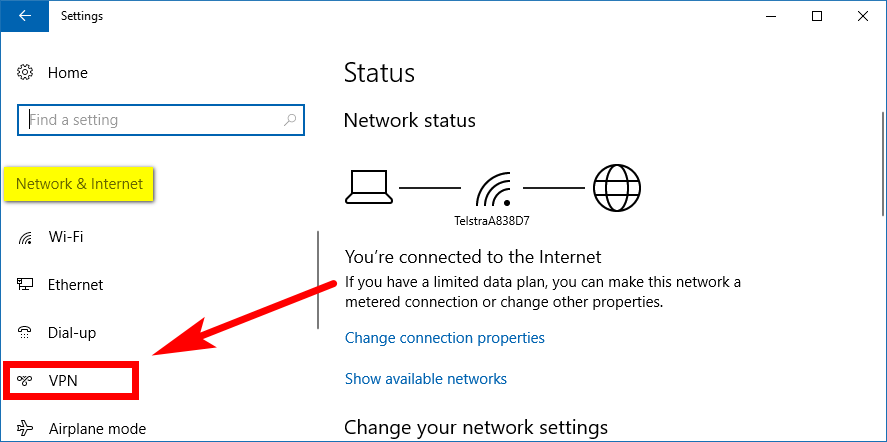
You can add or remove a VPN connection in Windows 10 by using the Settings application. To get things underway, head to the Start menu > Settings > Network and Internet and then click on the “VPN” link in the left side pane as shown in the picture below.
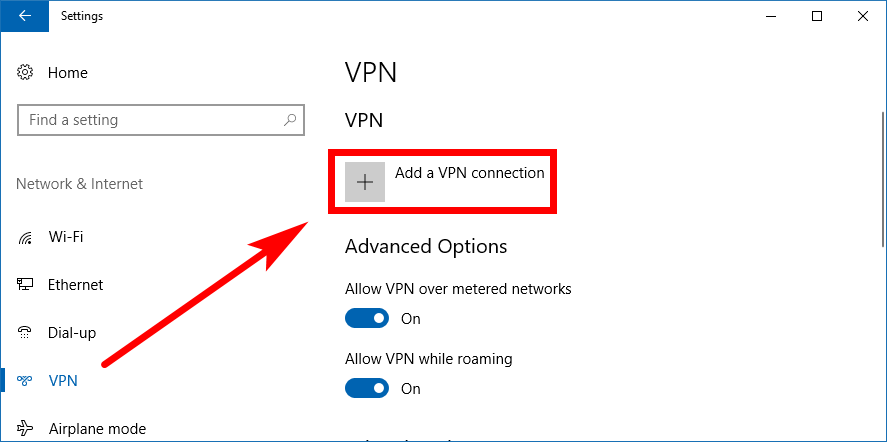
You’ll then see an “Add a VPN connection” under the VPN heading.
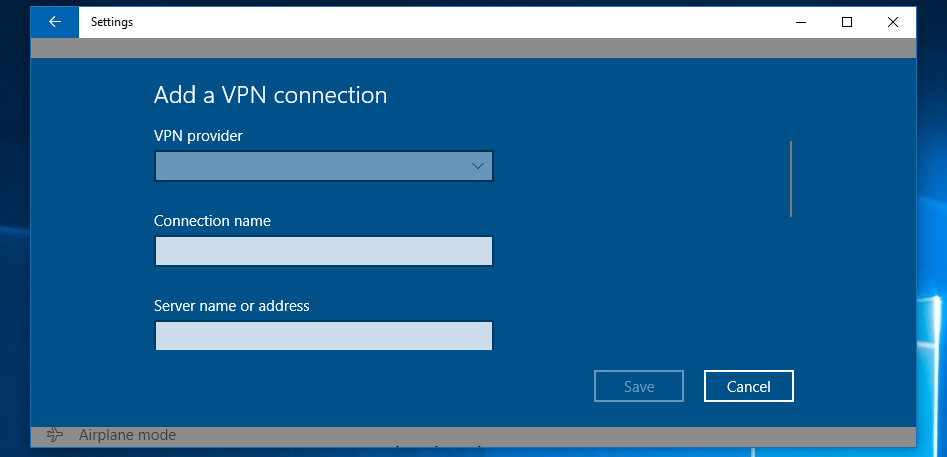
You then get a new window popping up where you can begin to add your VPN details. Choose the “Windows built-in” option from the dropdown menu where it asks for your VPN provider. You can make the connection name up yourself if you are hosting your own VPN, but if you’re using a provider, then some of them may want you to enter a specific name before this’ll work. The server name or address is also going to be information you need to ask your service provider if you have one or look for your own details if you are self-hosting.
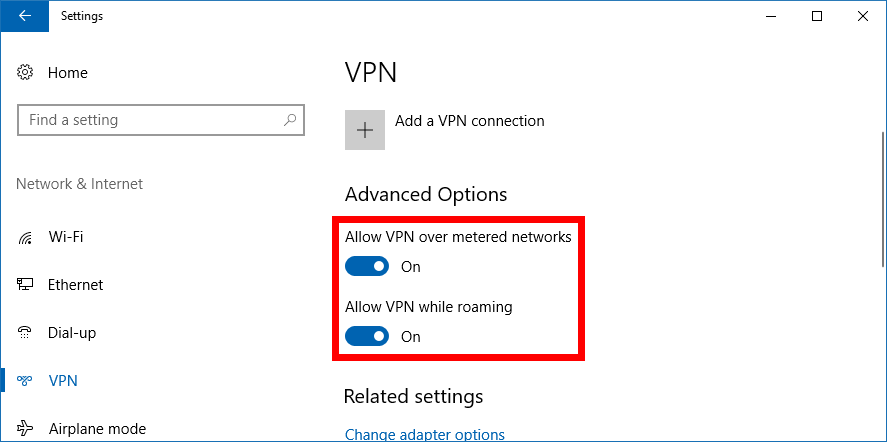
Once you’ve added your VPN connection, you can check out the advanced options that are available directly beneath the button you used for adding. The first toggle is there for you to choose if you want to allow the VPN to work over metered connections or not. A metered connection when turned on limits that stuff that Windows will download to your computer, designed to help people on data limits save money. The second toggle is there to allow you to choose if you want the VPN to work when roaming or not. Sometimes people’s operating system roam between connections.
How to Remove VPN Connections from Settings
You can remove the VPN connection from the same area of the Settings application in Windows 10 that you used to add it in the first place. To get there, navigate to the Start menu > Settings > Network and Internet and then click on the “VPN” link from the left side pane. Then you’ll see your VPN connection that you’ve added in the right side pane under the VPN heading. Click on it, and it expands to reveal a couple of options beneath the name, one of which is the “Remove” button that you need to click on to remove the connection. It then gives you a little message that says “If you remove this VPN connection, you’ll need to set it up again to reconnect.” Click on the “Remove” button a second time from that small message and then it will be removed.
How to Add VPN Connections from Network and Sharing Center in Control Panel
You can also set up a VPN connection from the Network and Sharing Center from the Control Panel in Windows 10 if you prefer or your Settings application won’t open for the time being. To do it this way, open the Control Panel so that it is showing the classic view with the smaller icons on display and then click on the “Network and Sharing Center” link from the list of all Control Panel items. Now look under the Change your network settings heading and click on the “Set up a new connection or network” link.

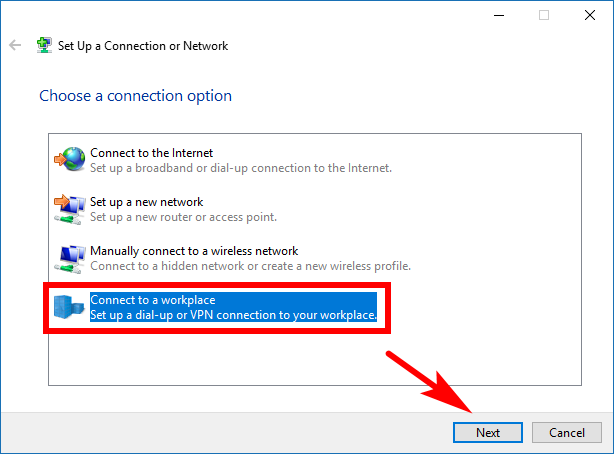
You’ll be given a list of a few options. The one you want to click on is the “Connect to a workplace” so that it is highlighted and then click on the “Next” button at the bottom of the window.
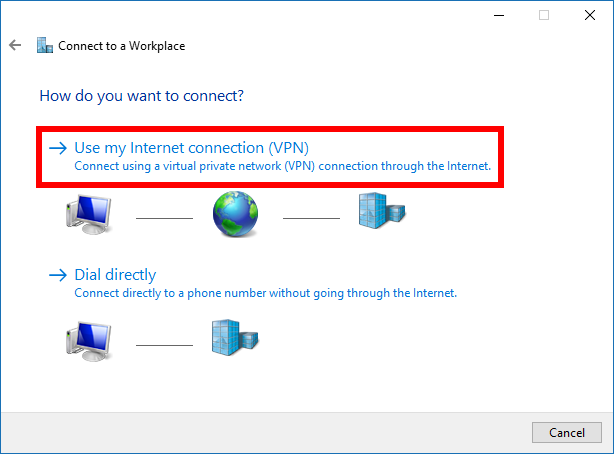
Now click on the link that says “Use my Internet connection (VPN)” under where it asks how you would like to connect.
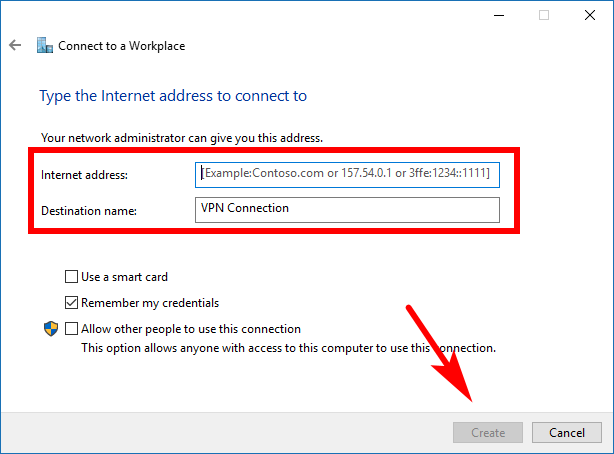
You’ll need to enter the Internet address in the available field before you can then advance by clicking on the “Create” button at the bottom of the window. Once you’ve done that, the VPN connection is all set up and ready to go.
How to Remove VPN Connections from Network and Sharing Center in Control Panel
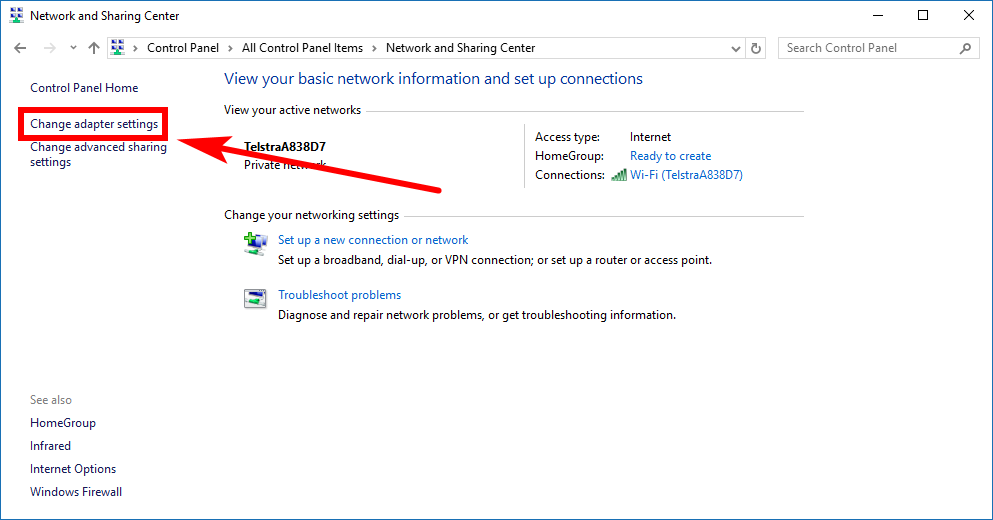
You can also remove the VPN connection from the Network and Sharing Center from the Control Panel in Windows 10 as well if you like. To do it, open up the Control Panel so that it is showing its more classical view with the smaller icons again and then click on the “Network and Sharing Center” link from the full list of Control Panel items. Click on the “Change adapter settings” link from the left side pane. You’ll then see a new ribbon appearing just under the address bar of the Control Panel window, and one of the options from that ribbon is the “Delete this connection” link. Click on that link and then the VPN connection is removed.
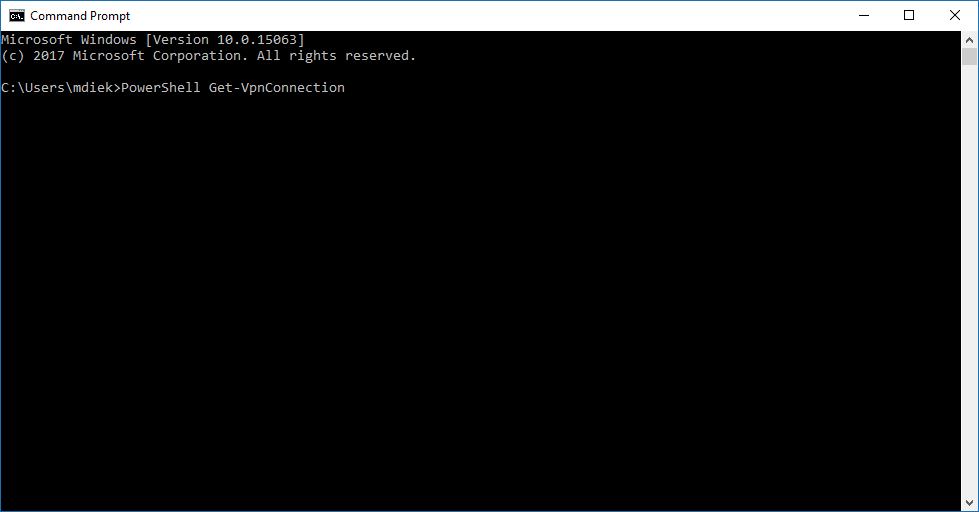
How to Remove VPN Connections from Command Prompt
You could also remove VPN connections by using the Command Prompt if you wanted. To get started, open the Command Prompt window—it doesn’t have to be one with the administrative permissions assigned to it—and then type the PowerShell Get-VpnConnection command and then hit the Enter key on your keyboards. You’ll then be able to see the name of the VPN connection. Now type the rasphone -R "VPN name" command and hit Enter, substituting where it says “VPN name” with the real name that you got after executing the previous command and then the VPN will be disconnected.
You might also be interested in:
- Classic Shell For Windows Is No Longer Being Developed
- How to Turn On/Off AutoPlay in Windows 10
- How to Give Great Tech Support Around Your Home
- How to Create a Password Reset Disk on USB Flash Drive in Windows 10
You can subscribe to our RSS, follow us on Twitter or like our Facebook page to keep on consuming more tech.