Last Updated on December 26, 2022 by Mat Diekhake
The Windows operating system is cleverly laid out so that when you go looking for something, it’s path for finding it has some common sense attached to it. But Windows is also thought of as a feature-rich OS, and thus there are lots of different places and paths that one would need to follow should they ever become dexterous enough to find their way around the whole thing.
Knowing your way around Windows doesn’t need to involve a ridiculously high IQ. All you need is some practice and continued learning, so you begin to remember where these places are.
There’s also another feature that Windows has that allows you to find places without having to navigate to them called the Windows search index. The search index is what you get after you type a query into the search box. Older versions had a search box too—for example, Windows 7 had a search box available from the bottom of the Start menu—but there is more emphasis put on the search box in Windows 10 since it is now accessible from the taskbar. And probably rightfully so too: it was asking a bit much for everyone to know how to navigate the Windows operating system when not close to everyone is a Windows PC expert.
Windows 10 Indexing Options
1. If you’ve been browsing around Windows and wondering where to find Windows’ indexing options, you’ll need to begin at the Control Panel or, ironically, with the search box. Those preferring to search for it can find it by typing Indexing Options and then pressing the Enter key on your keyboards.
2. When using the Control Panel, you need to open it up so that it is showing the classic view with either the large icons or the small icons. You can control what kind of icons the Control Panel displays by clicking on the View by drop-down menu available on the top right side of the Control Panel window after you first open it up.
3. Next, click on the Indexing Options link from the list of all Control Panel items.

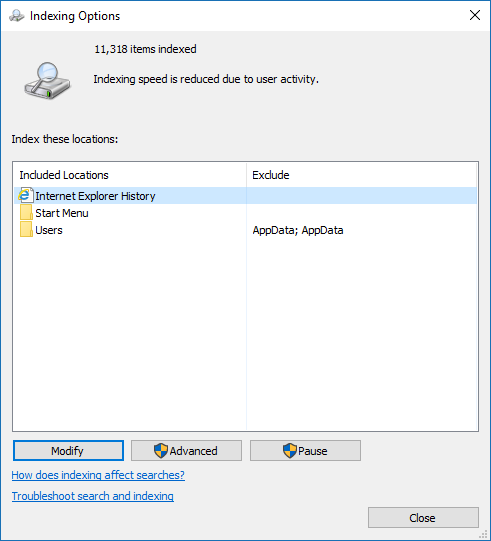
4. It’ll open up the Indexing Options dialog box and give you the current locations that are indexed. When you want to make changes to the index, you click on the Modify button at the bottom of the dialog.
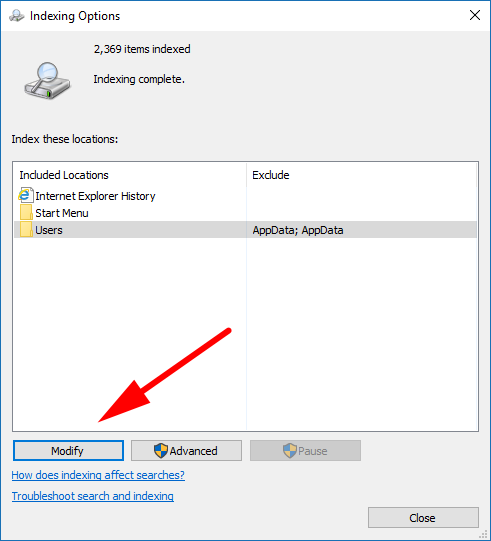
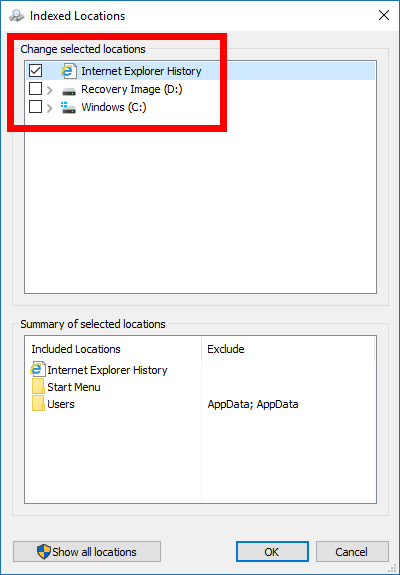
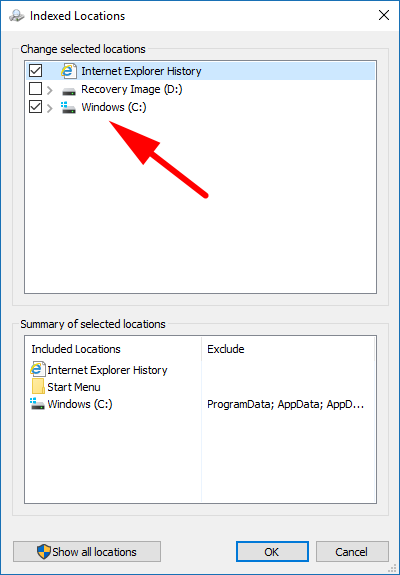
5. Next, look under the Change selected locations section at the top of the dialog and click on the one you want to change.
6. When you’ve made the changes, you then need to click on the OK button at the bottom of the dialog box for them to be applied and saved.
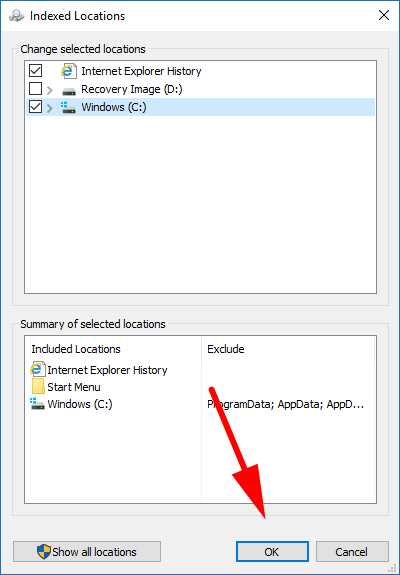
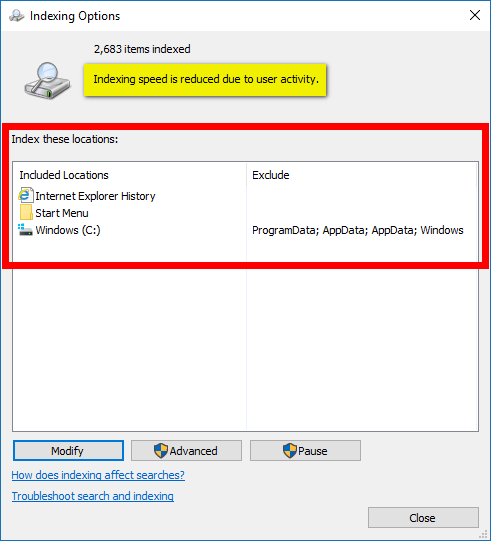
7. You’ll notice that the Users folder is now replaced with the Windows C: drive and just above the indexing location is some new text that says Indexing speed is reduced due to user activity. That’s letting you know that including the C: drive in its entirety is going to slow down the computers indexing process because adding more stuff to the index means it now needs to sift through more stuff to find what you are looking for. That’s in relation to the indexing speed only and not when you use your computer for anything else.
Adding Specific folders to Windows Search Index
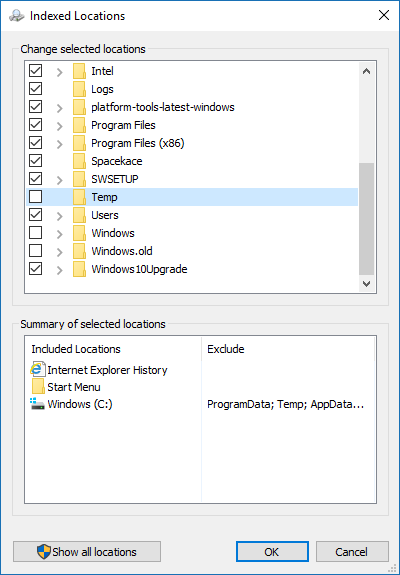
1. Instead of adding the entire C: drive, you can also just add folders or more specific locations on the C: drive. Just double-click on the Windows C: drive entry to get started.
2. And then you’ll see all of the folders that are found in the C: drive. They all have a checkbox to the left side of them that you can uncheck if you don’t want to include it in the search index. You can also go a step further and click to open those folders and then remove anything inside a folder that you don’t want to be indexed as well.
Undoing the Changes You’ve Made
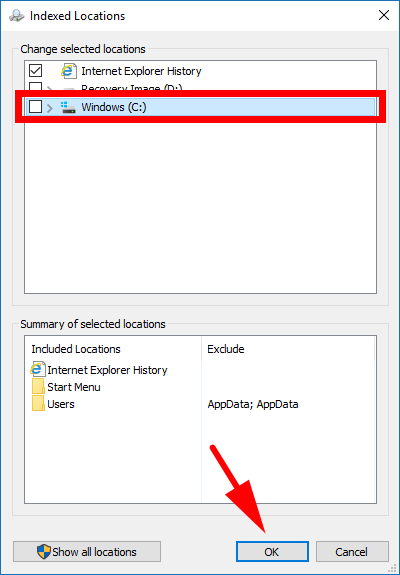
1. You can undo any changes you’ve made to the search indexing by opening up the Indexing Options dialog box again, highlighting the location that you had previously made alterations to and then clicking on the Modify button.

2. Now you can check or uncheck the boxes accordingly. If you had included the C: drive before, for example, you need to uncheck the box next to it and then click on the OK button at the bottom of the Indexing Options dialog box.
3. Once you’ve applied the changes, it can take a few seconds for them to be reflected in the Indexing Options area. For example, it took about 5 seconds of waiting before the part that said C: drive eventually changed over to now show the older Users folder, like it was before we made any changes to our search index.
There’s only one way to cut down the total amount of time it takes to search through the index, and that is by cutting down on the amount of stuff that is available for the index. On the other hand, sometimes you might care more about making as much stuff available from the search index as possible so you can use the search box more than you would be able to by default. People choosing to have the C: drive included in the index so they can search for files instead of having to venture into the File Explorer being one of the major changes that some people choose to make—it would slow down the performance but at least make it possible to use the search feature for finding documents. By default Windows doesn’t make the C: drive available for searching through your documents. Instead, it’s just mainly used for opening up stuff that the operating system has and not files that are tied to you as a person—stuff like getting the System Configuration, Command Prompt, Control Panel, Registry Editor, so forth.
Other Ways to Search for Files in Windows 10
If you wanted to keep your search index on its default settings so you can use it for searching all the things you might use in Windows 10 for being a system administrator, like starting and stopping programs from msconfig, for instance, then you might be more interested in using one of the other tools out there that can help you browse through files on Windows 10.
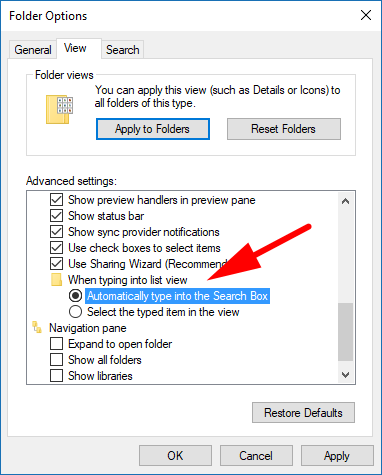
File Explorer: Using the File Explorer can seem like it’s always the long way around, but the File Explorer itself has its own search box that you can use as well. It’s probably at least partially why Microsoft doesn’t include the C: drive to be included in the search index by default. All you need to do is open the File Explorer and then click on the folder you want to browse. When you do you’ll then see the search box in the top right corner of the File Explorer window. The File Explorer works in such a way that if you were to type something on your keyboard with the File Explorer window open, it would automatically highlight whatever is within File Explorer with the same letters. For example, if you press the R key, it will then highlight the Recycling Bin and so on. However, you can also use the Folder Options dialog box to change this so that it starts typing automatically into the search box Doing so bring different results and includes all those file names you only get when you start typing in the search field from File Explorer.
Everything: You can also install a third-party tool called Everything and get a custom search index built that way if you prefer. Everything is free to use and is one of the most popular alternatives for people who don’t like the way Windows 10 has the search index set up for you. Once you set it up, it’ll build a database of every file and folder located on your computer and then brings them up very quickly as soon as you start typing them. Everything won’t be the best solution out there for everybody because lots of people have no idea what the names of their files or folders are and they are just used to finding the locations of them in File Explorer. However, if you are one who is familiar with names of files and folders, it’s remarkable how quickly Everything manages to work. Especially after all the talk of the Windows search index slowing down and losing performance the more you have in it.
Cortana: You should notice the Cortana ring symbol available on the left side of your search box. Using Cortana means you can get a bunch of stuff answered from the Bing search engine. If Cortana isn’t able to talk out the answer to your question, then she’ll still type what she heard you say and retrieve all the information from Bing for you to look at instead. Not everyone has a use for her, but if you are someone who is interested in the traffic conditions or weather at some point during your data, then she can come in handy and give you enough information to be worth her keep.
This article was last updated on May 31, 2019.
That’s all.
Related Tutorials