Last Updated on December 26, 2022 by Mat Diekhake
Your computers that run on a version of the Windows operating system are always going to come with at least one drive—for example, the hard drive in itself is a drive. Knowing if a problem is associated with the drives or not isn’t easy, but if you are noticing some performance issues, then the drive is one of the first places you should look. Drives can be large and have lots of stuff on them, so there’s always a good chance it is going to be related to your problems.
Even if you aren’t specifically noticing a new problem when using your computer, it’s a good idea to check the drives every so often because it just might be ready for a tune up without you even realizing it.
There are two types of drives you can check on the Windows operating system. The guide below will run you through what you can do to check a hard disk drive or solid state drive (HDD or SDD) in Windows 10 with its built-in tools.
How to Check Drive for Errors in Control Panel
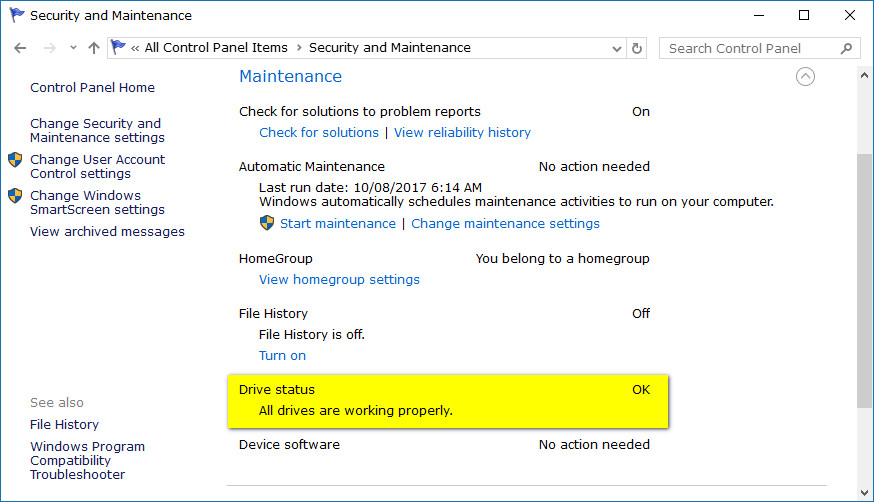
You can check for drive errors in Windows 10 from the Security and maintenance link available from the Control Panel. To get there, open up the Control Panel, so it is showing you the classic view with the smaller icons option and then click on the “Security and maintenance” link. Once inside, click on the “Maintenance” drop-down menu link and it then reveals everything with relation to the maintenance side of things.

Scroll down the window until you get to the part that says “Drive status, ” and it gives you a message underneath that lets you know the status of your drives.
How to Check Drive for Errors in File Explorer
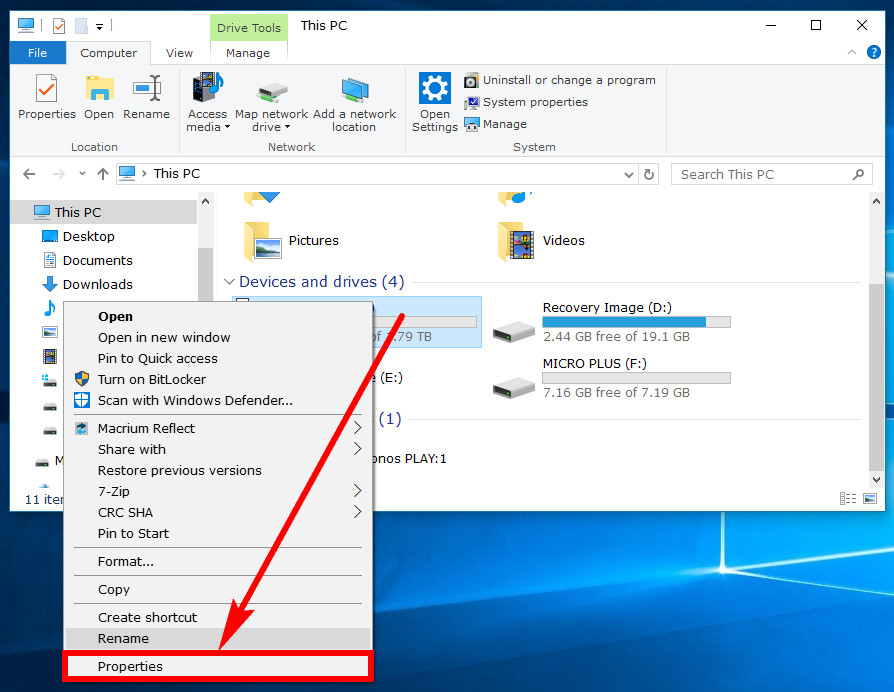
You can also check a drive for errors by viewing the drive’s Properties directly from the File Explorer if you want. To get there, open up the File Explorer by heading to the Start menu > File Explorer and then right-click on the drive you want to check for errors and then click on the “Properties” option from the menu. Most computers only have the C: drive from the File Explorer, so we’ll use that in the example.
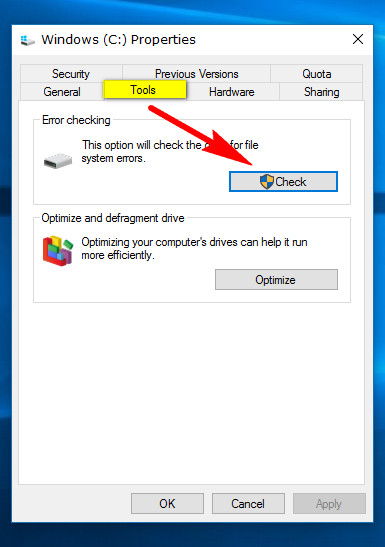
Select the “Tools” tab from the top of the Windows C: drive Properties dialog box and then click on the “Check” button where it gives the Error checking heading.
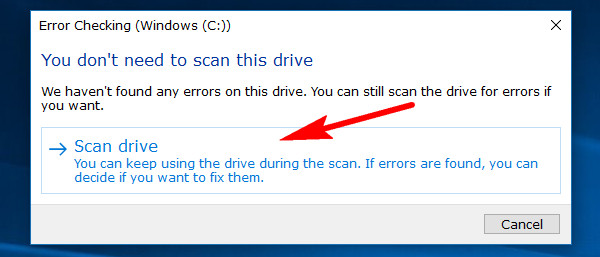
You’ll get a message on the screen now letting you know that you either have a drive with errors or no errors. The scan can complete rather quickly if there are no errors. You also get another button to click if you want to scan the drive again anyway, even though it says there aren’t any errors just to give yourself some additional piece of mind if you want it.
How to Check Drive for Errors in Command Prompt
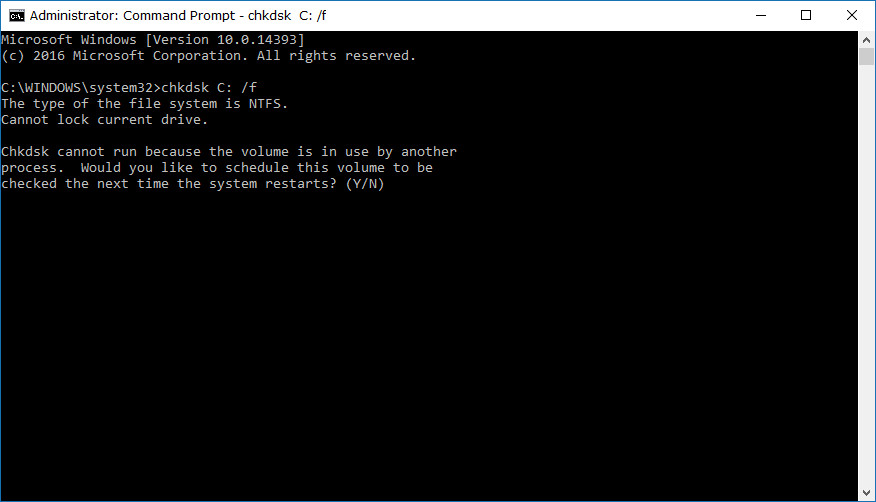
You can check a drive on your PC for errors from the Command prompt in Windows 10 too. To do it this way you need to open up the elevated version of the Command Prompt window and then type “chkdsk /?” to bring up the switches. The switches are what you see in the left column in the results of the command line’s window. For example, the F, V, and R are all switches.
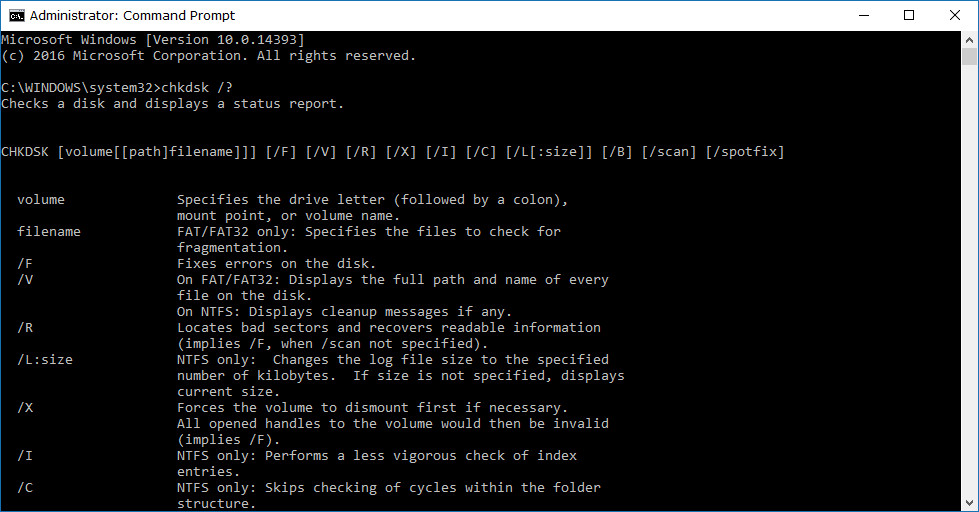
Once you know the switch you want to scan—for example, if you wanted to fix errors on the disk you would use the “F” like it shows in the switches results in the picture above—type the “chkdsk : <drive letter> /<switch> ” command and Hit the Enter key on your keyboards, substituting where it says “Drive letter” and “switch” for those two details.
How to Check Drive for Errors in PowerShell
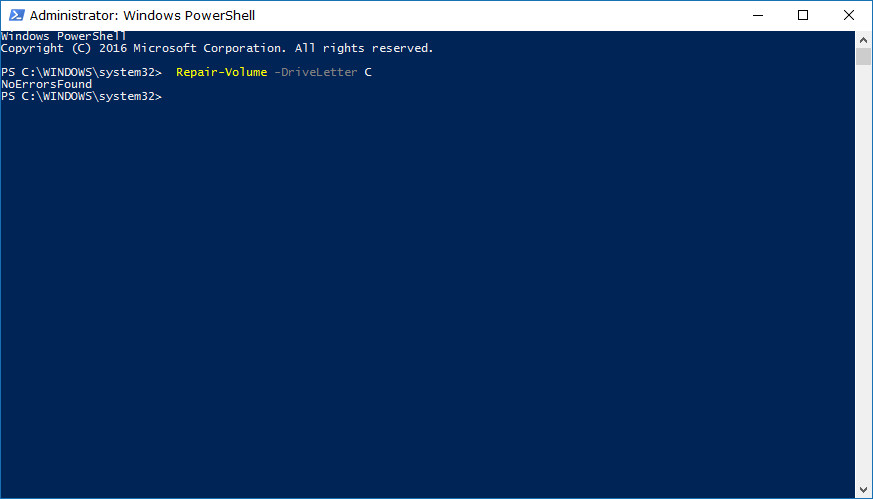
You can also scan and repair drives using the Windows PowerShell. To give it a try this way, open up the elevated version of the Windows PowerShell and then type ” Repair-Volume -DriveLetter <drive letter>.” So for example, if you wanted to scan the command D: drive for errors from the Windows PowerShell, you would need to type the Repair-Volume -DriveLetter D command and then execute it by pressing the Enter key on your keyboards.
Your hard drives should now be well and truly fixed, and you should have no worries going back to using your computers, making the most of Windows 10.
You might also be interested in:
- How to Do a System Restore of Windows 10
- How to Turn On/Off Sync Settings for Microsoft Account in Windows 10
- How to Turn On/Off Windows Optional Features in Windows 10
- How to Change a Network Profile Name in Windows 10
You can subscribe to our RSS, follow us on Twitter or like our Facebook page to keep on consuming more tech.