Last Updated on December 26, 2022 by Mat Diekhake
If you don’t like the idea people being able to see your name when you email them, then you’ll need to create an email address that doesn’t feature your name first. The next thing you want to do is make sure that your name isn’t being shown at the top of the email after you send it.
An email client always gives people the chance to change the name that is going to be shown to the recipient. One thing that people forget is that the default Windows 10 email app is a unique thing, meaning even if you have your Hotmail or Gmail account altered so that it doesn’t show your name, the Windows 10 email app still might be showing it.
To make sure that your name isn’t being shown when you send emails from the Windows 10 email app that you get access to when you navigate to the Start menu > Email tile, then follow the guide below.
This is what you need to change that name that appears on emails when you send them when you’re using a version of the Windows 10 operating system.
How to Change How Your Name is Displayed When You Send Emails Using Windows 10 Email App
You can change what name shows up when people view your emails that you send from the Windows 10 Mail app from the Mail app’s settings menu. Here is how you can do that:
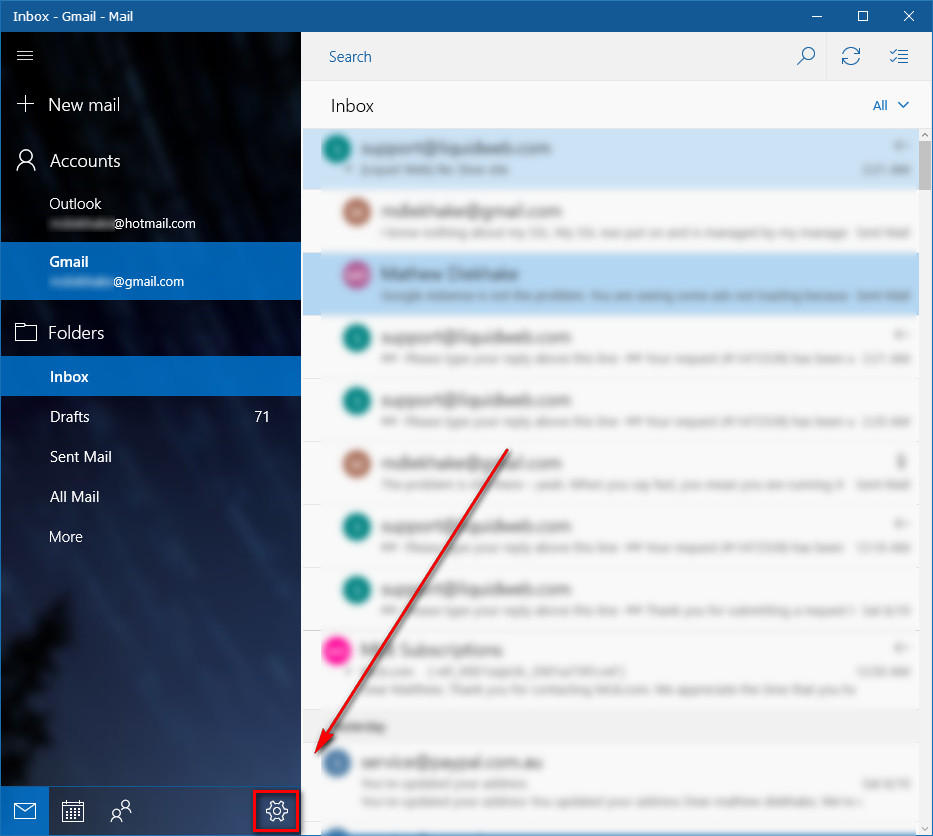
1. Open the Windows 10 email app by navigating to Start > Email tile and then click on the Settings gear icon at the bottom of the email application’s window.
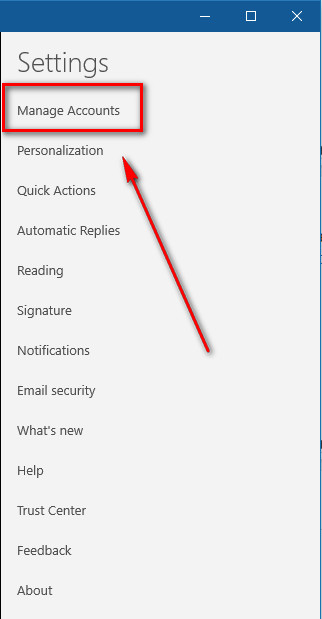
2. Click on Manage Accounts at the top of the menu.
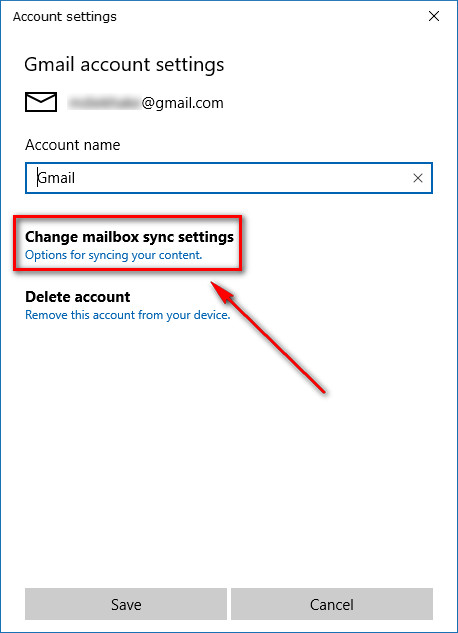
3. Choose the email that is the one you want a name change within.

4. Click on the Change mailbox sync settings link to get access to your options for syncing the account.
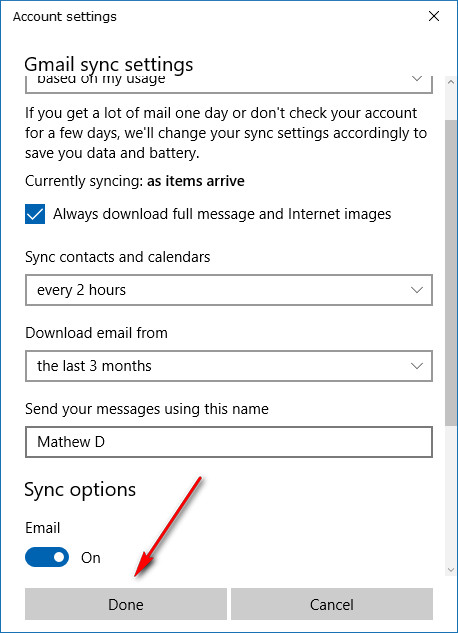
5. Under where it shows the Send your messages using this name heading, change the name within the box to the name you want to use.
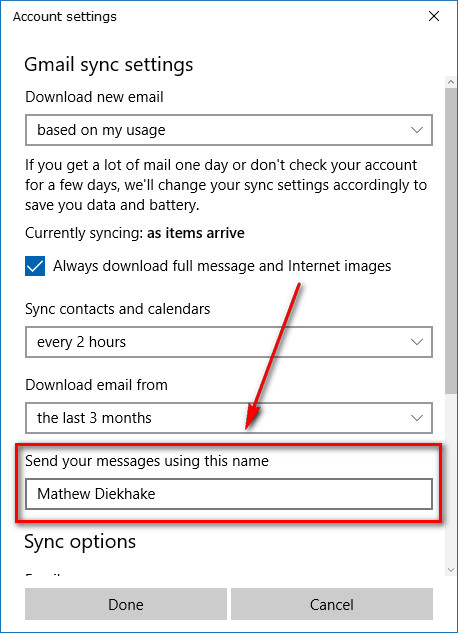
6. Click on the Done button after you have made the name change.
The Windows 10 email client is now ready for you to send new emails with your new name. You can exit the Settings for the email app and start posting.
Related Tutorials
- How to Change Folder Icon in Windows 10
- How to Change Power Plan Settings in Windows 10
- How to Delete a Note from Microsoft OneNote
- How to Turn Off Cortana Contacts, Email, Calendar Permissions in Windows 10
- How to Change Email Name in Windows 10 Mail
- How to Hide Username and Email from Windows 10 Login Screen
- How to Add Another Email Account to Outlook in Windows 10
- How to Pin Email Account to Start Menu in Windows 10
- How to Enable/Disable Email Notifications in Action Center in Windows 10
- How to Take Away Email Address from Windows 10 Login Screen
January 9, 2020 @ 13:12
I have several emails in my Windows 10 Mail, but the option to change the display name only appears in the location you referenced for certain email accounts. For example, it is there for my gmail account but not my @msn.com or @hotmail.com emails. I’m looking to change the name on those accounts as well and cannot find where to do so.
February 22, 2020 @ 21:56
What works is to delete the email account from the ‘mail’ app in Windows 10. Then you add the account again as if it is new. Name will reflect what the email account uses as name. I didn’t have the name option for any of my accounts in the mail app. Apparently I had changed it before they removed that option. Eventually gave up and deleted the account from the mail app, thinking I would just use a different mail app, but then I added it again and the correct name was restored, from the gmail settings, not windows 10 mail settings.
September 3, 2019 @ 20:07
Thanks Mathew, this was exactly what I was looking for! The Windows forums is filled with this problem but none has replied to them. This is a life saver.
September 4, 2019 @ 05:16
You’re welcome Mohandas 🙂
Thanks for the feedback.
And feel free to share this on that forum you speak of.