Last Updated on December 26, 2022 by Mat Diekhake
In the world of IT, they say that you should become a developer because that’s where the money is. That is true. The developing side of information technology makes far more money than the technician side of things.
Developing also isn’t something that you need to be incredibly smart to do. There’s plenty of people out there who would argue that you need to be smarter to be studying the technical side of things than developing. Developing is more like just learning another language or twenty different alphabets: it just requires time, effort and a good memory.
When you’re good at developing, the money can come reigning in. It isn’t always easy though. There are some things to do with developing that are nuisances, such as having to update applications continually.
You can’t just create an application and then expect it to be compatible with a bunch of different operating systems. Likewise, you can’t even expect to develop an app and think that’s it’s going to be compatible with numerous versions of the same operating systems. Over time, these things need updating: sometimes to reduce security vulnerabilities and other times just so that the app works.
In Windows 10 things are no different. Many of the applications that were created for Windows XP, Windows Vista, Windows 7, Windows 8 and 8.1 will not work with Windows 10 until the developer has updated them to work with Windows 10. Typically the older the version of Windows that it was created for, the less likely it is to be compatible. But applications are complicated things, and it’s difficult to predict what apps will or won’t have compatibility problems. There will be quite a few that never developer such problems at all.
GDI-based applications
Microsoft has made things easier for application compatibility starting from the Windows build 15002 that rolled out to Windows Insiders from the 9th of January and was included in official Windows update not long after that. The way they achieved this was by enabled high-DPI support improvements by default for many of the desktop applications, and there’s even an option for you to choose between enabling and disabling it for other GDI-based applications as well.
The Creators Update built on the earlier success of the Windows build 15002 and brought new high-DPI scaling improvements with it to further assist desktop applications.
How to Change Compatibility Mode Settings for Apps from Control Panel
You can modify the compatibility mode settings from the Control Panel in Windows 10. To get started, open the Control Panel so that it is showing the classic view with the smaller icons and then click on the “Troubleshooting” link from the list of all Control Panel items. Now click on the “Programs” link under the “Troubleshoot computer problems” heading.
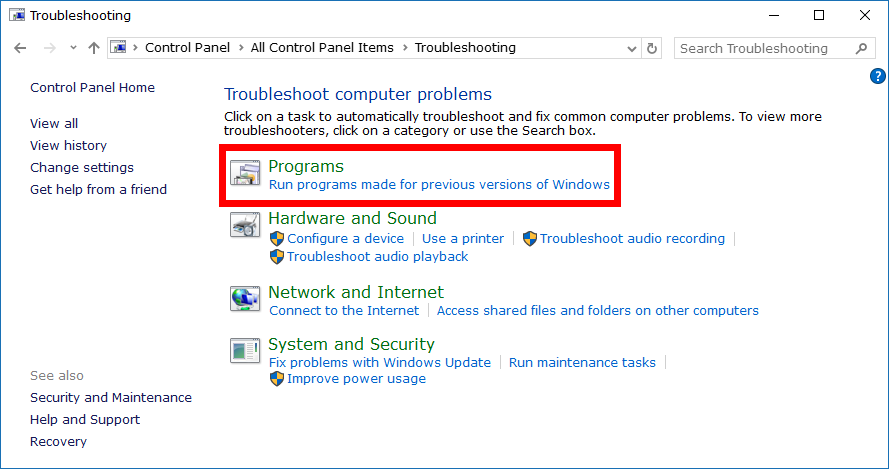
You’ll then see another list of links under the “troubleshoot problems — Programs” heading. Click on the “Programs” link again.

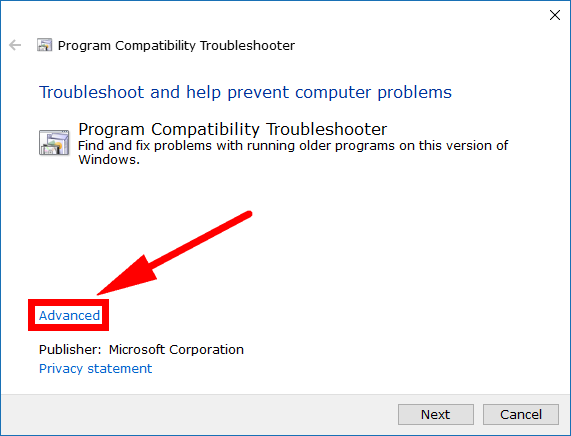
From the “Troubleshoot and help prevent computer problems” window, click on the “Advanced” link in the bottom left corner.
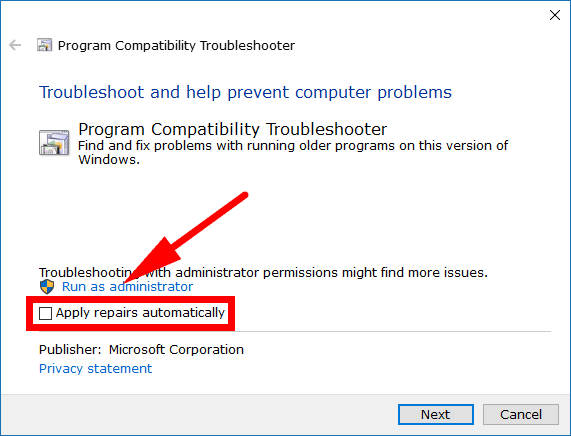
Uncheck the “Apply repairs automatically” and then click on the “Next” button.
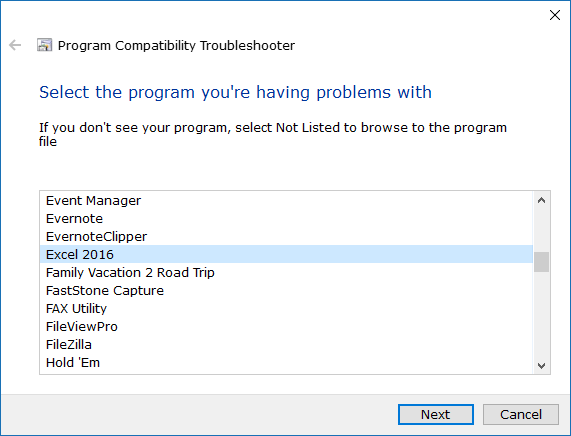
Manually highlight the program that you want to change compatibility mode settings for from the list by clicking on it once and then click on the “Next” button.
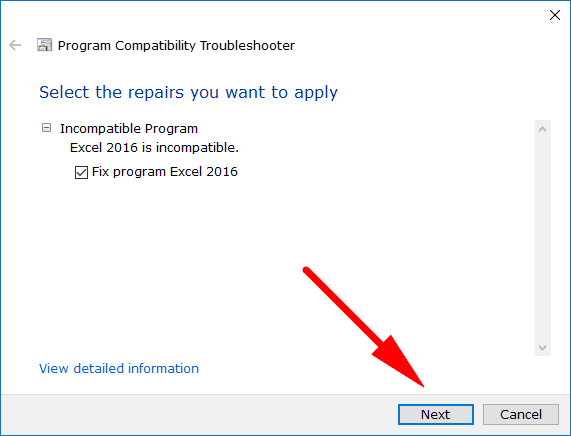
Make sure there is a checkmark in the box for fixing the program and then click on the “Next” button in the bottom right corner again.
Under the “Select troubleshooting option” there are two options for you to choose. You can either try the recommended settings or troubleshoot the program.
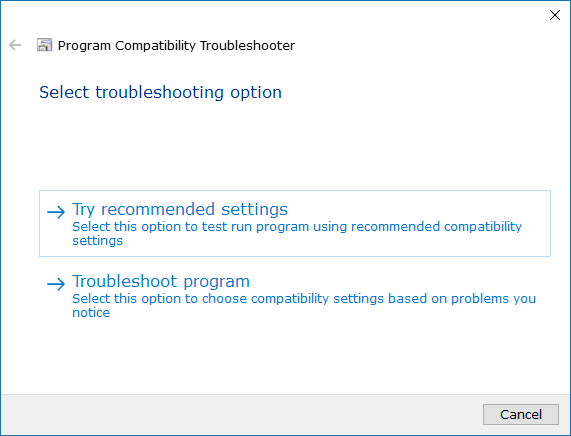
If you click on the “Troubleshoot program” it then gives you some further option that you need to choose from to help fix the problem. Check the boxes that relate to the problems that you have noticed and then continue by clicking on the “Next” button at the bottom of the window.

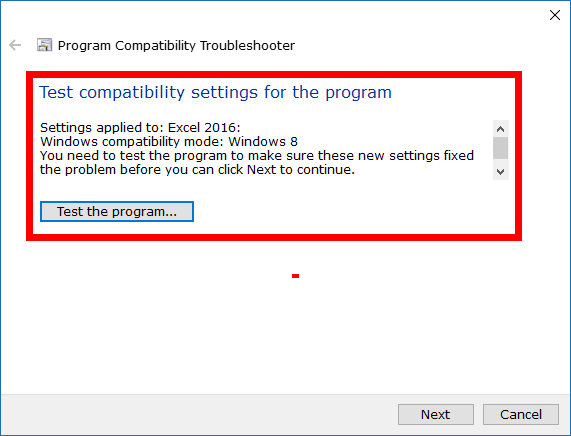
If you clicked on the “Try recommended settings” instead, then it gives you the “Test the program” button instead. Click on that and see how you go with the automatic tests by Windows.
How to Change Compatibility Mode Settings for Apps Using Properties Dialog Box
You can also change the compatibility mode settings for applications by using the Properties dialog box that comes directly from the app itself. To do that, right-click the mouse on the application and then select “Properties” from the menu. You can then click on the “Compatibility” tab at the top of the dialog box, and then you have the same two buttons: “Run compatibility troubleshooter” and “Change settings for all users” available in the box.

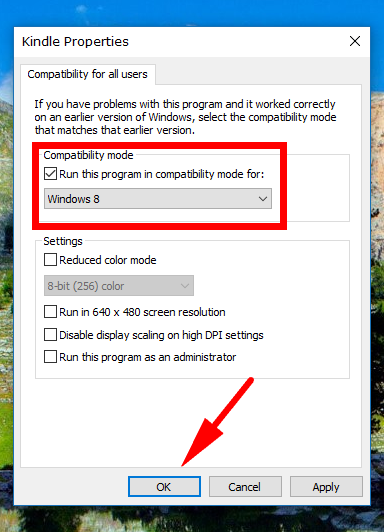
Running the compatibility troubleshooter will run the same program that was shown in the steps above when using the Control Panel. If you clicked on the “Change settings for all users” on the other hand, it lets you choose what operating system you want to run the compatibility mode for with the app. Click on the drop-down menu and choose the Windows operating system version—it shows all of them ranging all the way from Windows 95 through to Windows 8 (the last version of Windows that arrived before Windows 10 and you don’t need to worry about Windows 10 because the apps are already compatible).
If the application is getting enough users, it should be looked after by the developer, so you don’t need to worry about compatibility issues. In other words, this isn’t something you need to be doing for all apps or anything close to it. However, if you need an application to work, and you think it might have stopped being developed by its developer, then you can use the compatibility mode settings that Windows 10 has on offer to try and solve the problem by running the older versions of Windows that it was compatible with so those present-day problems are gone.
You might also be interested in:
- How to Restart Computer in Windows 10
- How to Change Windows Backup Settings in Window 10
- How to Cast Media to Device in Microsoft Edge in Windows 10
- How to Remove Windows 10 PC from Local Active Directory Domain
You can subscribe to our RSS, follow us on Twitter or like our Facebook page to keep on consuming more tech.