Last Updated on December 26, 2022 by Mat Diekhake
Local Active Directory Domains are commonly used in the workplace or schools. A group of computers all connected to the same network on a domain gives administration access all computers from a single computer. That single computer that can roam anywhere in the network is called a server.
The domain allows for single user login for any computer on the network and no matter what computer you are in front of at the time. The administrator of the network gets to control what permissions regular users have when they use their accounts. That will dictate whether a user can also use another computer on the network or not.
Domain Controller
You’ll need to have a domain controller set up before you can connect to that domain. All versions of Windows operating systems have a directory that resides on computers that are configured as domain controllers. You’ll need to know the name of the domain that you are trying to join before you can connect to that Active Directory. Additionally, you’ll need to have the name and password that’s associated with your user account. That password and name is created by the domain administrator and has nothing to do with your standard user account details like logging in to Windows 10 with your Microsoft account.
Active Directory
The Active Directory is a term used by Microsoft that describes any Microsoft network that is built on the typical network model that involves a client and a server. The idea is to offer a centralized server called a Domain Controller, otherwise known as “DC” for short. The Domain Controller is then responsible for authenticating the entire network. That means you don’t just log in to a local computer like you might have to read this article. Instead, you log in with authentication to the DC.
How to Remove Windows 10 PC from Local Active Directory Domain Settings
You can remove a PC that runs on Windows 10 from a Domain by using the Settings application. To get started, navigate to the Start menu > Settings gear icon from the Start menu’s left side pane and then click on the “Accounts” link from the Windows Settings screen. When inside Accounts, click on the “Access work or school” from the left pane and then your connections will be visible in the right side pane.
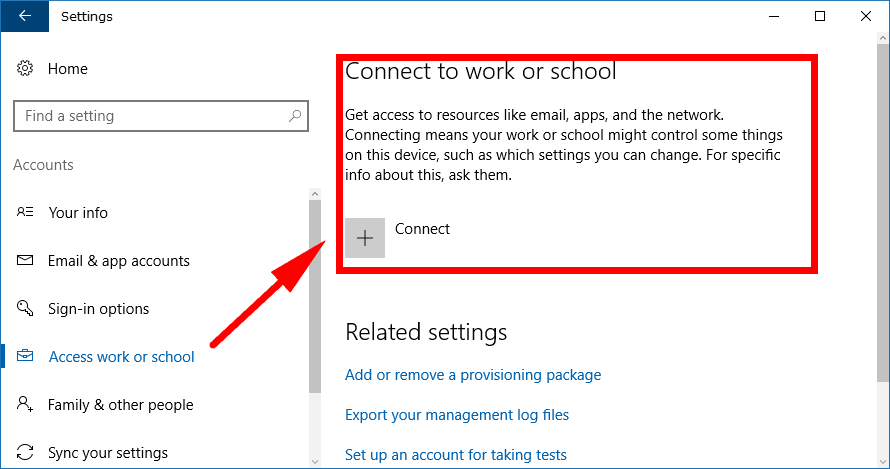
You can click once on the name of the connection that you are currently connected to, and then it opens up to show you more. Part of the area that opens up has a button on it that says “Disconnect.” That’s the button you need to click to disconnect your PC from the domain. Once you’re done that, just close the Settings application window, and you’re done.
Note: If you are running on the Windows 10 Pro edition and not the Home, then you need to be aware that it has the BitLocker Encryption active unless you have manually chosen to disable it on the past. If that’s the case, you should make sure that you have a backup of the BitLocker recovery key that isn’t on the computer’s hard drive before going ahead with the disconnection. We’ve also gone over before why we think it’s best practice to just encrypt a single file or folder for now instead of running with the BitLocker encryption if you’re interested in checking out that.
How to Remove Windows 10 PC from Local Active Directory Domain Control Panel
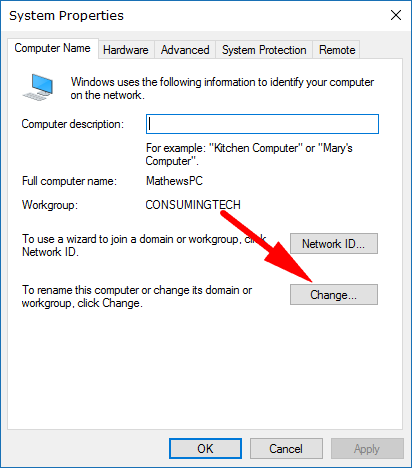
You can also remove a PC from a Domain in Windows 10 by using the Control Panel if you prefer. To do it this way, open up the Control Panel, so it is showing you the classic view with the smaller icons and then click on the “System” link from the menu of all Control Panel items. Next, click on the “Change settings” link that is available in the bottom right corner, so you get directed through to the System Properties dialog box.

Keep it on the “Computer Name” tab and then click on the “Change” button located next to where it says “To rename this computer or change its domain or workgroup.”
Since you are on a domain at the moment, you’ll see the checkmark next to the “Domain” checkbox. Click on the “Workgroup” one instead so that it swaps over. Now just click on the “OK” button to apply the changes and close the System Properties dialog box.
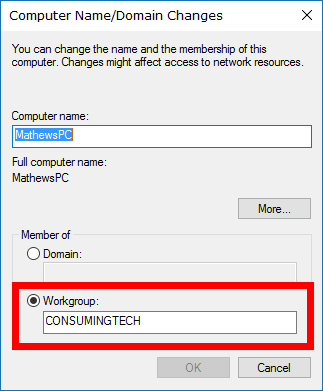
That’s all you need to do to remove a computer from a Domain. You’ll get a message from Microsoft now letting you know that you must restart the computer before the changes can be applied. Do that now and then log back in to your PC using your user local user or Microsoft account and password.
Related Tutorials