Last Updated on December 24, 2022 by Mat Diekhake
The navigation pane runs along the left side of File Explorer and is your easy access to a menu of sorts that leads to every location available within File Explorer.
The navigation pane is where you will find the Quick Access menu, the Downloads folder, the Documents folder, Networking, as well as This PC and all your computer’s hard disk drives and solid state drives.
By default the navigation pane is set to be on full display, but you can also choose to hide it if you prefer.
An example of how the File Explorer navigation pane appears in File Explorer when enabled:

The following tutorial demonstrates how to show or hide the navigation pane in File Explorer when you’re using a version of the Windows 10 operating system.
How to Show or Hide Navigation Pane from File Explorer Ribbon
You can choose to show and hide the navigation pane in File Explorer from the View tab within the File Explorer window. Here’s how you can do that:
Note: Showing and hiding the navigation pane in File Explorer is a universal setting, meaning that it will always be either shown or hidden, based on your selection, no matter what folder you have open or where you’re located within File Explorer.
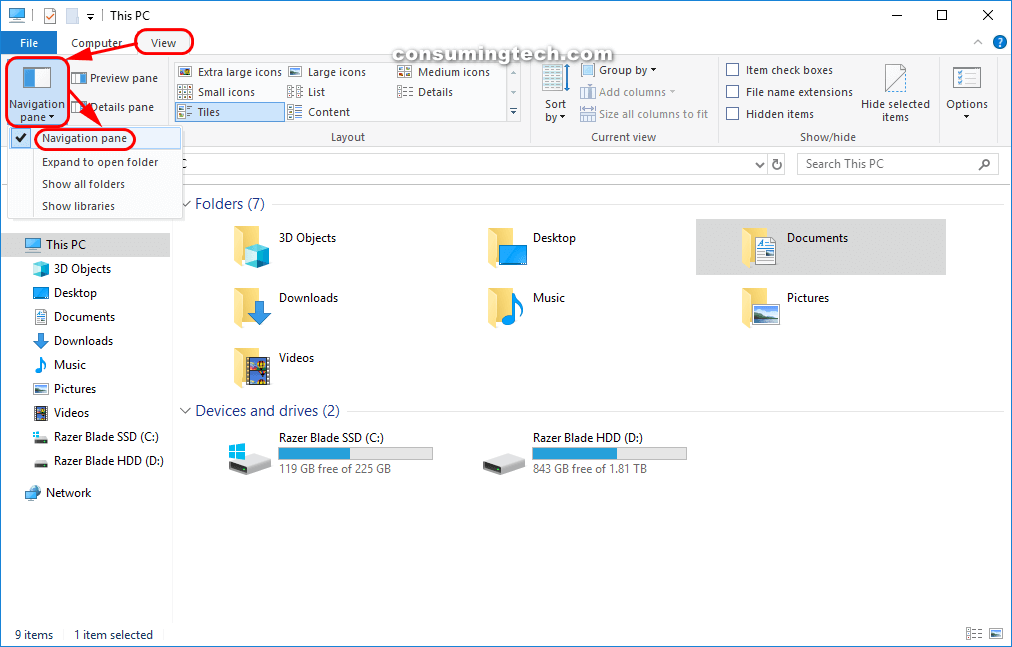
1. With the File Explorer window open, click on the View tab, click on the Navigation pane icon, and then select Navigation pane from the menu.
You can follow the same steps to hide and show the navigation pane in File Explorer. When the Navigation pane shows a tick to the left side of the entry, it is showing. When the tick is removed, it is hidden.
That’s all.