Last Updated on May 13, 2023 by Mat Diekhake
With Android, we have what is called a root user. The only problem is we are locked out of being root users by default. If the terms seem unfamiliar, you might know it as using Windows with administrator permission instead. Essentially what being an administrative user in Windows or a root user in Android mean is yo are using the operating system with master control and the ability to do what you want. If you were to log out of the administrator’s account in the Windows operating system and use another user account, you would find that you will not be able just to go around and install anything that you want. Android works much in the same manner; the only difference is Android is a mobile platform and what we cannot install if we are not a root user is applications.
Applications are a huge deal on our smartphone, and most people decided to choose to buy a device that runs Android and not Windows because the Google Play Store is just that much better than the Windows App store. You will see that opinion just about everywhere you turn, and it is well documented as one of Microsoft’s struggles with growing the Windows mobile platform after it arrived late to the scene. Android developers decide they have no choice by to lock people out of being root users because of security reasons. If you were to install an app that turned out to be malware or something that you could not trust, it could potentially read other apps and jump out of its sandbox area into another apps area. That is is how the malware problems begin. Moreover, it is also the reason why Android Pay will not work if you have a device with root access.
Nobody including us denies that the world should not be automatically granted the permissions to be root users knowing what we do know about security, but even Android developers would also not deny that there are many people out there who should be root users if they want to make that choice. In fact, Google and Android are huge fans of developing, and we know this because the Google Nexus range of smartphone is brought out with the sole intention of being appealing to developers. The thing with most developing is that you cannot make any changes to the Android system without bringing a root user, so most Nexus device owners root their devices.
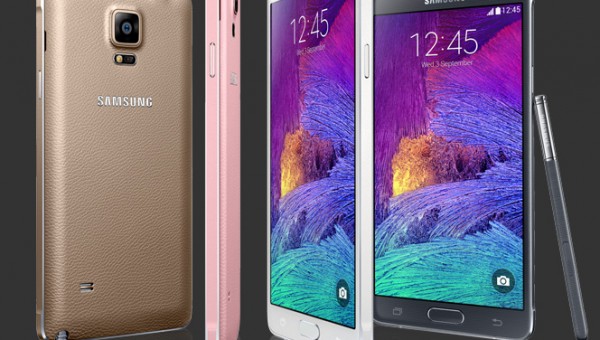
There is a unique CF-Auto-Root tool created for each device by Chainfire, which must be flashed for that device and model number. Each of those rooting files is based on a particular software update. That is the firmware that was running on the phone when Chainfire developed the version of the CF-Auto-Root tool. In this case, that is the MMB29M.N915R4TYU1CPC5 firmware build number is the one Chainfire used for the Samsung Galaxy Note 4 SM-N915R4 smartphone when it is running on the Android 6.0.1 Marshmallow software updates.
Files You Need
- Download the CF-Auto-Root file for the Samsung Galaxy Note 4 with the SM-N915R4 smartphone when it is running on the Android 6.0.1 Marshmallow updates from here.
- Download the Samsung USB Drivers for the Note 4 on the Windows PC from here.
You must have a computer that is running a version of the Windows operating system to use this guide. The Odin flashing application that is made by Samsung developers work on Windows and does not flash files if you attempt to run the tool on a MacOS or one of the Linux distributions. You can run a virtual machine if you only have one of the other operating systems, and you need to get Windows from Microsoft running. A Virtual Machine gives you a volatile Windows environment you can use and run your programs.
You can only flash the CF-Auto-Root tool found in this guide on the Samsung Galaxy Note 4 smartphone with the SM-N915R4 model number. You can check out what the model number of your Samsung Galaxy Note 4 smartphone is by pointing to the Menu > Settings > About Device > Model Number.
The following guide is made for the US Cellular Samsung Galaxy Note 4 smartphone that has the SM-N915R4 running on the Android 6.0.1 Marshmallow. It should work for any of the firmware versions that are based on Android 6.0.1 Marshmallow updates.
There could be some more Android software update that is based on the Android 6.0.1 Marshmallow updates that bring new bootloaders with them. People can easily tell when that is the case because it causes the CF-Auto-Root tool to stop working until Chainfire updates the files again. You now that you are one of the unlocked ones if you try flashing the CF-Auto-Root tool and your device does not boot after the flashing or just will not flash. Period. You need to let Chainfire know about the problem so he can fix it and he does that by updating the files with the new recovery image files that are found in the new firmware files. You can submit the new recovery image files to the official CF-Auto-Root thread made for the rooting tool over at the XDA-Developers website. Once he sees the message you have left he then applies the necessary changes on his end of the files and then they start working again. They start working as soon as he makes the changes if you are viewing the files from our website because we link directly back to the official CF-Auto-Root repository by Chainfire.
Rooting the Samsung Galaxy Note 4 SM-N915R4 running on the Android 6.0.1 Marshmallow software updates
- Log into a Windows computer using an account that has administrator permissions.
- Unlock the Developer Options menu on the Samsung Galaxy Note 4 SM-N915R4 smartphone so you can use the set of options available within the Developer Options menu.
- Enable the USB Debugging Mode on the Samsung Galaxy Note 4 smartphone from inside the Developer Options menu that you just unlocked so that you can connect the device to the PC and then flash files that can make developmental changes to your operating system.
- Extract the rooting file to the desktop of the computer so you can see the Odin flashing application and the rooting file ending in the tar.md5 file extension.
- Run the Samsung USB Drivers on the computer so your Galaxy Note 4 smartphone can connect to the computer with the USB cable and then be detected by the flashing application you run on the computer which is going to do the rooting.
- Boot the Samsung Galaxy Note 4 smartphone into the download mode and then connect it to the computer with the USB cable that you usually use to charge the battery on the device.
- Check that you can see a yellow or blue ID: COM port coming from the Odin flashing tool’s user interface as well as an “added” message that both let you know that your smartphone is being detected like it needs to be by the flashing tool for the rooting to work.
- Do not make any changes from the default settings you get from the Odin user interface.
- Click the AP button and then browse the desktop of the computer for the rooting file that has the CF-Auto-Root in the file name and ends in the tar.md5 file extension.
- Click the Start button from the Odin flashing tool user interface and then pick up the smartphone.
- Check that you get text rolling down your Note 4’s screen telling you that it is detecting the device, mounting the system and mounting the cache, resetting the SuperSU, running the SUperSU installer and the boot image patcher.
- Check the display for a few important notices which let you know that you can expect the device to reboot a few times, and the rooting out takes a few minutes. Do not be alarmed by the boot loops if you get them; they are part of the natural rooting process. Moreover, whatever you do, do not interrupt the rooting process.
- Check you get more text stating that it is unmounting the system, restoring the stock recovery, cleaning up and then finally going to reboot in ten seconds.
In conclusion, that is how to root the Samsung Galaxy Note 4 SM-N915R4 smartphone running on the Android 6.0.1 Marshmallow software updates by using the systemless root version of the CF-Auto-Root tool for Marshmallow updates by Chainfire. The smartphone will reboot in ten seconds as the text on the screen suggest sand you will also get a green pass message coming from the Odin user interface. As soon as you see the green pass message inside a box coming from the Odin application on the computer, you can unplug from the computer and start using your device in the normal mode. You might be interested in observing the SuperSU application that is now available from the app drawer and then opening the Google Play Store to download the root checker app. There are some free versions of the root checker application that are willing to let you check the root status of your smartphone. Moreover, those wanting more can install the paid version and get BusyBox installed.
Once you have checked the root status of the Samsung Galaxy Note 4, you can either choose to troubleshoot your potential problems or go ahead and make use of the rooting guide that you just completed by checking out all the things anyone can do once they become a root user on the Android operating system. Those needs to fix problems might want to check whether the Samsung Galaxy Note 4 smartphone is getting into the recovery mode automatically or not during the rooting process. It can be hard to tell when watching, but Chainfire states that getting into the recovery mode is what should happen and if it does not then the device will not have SuperSU installed and enabled correctly. You can wait until the screen says it is going to reboot in ten seconds and then hold down the hardware button combination for the recovery mode as soon as it does reboot to get into the recovery mode manually and the SuperSU should be enabled now that way. Chainfire states that it does not matter if the device gets into the recovery mode manually or automatically. As long as one of them is done (automatic or manual), then it should work.
Those who tried the recovery mode and fond that the root checker still gives the root status is void can try installing one of the other versions of the Odin flashing application instead. The version of Odin that Chainfire gives in the rooting file is the Odin 3.10 which is the latest version. However, nowhere does it state that it works for everybody; it is assumed that it works. However, looking around the web there are many cases of people trying to root their device with one version of the Odin flashing application and it did not work, so they used another version, and it did work. Different numbered versions of the Odin flashing application.
Furthermore, it is worth noting that if you own a Samsung device that shares a model number between multiple phone carrier networks that you can SIM unlock the device and then flash one of the other firmware files on your device that was intended for the other phone carrier networks. If you find the CF-Auto-Root tool is not working for your firmware, try one of the others instead. However, remember: the device must be SIM unlocked, and you can only use firmware for the same model number.