Last Updated on October 3, 2019 by Mat Diekhake
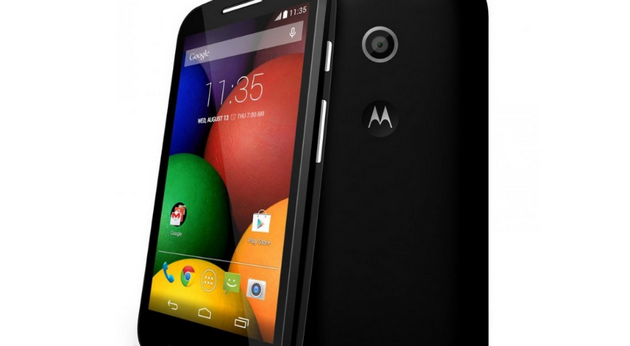
The Motorola Moto E is the most affordable smartphone that Motorola produced in the last few years. It is the little sister to the Moto G and makes up the trio of Moto X, Moto G and Moto E smartphone range by Motorola—a new lineup of phones that has catapulted Motorola to being one of the premier manufacturers of phones in the world once again.
When the “Hello Moto” company created the Motorola Moto G phone, they instantly knew they were onto something special as it quickly became the most bought mobile device in the history of the American manufacturer since they started selling devices. It doesn’t come with the same specifications to compete with its bigger brothers (and certainly not the Moto X smartphone that costs the most out of the three), but it does come with the gratuity of regularly getting looked after very well in the software update department thanks to a previous alliance with Google. You won’t find a more affordable handset that gets the official Android software updates rolling out in its direction for its users to experience the best of what Android has to offer on the device’s display.
If you are into software, you are probably pretty excited to check out other ideas such as installing custom ROMs and custom firmware to update your device to newer unofficial builds as soon as they release. Root access doesn’t directly impact your custom ROMs. It’s actually the custom recovery image that you would need to install new ROMs. But there are root apps out there that can help you see what ROMs are available, as well as help you install them too, so you don’t have to find the files and then install them from the custom recovery images yourself.
Nobody can install one of the root applications like Greenify or ROM Manager without getting in control of the root user account that has the administrative permissions first. In the guide below, I’ll show you how to do that effectively using the right version of the SuperSU program that’s made by Chainfire.
Only apply the following for the original Motorola Moto E variant of the smartphone series. You can’t flash the same files on a different device. Note that Motorola has continued this same line of smartphones and created a second, third and fourth generation of the Moto E under the same name, so make sure you have the right year. Again, this guide is for the original Moto E and not any of the later models.
Details We Should Know
- You must have the Motorola Moto E’s bootloader unlocked before you can install a custom recovery image and flash the SuperSu zip file from the custom recovery menu.
- You can’t expect to get root access with SuperSU without a custom recovery image installed first—it is the only way to load SuperSU and flash it. A favorite choice for the Motorola Moto E is TWRP Recovery. Flash the custom recovery image you want to use using Android SDK and then come back to this guide and continue with the rest. Find out how to flash the TWRP Recovery on the first generation Motorola Moto E smartphone and then come back and use this guide. Keep in mind that many custom ROMs require you to install TWRP, so you should definitely install that custom recovery image over anything else if you plan on getting ROMs installed later on.
- You need to have a desktop computer or laptop with a working USB slot to use this guide. You’ll need to be connecting the Motorola Moto E phone to the PC or portable device for transferring the files.
- Don’t start the steps unless you have sufficient battery power so that your phone doesn’t turn off when you are doing the rooting. Only you can know how much that’ll be because your battery might not last as long as other, but generally, anything over the halfway mark will do. The device doesn’t come with a battery that lasts as long as many other devices, including the Moto G or the Moto X since everything more expensive comes with better specs that include a bigger battery; therefore you want to reserve some extra juice to make sure it doesn’t shut down before the flashing completes.
- Enable the USB Debugging Mode on the Motorola Moto E handset by continuing to Settings > Developer Options > tick the USB Debugging box.
- Install the latest official Motorola USB drivers on your computer. You’ll find the Motorola drivers from the endorsed website by Motorola. All manufacturers offer their USB drivers from their real websites.
- Make sure you backup the smartphone before continuing by using the Helium application from the Google Play Store. If you don’t want to use apps from Google Play such as Helium to get your stuff backed up, you can always use the built-in backup functionality that your Motorola smartphone has. You’ll get access to that from its settings.
How to Back up Using the Built-In Utility
- Tap your finger on the Backup and restore button and then wait for the backup wizard to open.
- Wait for the on-screen instructions to appear.
- Follow the instructions so that the Moto E device continues to backup the data.
- Don’t touch any buttons until it completes.
- Tap the Finish button and close to the backup and restore feature.
How to Root the Motorola Moto E Running on Android 4.4.4 Kitkat Software Update with SuperSU
- Download the SuperSU 1.94 zip file directly on the computer using any web browser such as Google Chrome or Microsoft Edge.
- WHen the file downloads, it’ll end up in the Downloads folder if you are using a Windows operating system. In Windows 10, you can find that by navigating to the Start menu > File Explorer > Downloads from the left pane.
- Boot the Moto E into the Fastboot mode that it has.
- Connect the Motorola Moto E smartphone to the computer using the USB cable.
- Copy the SuperSU zip file (still zipped) to the Moto E phone’s internal storage SD card of the Motorola Moto E smartphone.
– do not unzip the file. - Disconnect the Motorola Moto E handset from the computer now.
- Boot the Motorola Moto E in recovery mode now.
– it’ll then boot to the custom recovery image that you had replaced the stock recovery image with, such as the TWRP you previously installed. - Select the Install zip from SD card open and then the Choose zip from SD card choice from the recovery menu.
- Upload the SuperSU zip file (still zipped) and wait until the flashing stops. The custom recovery image is designed to unpackage it completely by itself and then install it without you needing to do anything.
- Navigate back to the TWRP Recovery’s main menu and reboot the device in normal mode by selecting that option on the screen when it gives it.
The first rebooting process can take longer than usual. It’ll eventually boot to the “normal” mode and all you to start using the smartphone again, just like you would have before you got root access. The difference now is that you can begin installing our root applications.