Last Updated on February 25, 2024 by Mat Diekhake
Most of you who used the Windows operating system before Windows 10 arrived will remember the Windows Photo Viewer application. It was the default photo viewer for people to use. Once Windows 10 came around though that soon changes to the new Photos app.
The new Photos app is now the app that opens by default for you to view your image files with now, and if you were to venture into the settings application or the Control Panel, you wouldn’t find any option to restore the Windows Photo Viewer application either. It’s fairly evident that Microsoft feels as though the newer Photos app is, the better one for people to use, but that doesn’t mean you have to feel the same way too.
There is a way you can get it back on your computer if you want it, and it’ll give you the official version of the application as well.
This is what you need to restore the Windows Photo Viewer on your computer if you’re running on a version of the Windows 10 operating system. It won’t set it as the default application to open image files by default, but you can venture into the Control Panel and set it as your default if you would like it to take the reigns over the Photos app as well if you like. That part is further explained at the bottom of the guide.
How to Restore Windows Photo Viewer in Windows 10
Copy this code and save it to your computer as a .reg file:
Windows Registry Editor Version 5.00
[HKEY_CLASSES_ROOT\Applications\photoviewer.dll]
[HKEY_CLASSES_ROOT\Applications\photoviewer.dll\shell]
[HKEY_CLASSES_ROOT\Applications\photoviewer.dll\shell\open]
“MuiVerb”=”@photoviewer.dll,-3043”
[HKEY_CLASSES_ROOT\Applications\photoviewer.dll\shell\open\command]
@=hex(2):25,00,53,00,79,00,73,00,74,00,65,00,6d,00,52,00,6f,00,6f,00,74,00,25,\
00,5c,00,53,00,79,00,73,00,74,00,65,00,6d,00,33,00,32,00,5c,00,72,00,75,00,\
6e,00,64,00,6c,00,6c,00,33,00,32,00,2e,00,65,00,78,00,65,00,20,00,22,00,25,\
00,50,00,72,00,6f,00,67,00,72,00,61,00,6d,00,46,00,69,00,6c,00,65,00,73,00,\
25,00,5c,00,57,00,69,00,6e,00,64,00,6f,00,77,00,73,00,20,00,50,00,68,00,6f,\
00,74,00,6f,00,20,00,56,00,69,00,65,00,77,00,65,00,72,00,5c,00,50,00,68,00,\
6f,00,74,00,6f,00,56,00,69,00,65,00,77,00,65,00,72,00,2e,00,64,00,6c,00,6c,\
00,22,00,2c,00,20,00,49,00,6d,00,61,00,67,00,65,00,56,00,69,00,65,00,77,00,\
5f,00,46,00,75,00,6c,00,6c,00,73,00,63,00,72,00,65,00,65,00,6e,00,20,00,25,\
00,31,00,00,00
[HKEY_CLASSES_ROOT\Applications\photoviewer.dll\shell\open\DropTarget]
“Clsid”=”{FFE2A43C-56B9-4bf5-9A79-CC6D4285608A}”
[HKEY_CLASSES_ROOT\Applications\photoviewer.dll\shell\print]
[HKEY_CLASSES_ROOT\Applications\photoviewer.dll\shell\print\command]
@=hex(2):25,00,53,00,79,00,73,00,74,00,65,00,6d,00,52,00,6f,00,6f,00,74,00,25,\
00,5c,00,53,00,79,00,73,00,74,00,65,00,6d,00,33,00,32,00,5c,00,72,00,75,00,\
6e,00,64,00,6c,00,6c,00,33,00,32,00,2e,00,65,00,78,00,65,00,20,00,22,00,25,\
00,50,00,72,00,6f,00,67,00,72,00,61,00,6d,00,46,00,69,00,6c,00,65,00,73,00,\
25,00,5c,00,57,00,69,00,6e,00,64,00,6f,00,77,00,73,00,20,00,50,00,68,00,6f,\
00,74,00,6f,00,20,00,56,00,69,00,65,00,77,00,65,00,72,00,5c,00,50,00,68,00,\
6f,00,74,00,6f,00,56,00,69,00,65,00,77,00,65,00,72,00,2e,00,64,00,6c,00,6c,\
00,22,00,2c,00,20,00,49,00,6d,00,61,00,67,00,65,00,56,00,69,00,65,00,77,00,\
5f,00,46,00,75,00,6c,00,6c,00,73,00,63,00,72,00,65,00,65,00,6e,00,20,00,25,\
00,31,00,00,00
[HKEY_CLASSES_ROOT\Applications\photoviewer.dll\shell\print\DropTarget]
“Clsid”=”{60fd46de-f830-4894-a628-6fa81bc0190d}”
It doesn’t matter what you call the file—something along the lines of PhotoViewer.reg so you can identify it will work well.
When saved, open it’s location and then double-click on it, and it’ll then merge with your Registry on Windows 10. (If you get prompted by User Account Control (UAC), click on the Yes button until it allows for the changes to be made to your Windows registry.)
Open up the Control Panel by typing Control Panel into the Cortana search and then clicking on the Control Panel desktop application that appears under the Best match section. Make sure you set it so that Control Panel is showing the more classic view with the smaller icons from the drop-down in the top right corner and then click through to Default Programs > Set Default Programs.
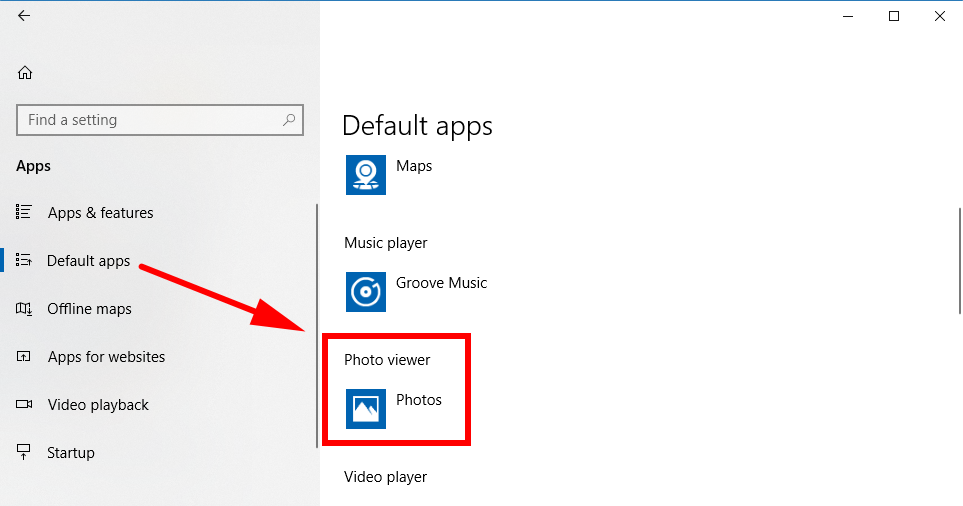
You’ll now be able to scroll down and find the Windows Photo Viewer nestled in amongst the programs which you are then able to click on and set it as your default program. You can find it by navigating to the Start menu > Settings > Apps > Default Apps > Photo Viewer and then you’ll see the Windows Photo Viewer as an application you can now choose to set as your default.
Microsoft is no stranger to making changes to the Windows operating system over time, and they make considerably more changes than do Apple for a Mac operating system. Many of the changes are positives ones though—as time goes on what people want changes and therefore so does the Windows operating system. But there are always some changes that people don’t like. If the Windows Photo Viewer is still your Photo application of choice, then you can still use it by getting it back using the guide above for all versions of Windows 10; Microsoft just has it hidden to begin with.
Related Tutorials