Last Updated on December 24, 2022 by Mathew Diekhake
The Windows Subsystem for Linux (WSL) allows you to run Linux command-line tools on the Windows 10 operating system. While WSL wasn’t available in the early versions of Windows 10, anyone can use it because it requires an app to be installed from the Microsoft Store rather than a specific version of Windows. All you need is a compatible version of Windows that has the option to enable it.
Linux has been available as a virtual machine for years already, but virtual machines have never been great tools to use because they take up so much of the computer’s resources when they run. For instance, it’s not uncommon for people to run a virtual machine and find out that it’s using up most of the computer’s RAM or even CPU when they open Task Manager. The WSL requires much fewer resources and thus is friendlier to run.
WSL is intended to be mostly a tool for developers. In particular, web developers and those who work with open source projects. WSL allows developers to use bash, common Linux tools, and Linux first tools (such as Python) on Windows.
The following tutorial demonstrates how to install the Windows Subsystem for Linux (WSL) distributions when you’re using a version of the Windows 10 operating system.
How to Install Windows Subsystem for Linux (WSL) Distros in Windows 10
Note: You will need to have Windows Subsystem for Linux (WSL) enabled before you can follow this guide to install and run it.
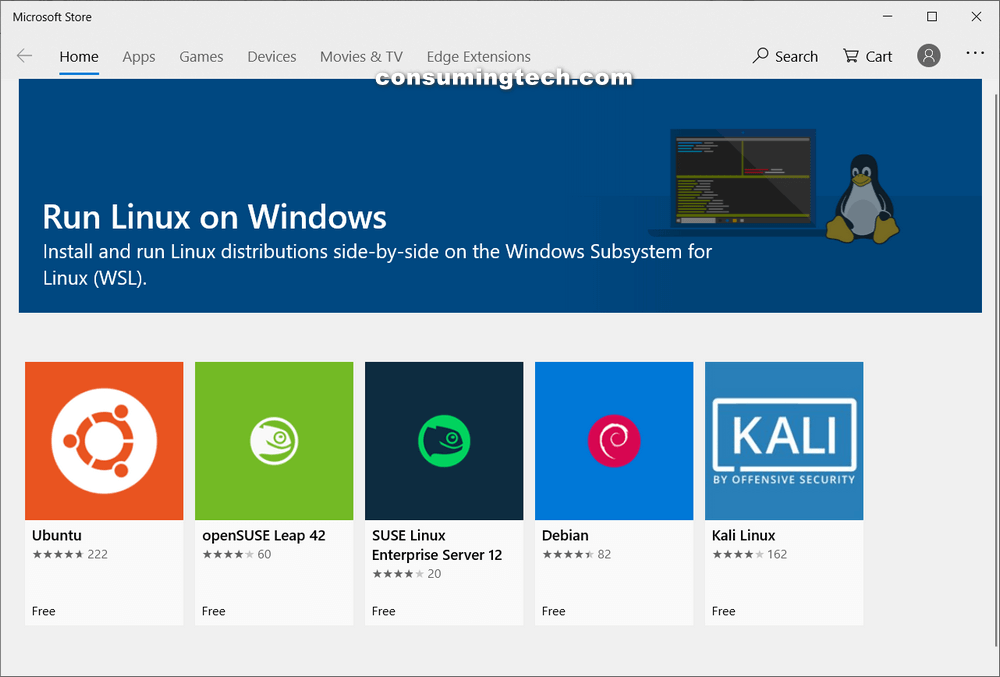
1. Download the Run Linux on Windows app from the Microsoft Store.
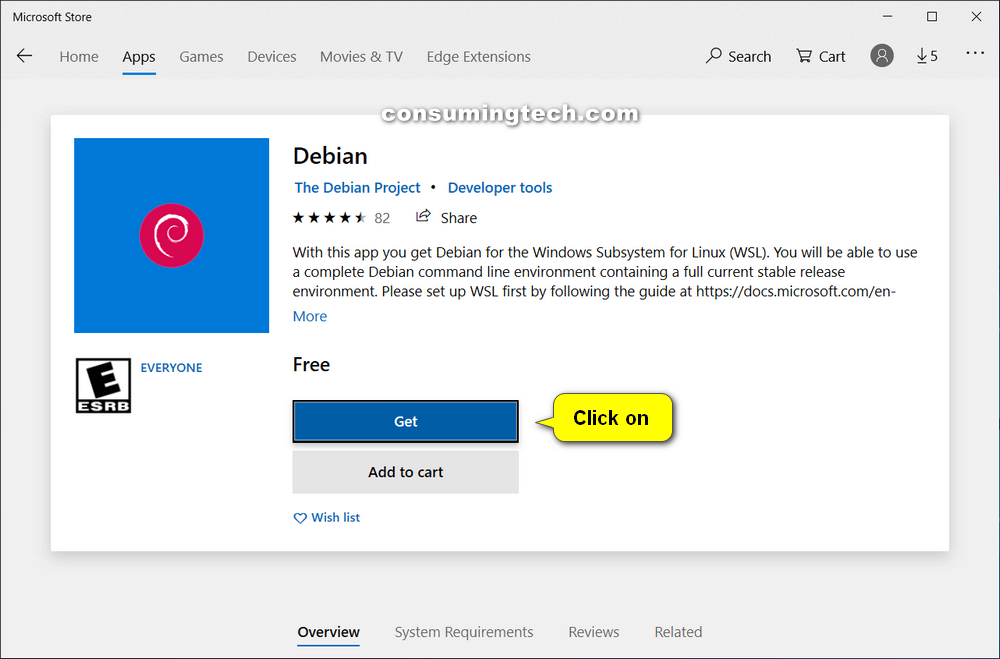
2. Click on the Linux distro that you want to use, and then click on the Get button.
When you open Run Linux on Windows app, you’ll see many distributions that you can download from the same link. Click on the one that you want. Each of them will be appropriately named, as well as pictured—i.e., the Ubuntu distro will be labeled as such as will also show the unique Ubuntu logo.
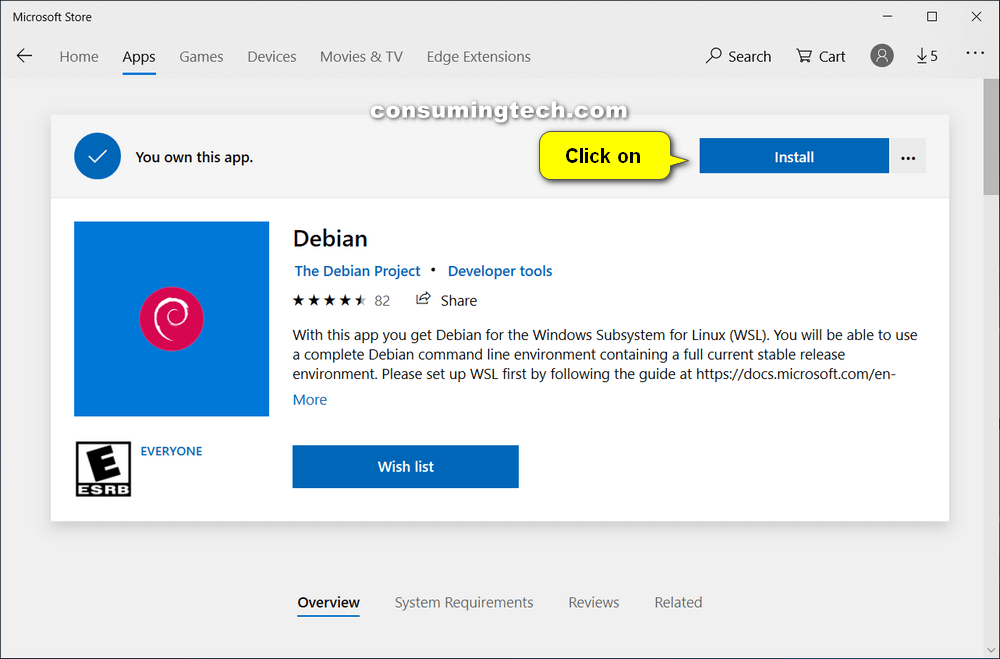
3. The Linux app may install on your computer automatically after clicking the Get button. If it doesn’t then click on the Install button.
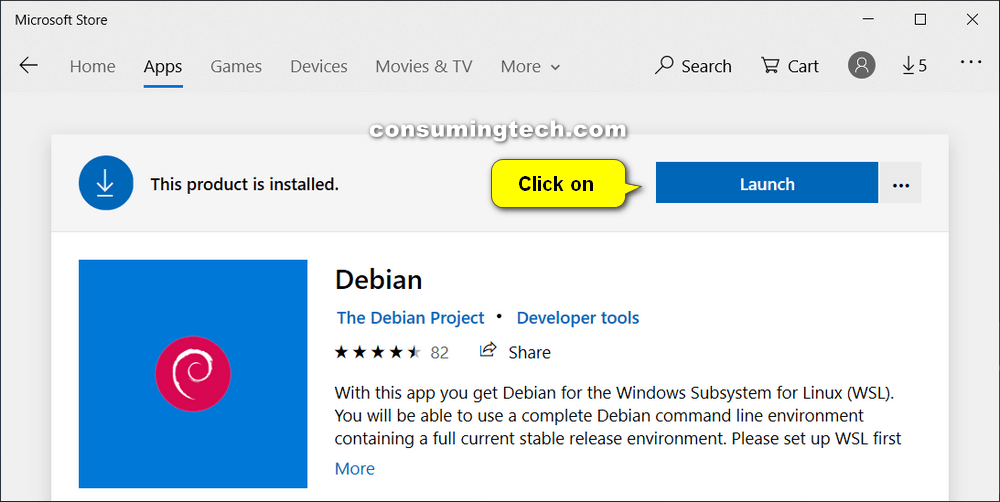
4. Once the installation is complete, click on the Launch button.
Note: You may also get a notification from the Action Center once the download is complete and you click launch the app from there.
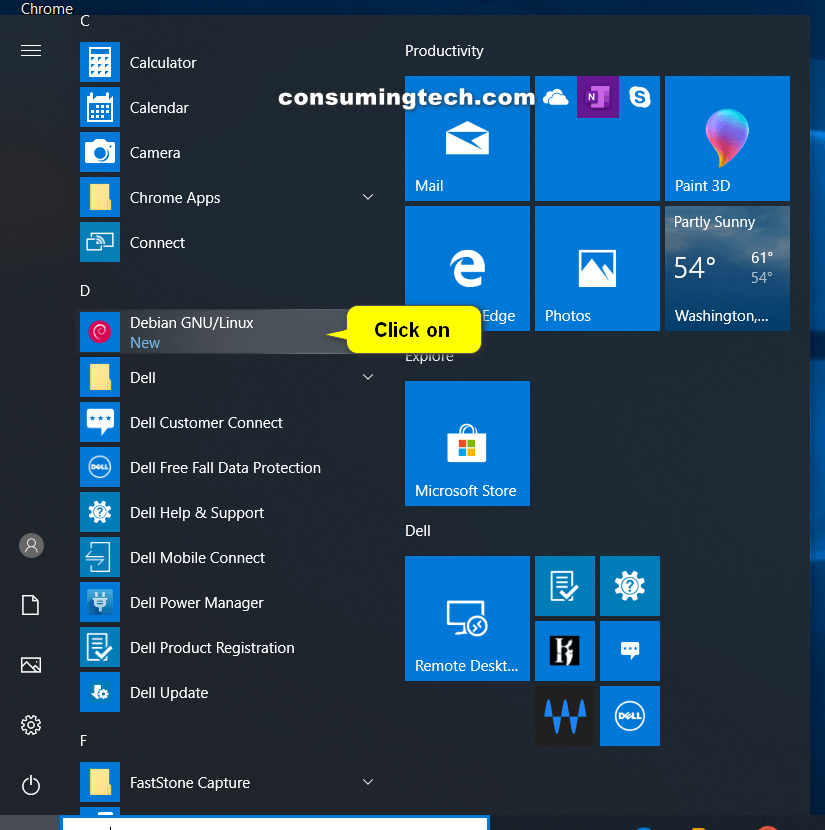
Note: You can also find the Linux app you installed from the Start menu as well. You can always find it in the Start menu if you miss the notification or close the Microsoft Store page before opening it.
When you launch the app for the first time, you’ll see the command line open and a message that says it will take a few minutes to complete the setup process. If you see a message from the command line that says an error code, it likely is because you haven’t enabled the Windows Subsystem for Linux (WSL) yet.
That’s all.
Related Tutorials

