These are the step-by-step instructions for installing the Android CDC driver on a computer that runs on a version of the Windows operating system. The screenshots are using Windows 10, more specifically, but the same process should be working on other versions, too.
The Android CDC driver can help by equipping you with the necessary computer drivers for your smartphones that run on versions of the Android operating system, such as if you were to be connecting your mobile device to a Windows PC in the hopes of using the Smartphone Flash Tool (SP Flash Tool).
How to Install Android CDC Driver on Windows PCs Manually
1. Download and extract the Android CDC driver package onto your computer. (Use the desktop for easy access.)
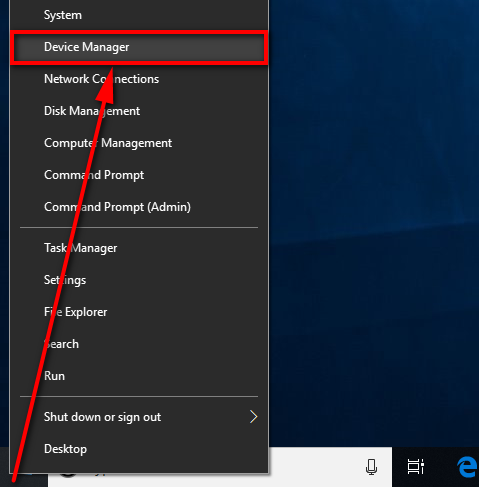
2. Open the Device Manager. For Windows 10, right-click on the Start button and then select Device Manager from the quick links menu.
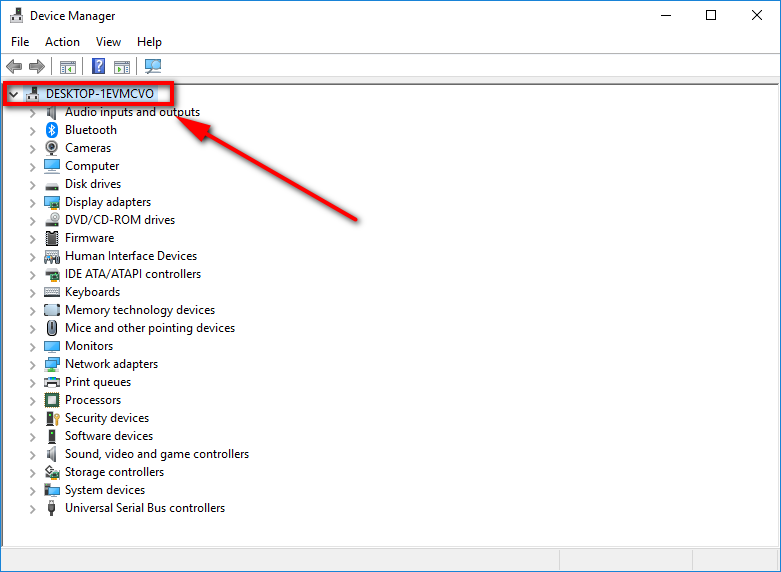
3. Click on the device that you want to install the drivers for from the list in the Device Manager. (For general Android CDC installations, just highlight the first option from the device tree, which is the name of your desktop computer or laptop.)
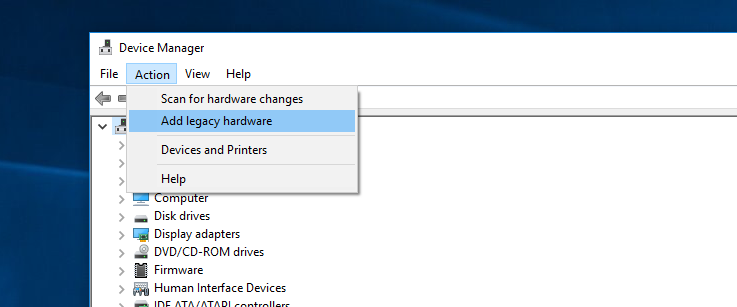
4. When highlighted, click on the Action from the Device Manager menu bar, followed by Add Legacy hardware from its menu.
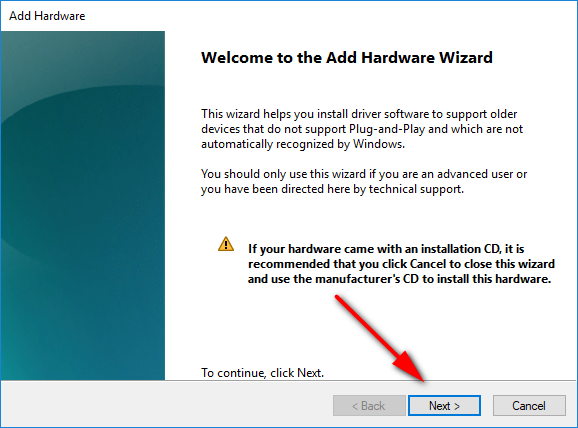
5. Click on the Next button from the beginning of the New hardware wizard.
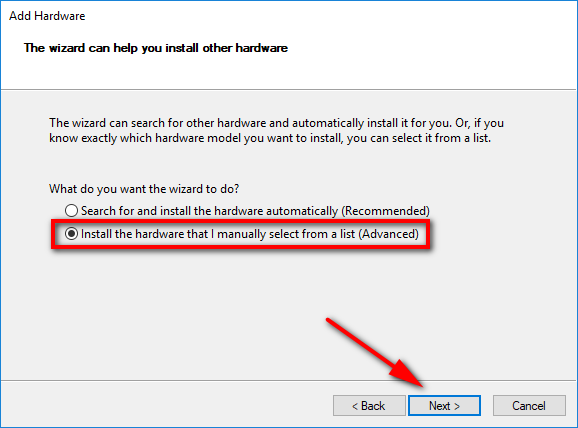
6. Select the checkbox for installing the hardware manually and then click on the Next button.
7. Double-click, the mouse on Show all devices and then click on the Have Disk button. From the Install From Disk dialog, Click on Browse and then browse through to the location where you unzipped the driver package, i.e., on the desktop. Once loaded, click on the OK button.
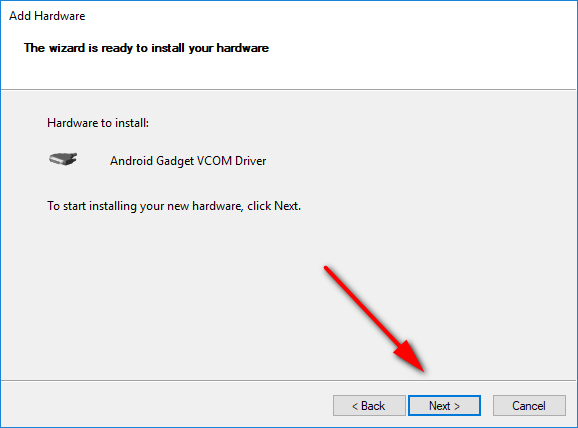
8. Click on the Next button when it shows you the hardware to be installed.
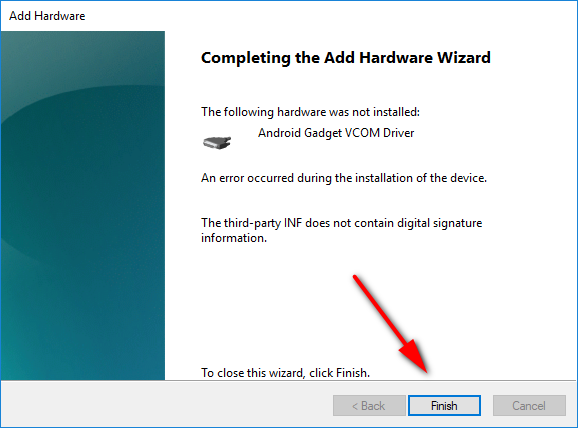
9. Click on the Finish button once the Android Gadget VCOM driver has been installed.
The Android CDC drivers are now installed on the Windows computer.
That’s all.
Related Tutorials
January 24, 2019 @ 05:20
When I try to install the Android drivers my computer says that it cannot install unsigned drivers. Is there any workaround for this?
January 24, 2019 @ 05:27
It shouldn’t be saying this. I’m not sure why exactly some people have this problem and others don’t. I have never had the issue myself and the drivers always install fine for me. But I’ll take your word for the unfortunate situation that you’re in. You might want to check that you’re running on up to date version of Windows 10 before anything else because it’s simple to do and doesn’t require much effort. You can do that by heading to the Start menu > Settings > Update and Security > Windows Update > Check for updates.
If you’re still facing the same problem, there are ways you can get around it. Here they are in point form.
Method One: Enable Test Signing Mode
(This works for all Windows 8 and Windows 10 versions of the operating system.)
Note: If you enable the Test mode, then Windows will continue to run with the driver signature enforcement will be disabled until you leave the Test mode. This means you should disable it once you’re finished with the firmware flashing or whatever you’re wanting the drivers installed on your computer for. If you don’t do that, then you’re making your computer less secure because the whole point of not installing unsigned drivers is to prevent malware from getting on your machine.
1. Open the elevated Command Prompt and then type the following command into the command line and press the “Enter” key on your keyboard:
bcdedit /set testsigning on
2. If Secure Boot is enabled, you’ll see a message that says “protected by Secure Boot policy.”
3. If that’s the case then you’ll need to disable Secure Boot. Once you do that, you’ll be able to install the unsigned drivers.
4. You know when the computer is in Test mode because it will tell you that as a watermark in the bottom corner of the computer’s display.
Option Two: Use an Advanced Boot Options
You can make a temporary change to the Advanced Boot Options menu. This means the next time your reboot the computer, the configuration will go back to normal. The Advanced Boot Options menu is only accessible before you boot into Windows so you can’t use a web browser on the same computer while you use it. So you might want to write this down or pull the instructions up from another device.
1. Hold Shift will clicking on the “Restart” button from the Start menu and the computer will reboot to the Advanced Boot Options menu.
2. From the Choose an Option screen, click on “Troubleshoot.”
3. From Troubleshoot, click on “Advanced Options.”
4. From Advanced Options, click on the “Startup Settings” link.
5. From Startup Settings, click on “Restart.”
6. Press on the “7” or “F7” key when it asks you to choose a number.
7. The computer will now reboot with the driver signature enforcement disabled so that you can install unsigned drivers.
October 6, 2018 @ 18:17
I can’t seem to get the USB drivers installed on my computer which is running on Windows 10. Can someone help me?
October 6, 2018 @ 18:25
Hello Ge Ri,
Unfortunately, there is no simple fix for drivers not being installed as they should be on your computer, but there are some things you can try first to see if it helps.
If you know you’re installing the driver correctly and it is disappearing, it might be due to a setting that your manufacturer has. For example, many people suffer from Bluetooth disappearing on Dell laptops these days, and there is a setting on Dell laptops that have it set to go to sleep after 15 minutes to preserve power. Once you change the setting, the Bluetooth doesn’t disappear anymore.
Try getting in touch with your computer manufacturer first and see if they can help you. If you’re still stuck, there are some things you can try on your own.
Troubleshooters:
Windows 10 now comes with troubleshooters that can help you diagnose and fix problems. Head to the Control Panel > Troubleshooting > View All > Hardware and Devices > Advanced > Run as Administrator > Next and then run through the troubleshooter and see what it says.
DISM tool:
The DISM tool can help you fix corruption errors. You can run DISM by heading to Cortana Search > CMD > Opening the Command Prompt > and then running the following two commands: “Dism /Online /Cleanup-Image /ScanHealth” and “Type Dism /Online /Cleanup-Image /RestoreHealth.”
These two commands can take some time to complete, so make sure you wait until they’re done.
Update drivers:
You may also need to update the driver software. The drivers that you install directly from the manufacturer’s websites should always be up to date, which is why we link to them in our Android USB drivers article. But there’s also a chance that your drivers need updating.
To update your drivers, navigate to the Device Manager and then find your device from the list. Once located, right-click on the device and then choose the option to “Update Driver Software.”
Reinstall the driver:
If all else fails, you should uninstall the current USB driver and try reinstalling it. You can try reinstalling it from the same source or try using a new source to see if that helps. For example, if you installed the driver package from the manufacturer’s website, then try installing the Universal ADB driver instead and see how you go.
October 6, 2018 @ 18:05
USB drivers are getting a bit confusing these days.
If I want to flash firmware files to my smartphone that is connected to the computer, do I want to have the Android “CDC” driver installed or the drivers from my manufacturer’s website?
October 6, 2018 @ 18:11
Hello JohnM,
You can install either of the two, and it should be fine. The Android CDC driver is what we often point to in our guides because it’s a simple solution for everybody, but you could use the USB drivers for the manufacturer as well.
The Android CDC driver can be used for all Android devices that require CDC drivers to communicate with the computer’s hardware.
There is always the universal ADB driver that you can install as well, and it should work for most devices as well. The ADB driver doesn’t necessarily work for some of the smaller manufacturers out there though, so it’s best to use the drivers from the manufacturer if it’s not a well-known manufacturer.