Last Updated on October 6, 2022 by Mat Diekhake
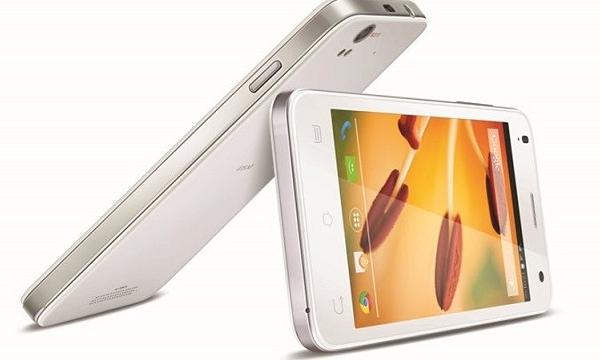
The Lava Iris X1 is a smartphone made to make some noise in India. It delivers excellent value for money in an economy that’s not always the easiest to provide for. Not many people know the name ‘Lava’ out west and in other parts of the world, but they have made a lot of phones, including the 506Q, 354E, 404E, 503, 458, 455, 405, Pro 30, 504 Q and the 502 model.
Nonetheless, today I’m going to show you how to root Android 4.4 KitKat. After coming out as a mid-range handset with all the bells and whistles during this year that will cover most people today. However, there are several things to touch base on before we get cracking so keep reading the prerequisites if you are not familiar with gaining root access and unchaining a device.
Details of Note
- As usual, when we apply the unchaining process over the top of the stock software the warranty is void. That means that if you had any remaining coverage for a faulty device, it won’t work anymore and the manufacturer won’t look at the phone. The one way to get around this is to reapply the stock firmware update over the top again and thus resetting the flash counter.
- We mentioned all the various model numbers under the name ‘Iris’ but it is important that you only proceed if you have the X1 variant and no other. Failing to comply here will land you in hot water. To check yours, navigate to Settings > About device and take a look.
- Battery life is not as important as it is on other occasions because the method we have is much quicker than a lot of the others. If you are on ‘your game’ you can get out of here in less than a minute or two. Nevertheless, we still recommend having some saved up so that the smartphone doesn’t cut out before getting to the end. if it does turn off before the steps finish it can soft-brick the handset or at the very least need a full factory reset.
- If you need a factory reset often the data is wiped and nothing is left on the operating system. Therefore, it’s in your best interest to back up everything from SMS texts to photo galleries and videos so that you do not lose the sensitive data you want to keep. The most important area for many people is the phone’s contacts because they run with these every day. Contacts are backed up to the internal storage, microSD or Trans-Flash, synced with a Google account, or using an app available from Google Play such as Helium. In fact, Helium is arguably the safest way to back up all market applications.
- The guide requires a computer for storing files. The operating system requires Windows. Any operating system from Windows XP through to Windows 8 works. Windows-based Notebooks and laptops will suffice as long as they have a USB slot in the side because we are connecting the handset to it and performing the root on the monitor.
- The steps are for anybody; you do not need to be an advanced user this time. However, any time you can surround yourself with experience in the field is the best way to go about it instead of alone. It will help avoid any nasty situations where you get stuck or harm the device.
- Go directly to Settings > Applications > Development > USB debugging and turn on the mode. The alternative way is by visiting the Developer Options menu.
- Make sure you have the up to date USB drivers.
- After completion, you can think about performing other operations with your mobile such as installing a Custom ROM, installing third-party applications or beta software releases. The possibilities are almost endless and customizing the OS is never more fun.
How To Root The Lava Iris X1 Using The One-Click Vroot Solution
1. Start with the phone turned off and start-up the computer instead.
2. Download the vRoot root package here to the desktop.
– the C: Drive is also serviceable if you are looking for a more long-term solution.
3. Run the file so it starts up on the computer.
4. Fetch the USB cable.
– it is often found as the wire connecting the phone charger.
5. Plug one end into the slot of the computer and the other end into the slot on the mobile.
6. Follow the instructions and the program will do the rest.
7. Wait for it to finish without touching any buttons.
8. Visit the ‘safely remove hardware’ icon and stop the USB Mass Storage device is using Windows PC.
Finish by downloading the root checker application from the Google Play Store. The root checker app will tell you if it worked of if you need to try again.