Last Updated on September 21, 2024 by Mathew Diekhake
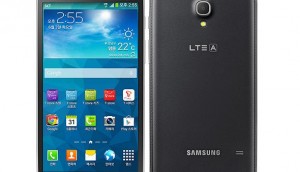
 The Samsung Galaxy W is one of the middle of the range smartphones released by the Electronics giant. Its rounded bottom design and slightly smaller screen make it light and compact and very easy to use single-handed.
The rooting process is an unlocking option that we can indulge in if we wish, so long as third-party developers have created a way in which we can get the root access. Our devices are once like they are after gaining root access, and then our OEMs lock them up so we cannot take advantage of the internal hardware. So, what we are really doing is taking the device back the way they were before they were altered to give users less freedom.
You must have a custom recovery installed on the Samsung Galaxy W before you can follow this guide. The reason is you need to get access to that recovery to flash the rooting package we have during the guide.
You should first enable the USB Debugging Mode so you can connect the device to the computer.
Prerequisites
- You need to install ClockworkMod Recovery on the Samsung Galaxy W I8150. You will then flash the SuperSU file via CWM Recovery.
- Install the Samsung USB drivers from the Samsung website.
- SuperSU
Rooting the Samsung Galaxy W
1. First off you need to download the Rooting package from above.
2. Once downloaded you will need to place the file on your desktop, but do not extract the files from it.
3. Now, connect your device to your PC via USB.
4. You will need to transfer the downloaded Rooting Package from your desktop to your devices internal SD card storage. Once you have transferred the file you can disconnect your device from your PC.
5. Switch off your device, then boot it into recovery mode. This can be done by holding down the Volume Up, Home and Power buttons all at the same time. Continue to hold them.
6. One the device turns on, release the Power button only.
7. A box image should appear on your device’s screen, when this happens, it is safe to release the Volume Up and Home buttons.
8. To enter Recovery mode, you will need to press the Menu key.
9. Using the Volume buttons to scroll up and down, select the following:
Apply sdcard:update.zip
Confirm by pressing the Home button.
10. Locate and select the update.zip that you placed on your devices internal SD card storage. This will begin the flashing process.
11. When flashing is complete, select the following from the recovery menu:
Reboot system now.
Now that your device is rooted, you can instantly download the root checker application. Doing so does confirm the steps during the guide above worked or didn’t work for you. You should probably think about installing the root checker application on your device. Doing so is the easiest way to check that the root access did work for you. Once you are done, you are free to think about installing a custom recovery image if you would prefer installing custom ROMs in the future. You won’t be able to flash any zip files for installing a custom ROM unless you have a custom recovery. The stock recoveries don’t usually allow for any uploading.
