Last Updated on December 26, 2022 by Mat Diekhake
Desktop shortcuts are available for just about anything worthwhile — from folders, programs, apps, files and even websites. In simple terms, a desktop shortcut is giving you quicker access to a link that you would have otherwise had to navigate to a longer way round with the operating system.
Desktop shortcuts have been around since the very beginning of Windows and are still around today with Windows 10. Since Windows 7, creating the shortcut for the desktop was different: you could right-click on the icon from the Start menu and then choose to make a shortcut for that link by clicking on the “Send” option from the menu.
However, since Windows 10, the same “Send” option is not there from the Start menu, and thus it’s causing some confusion.
The guide below demonstrates how you can create desktop shortcuts for programs in Windows 10 so you can understand what is required in the newer versions of Windows operating systems until it is changed again.
How to Create Desktop Shortcuts to Programs in Windows 10
There are two ways you can quickly create desktop shortcuts to programs and applications in Windows 10. The first way is the easiest, and the second should be used if you can’t get the first option to work. So, here is open one:
Close your browser and just have the desktop open. Click on the Windows icon that is available on your keyboard to bring up the Start menu.
Click and drag one the programs that you want to create a shortcut for on the computer. My example is using the Kindle reader app for Windows.
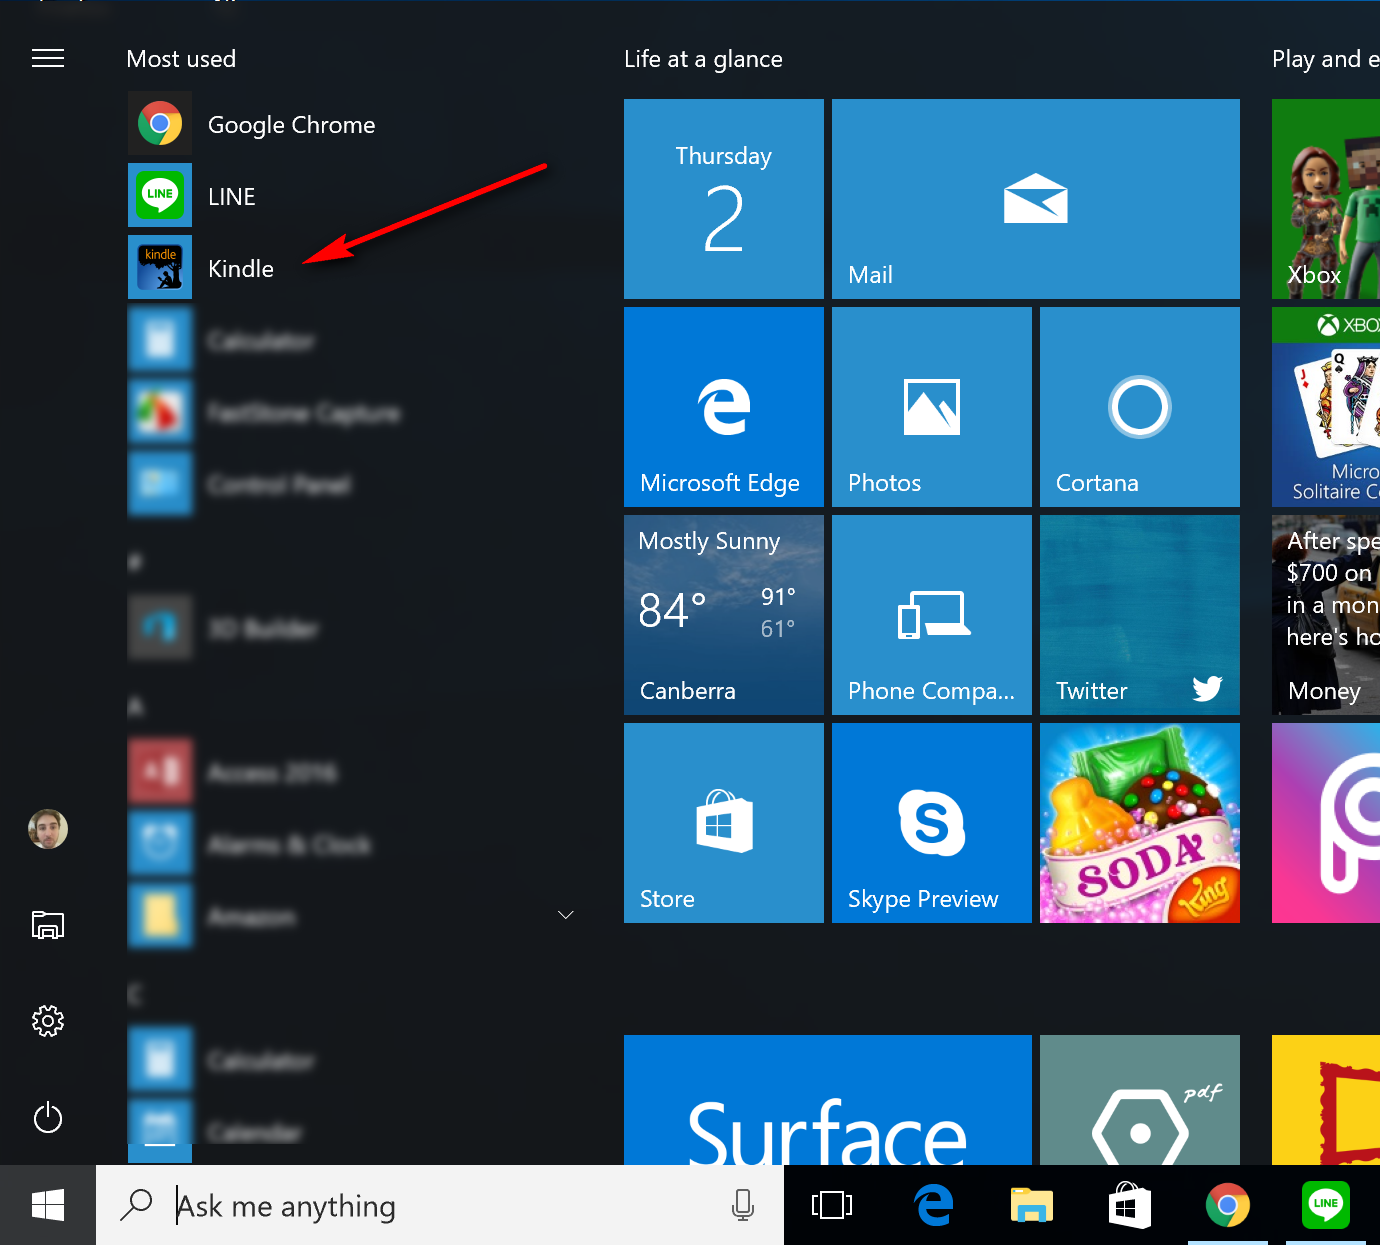
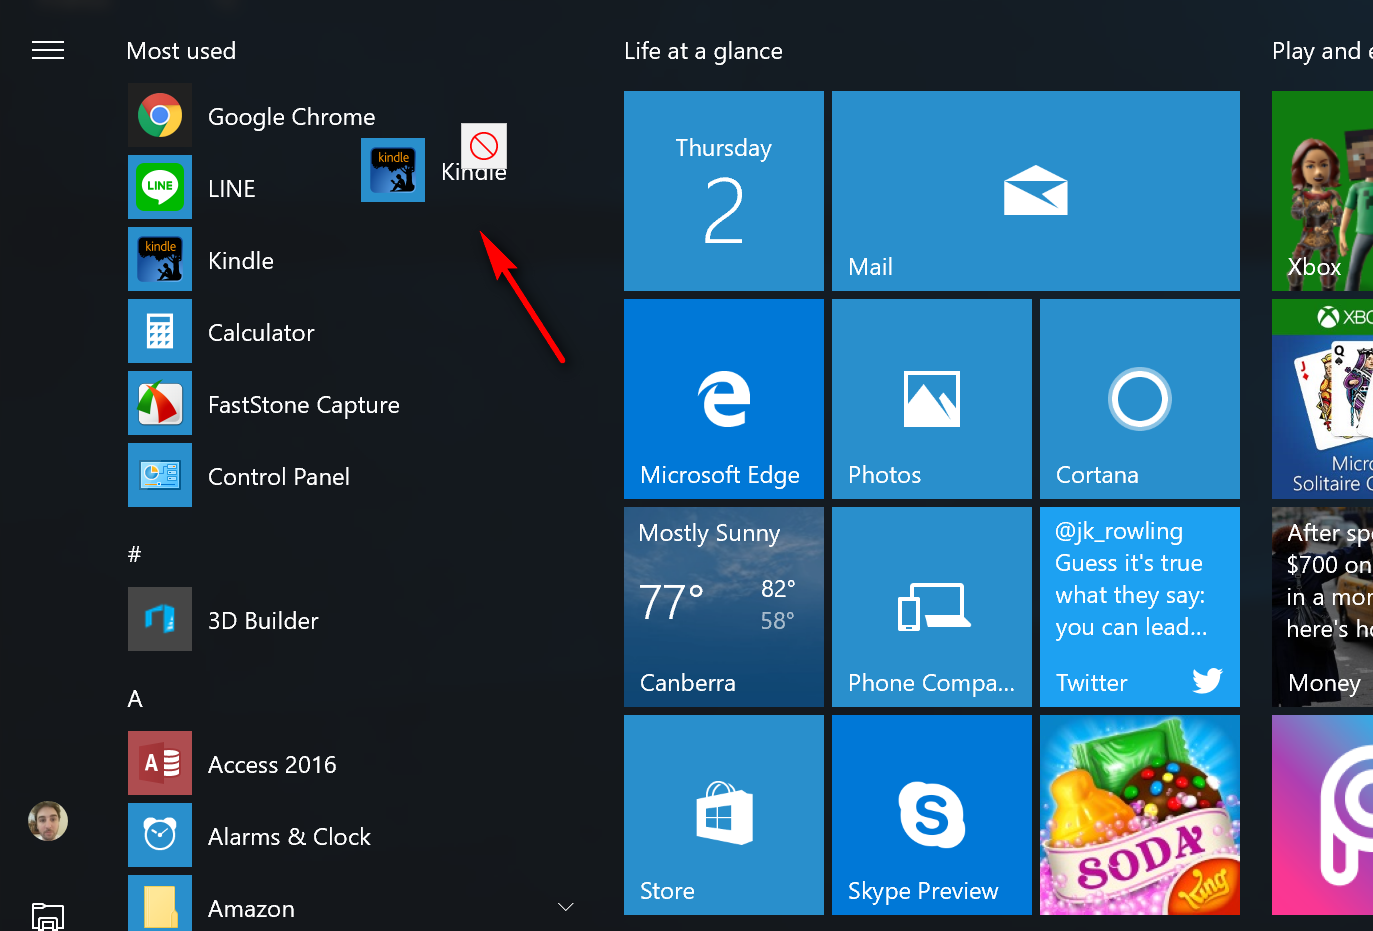
You know the program is dragging correctly if you can see it. It shows a symbol as if to say that your move is not allowed, but that is in reference to it hovering over another location in the Start menu. Continue dragging the program to the desktop. You should be able to see the desktop if you followed our directions in the beginning because naturally there is a gap between the Start menu and the desktop as long as you didn’t have a browser open when you started.
You can see below that the Kindle reader application is now on my desktop — the app you choose to have on the desktop should also be.

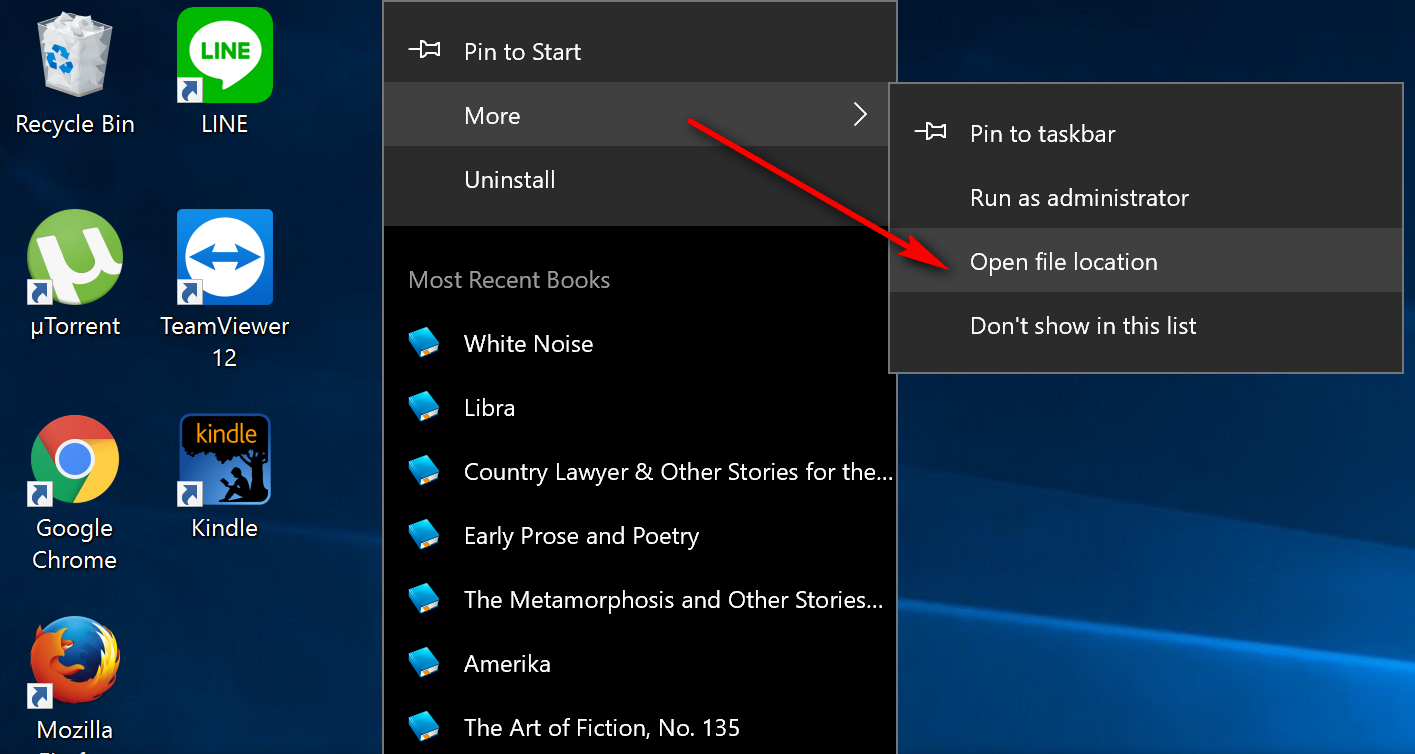
As mentioned, the second way should be carried out if the first way does not work for you for whatever reasons. To get started on the second method, click on the “Start” menu from the taskbar.

Right-click on the program that you want to create a desktop shortcut for in Windows 10 and then click on “More” from the menu.
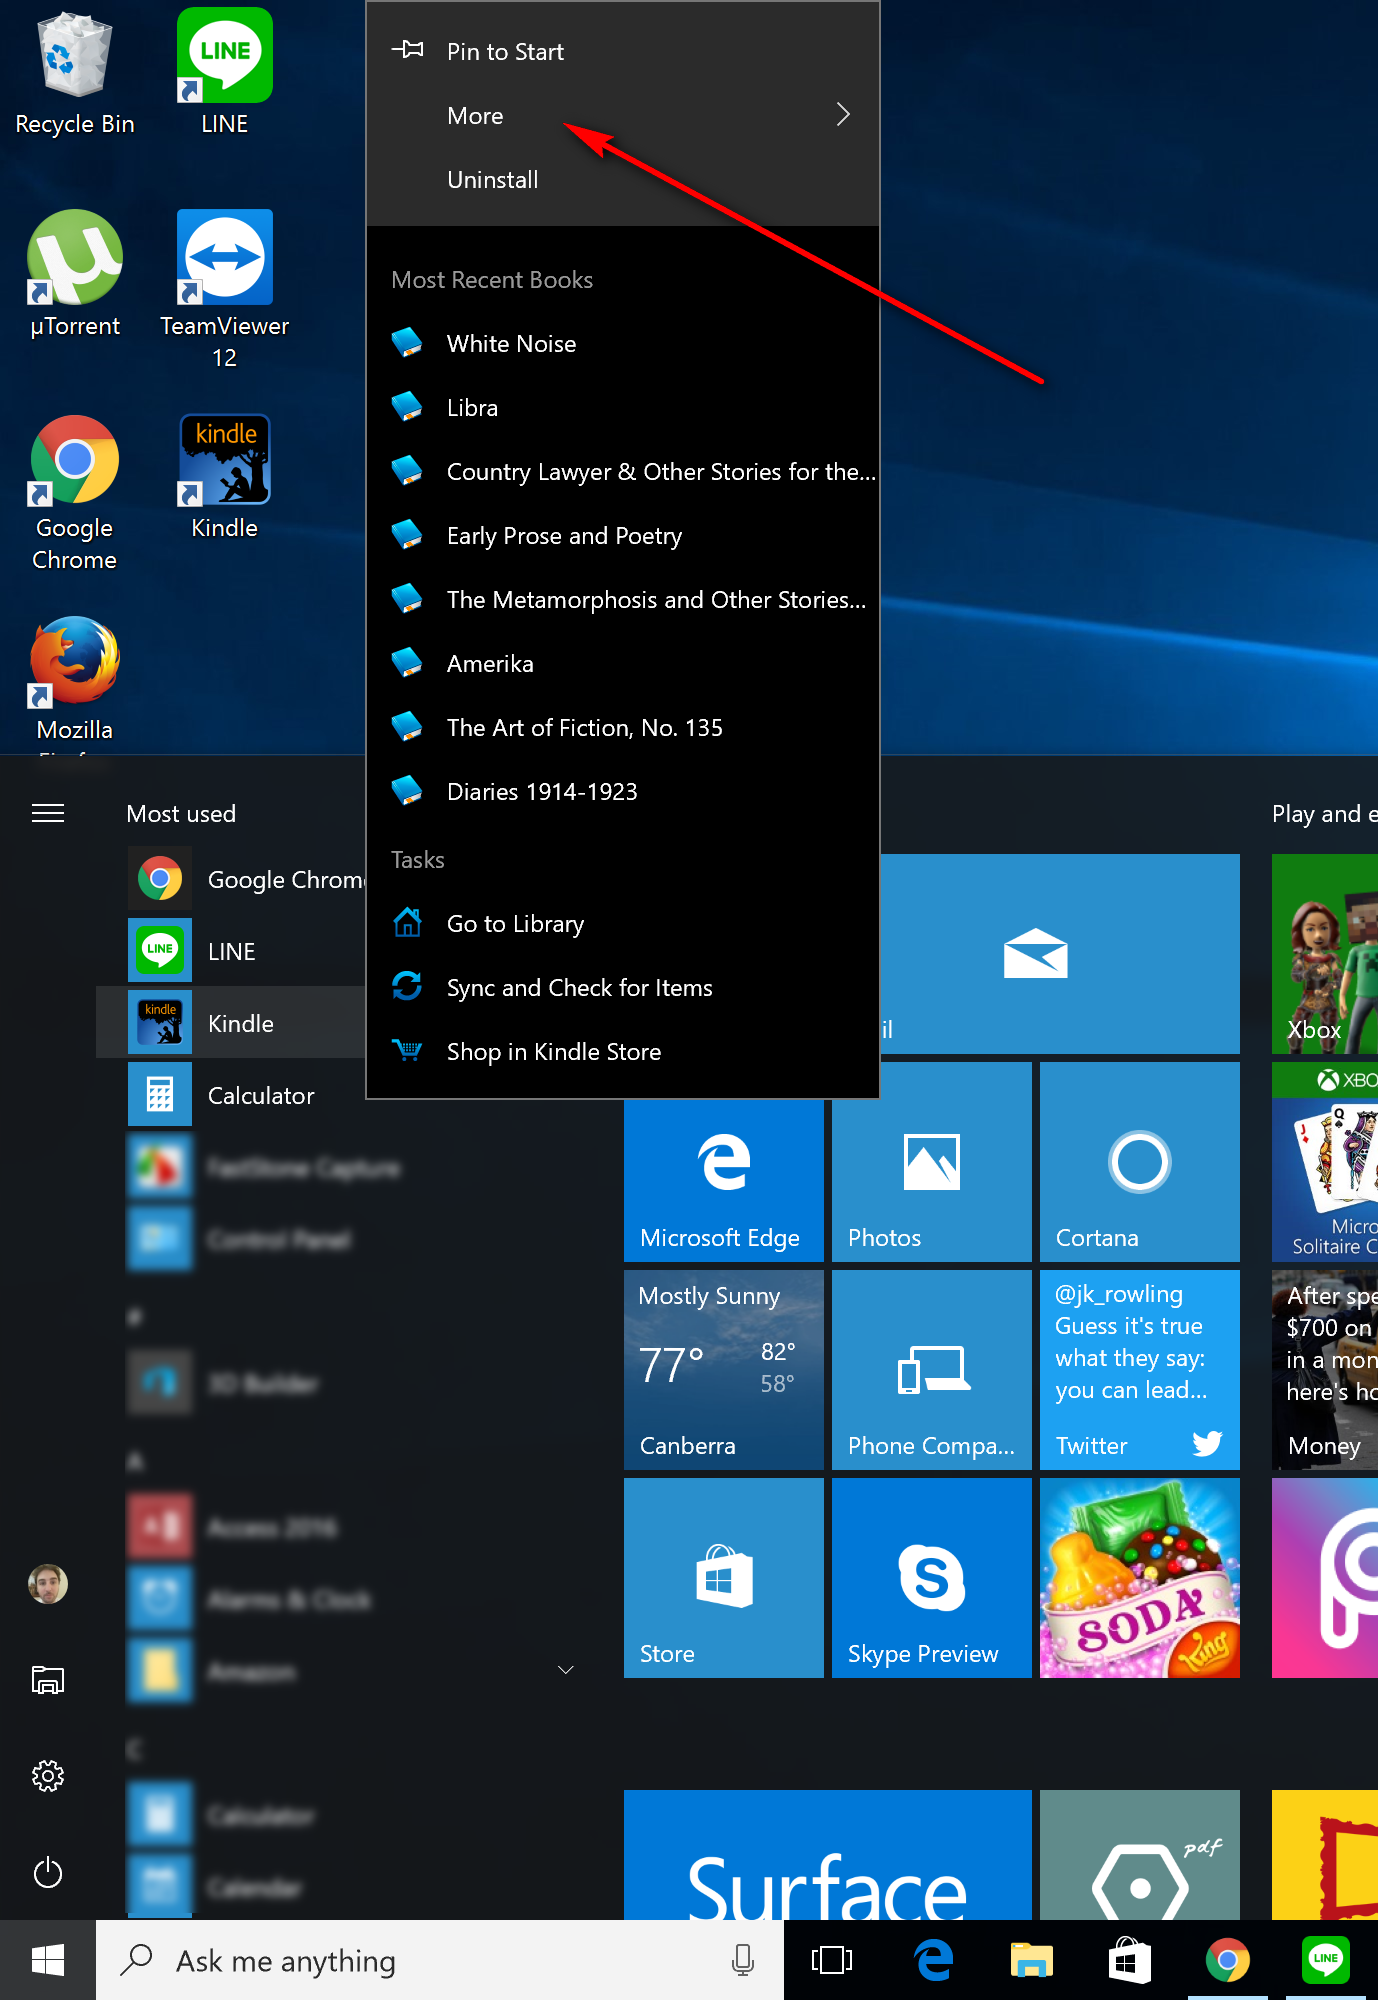
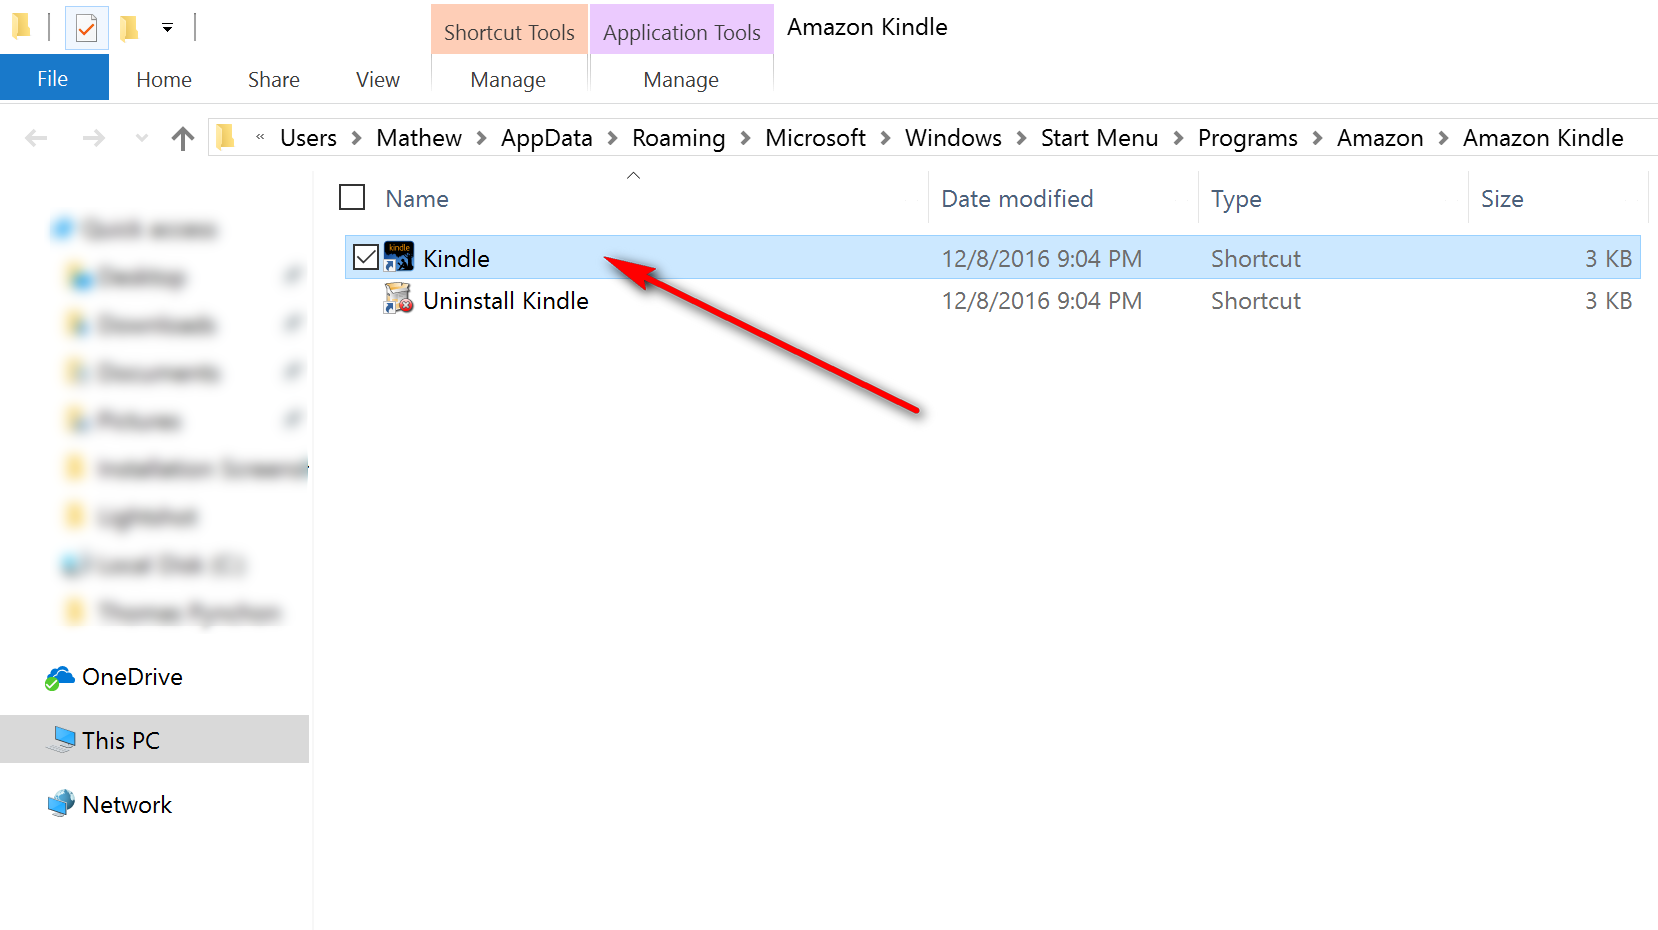
Click on the “Open file location” after clicking on the “More” option from the menu, and then the program opens up in its folder.
Right-click on the program to bring up another menu.
Hover the mouse or touchpad over the “Send to” option and then select the “Desktop (create shortcut)” option from the menu.
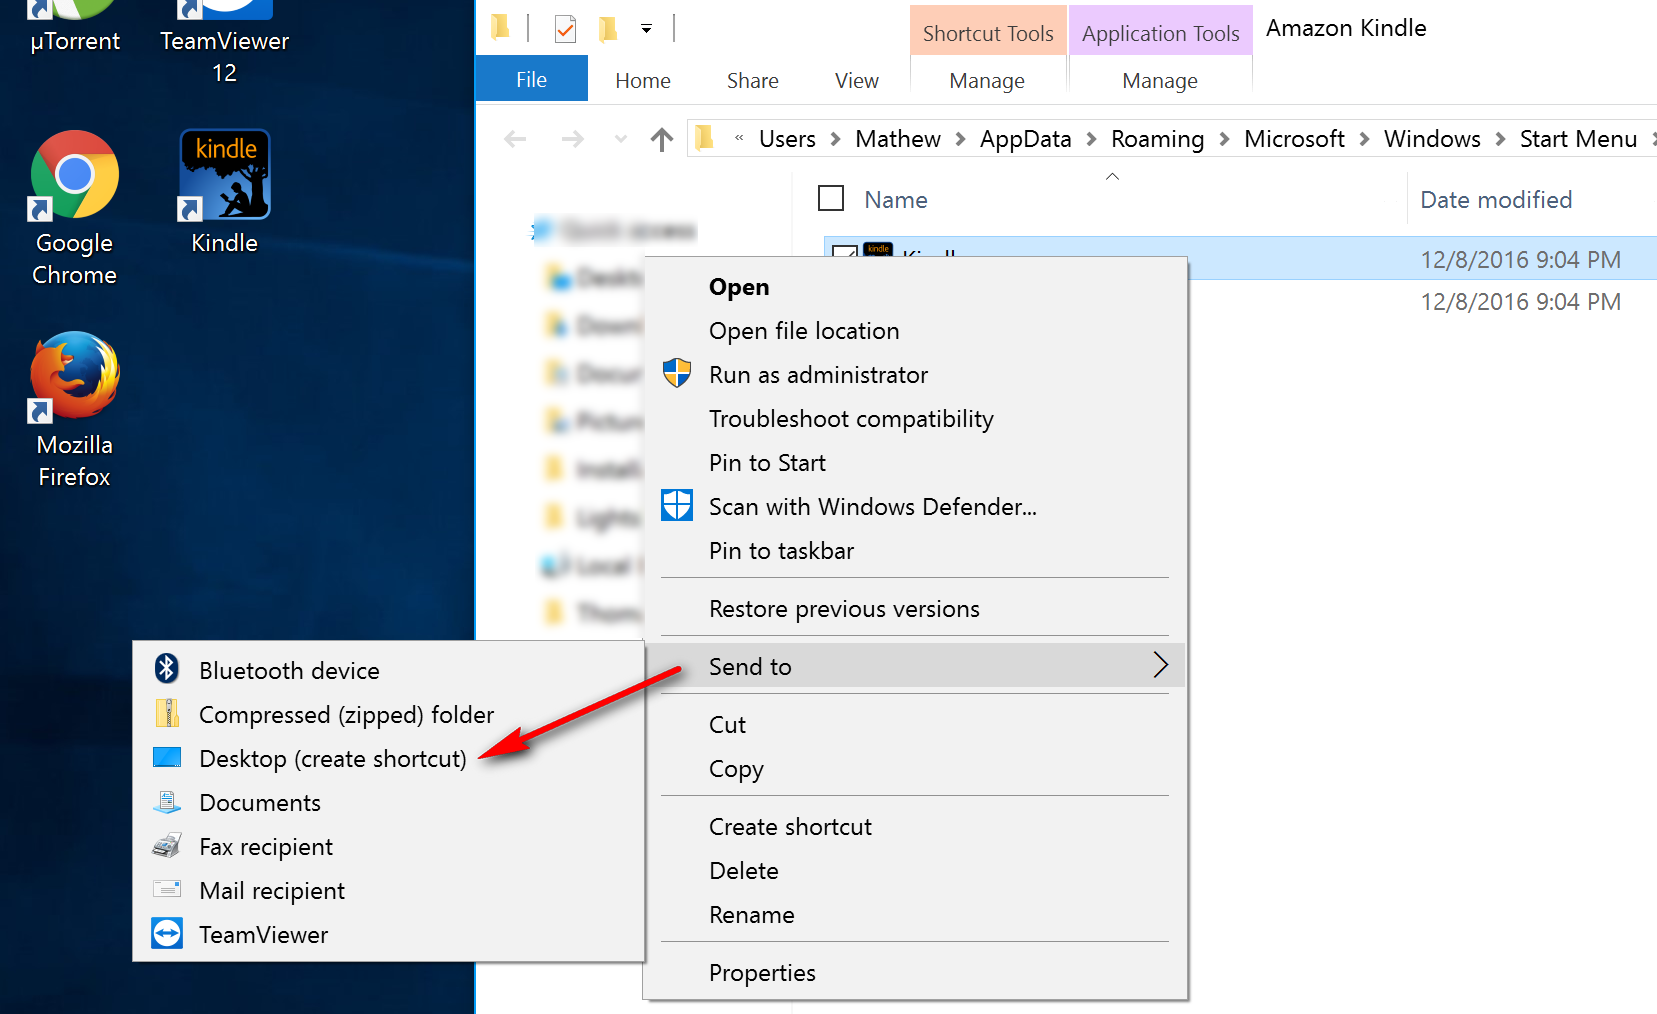
The program is now on the desktop also thanks to creating another desktop shortcut from the file location in Windows 10.
Both of those methods should always be available to you. It doesn’t matter which one you choose. The only difference is that theoretically, option number two should take you longer and that’s why we recommend using the first option unless you need to use the second choice.