Last Updated on December 26, 2022 by Mat Diekhake
SSH clients allow users to connect to computers that are running on an SSH server. While most people seem to be familiar with SSH from Linux distributions, it has always been possible to connect to an SSH server from the Windows operating system as well as its main competitors in Mac and Linux.
You’ll often find people using the Secure Shell protocol for SSH tunneling, SCP file transfers, and getting access to remote terminal connections.
It’s been possible to get SSH running using the Windows 10 operating system for years, but Windows has not offered a built-in SSH command up until now, which might explain why it hasn’t been as well known for Windows as it has for other operating systems.
Now though things have changed and Windows does offer you the chance to install SSH directly on the Windows 10 operating system and without you needing to download anything from other sources. If you are running on an up to date version of Windows 10 at the time of writing this guide, you will be able to do it directly from the Settings application.
The following tutorial demonstrates how to enable the built-in OpenSSH Client when you’re using a version of the Windows 10 operating system.
How to Enable the Built-In Windows 10 OpenSSH Client
You can enable the built-in OpenSSH client that Windows 10 has from the Settings application. Here is how you can do that:
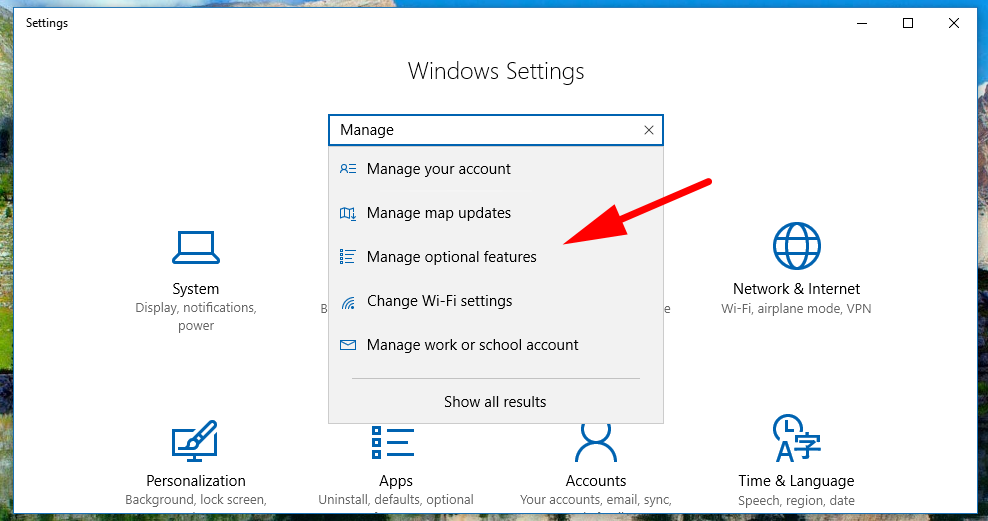
1. To get started, head to the Start menu > Settings gear icon in the Start menu’s left pane and then start typing Manage optional features into the search box that is available under the Windows Settings heading. Click on the Manage optional features result when you can see it.
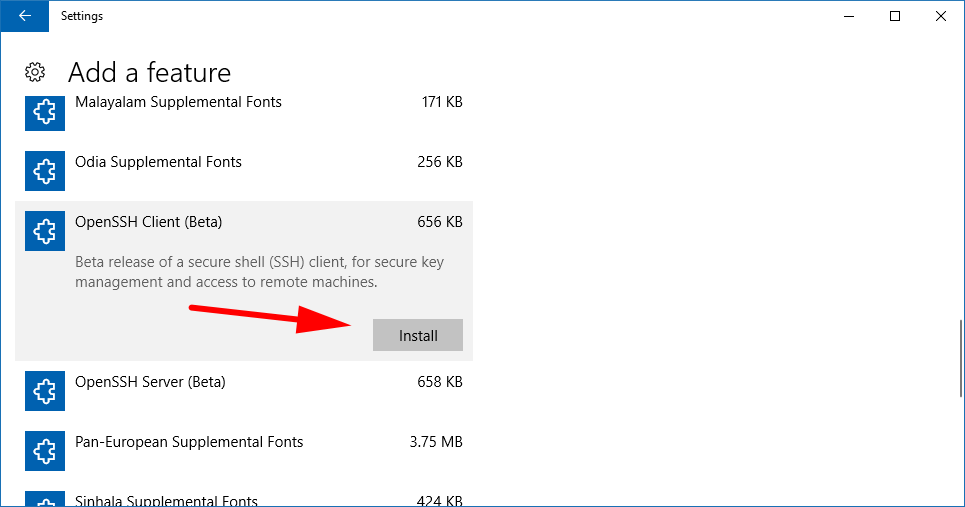
2. Click on the Add a feature plug symbol, so you get the chance to add something else.
3. And then scroll down the list until you see the OpenSSH Client (Beta) result. You’ll see that there is two of them there. It doesn’t matter which one you install. We haven’t trialed them both, but we did click on the first one, and it works perfectly fine. The assumption is that the second will also. If you don’t have any time to lose then just copy what I did and click on the first one from the list. When you do, it’ll open up with the Install button that you need to click on to get it installed.
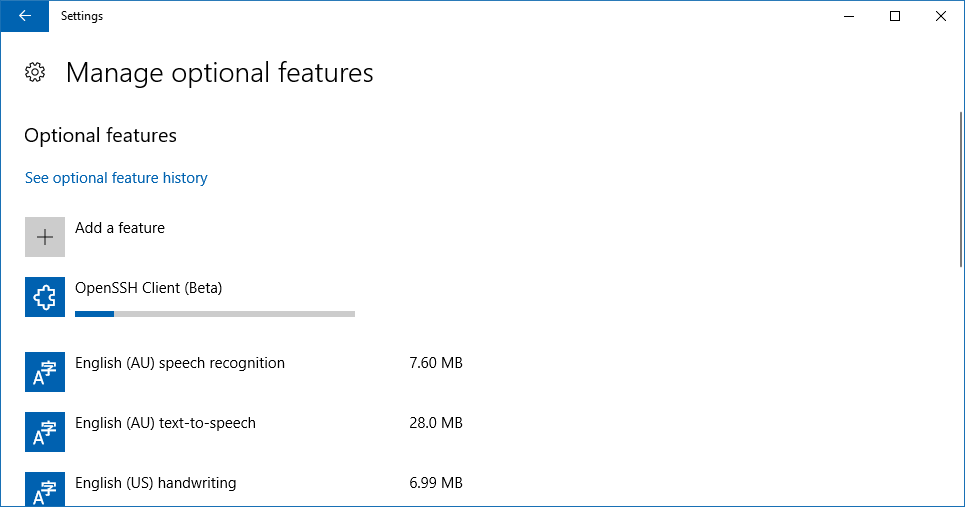
4. After you’ve clicked on the button to get the installation going, it’ll disappear from the list of things to add. Click on the arrow in the top left corner and then it’ll direct you back to the page where you can add new features, and it’ll show the OpenSSH Client progress bar there in the list, so you know it’s still being installed. Once it completes, you then need to reboot your computer before you can start using the new SSH client.
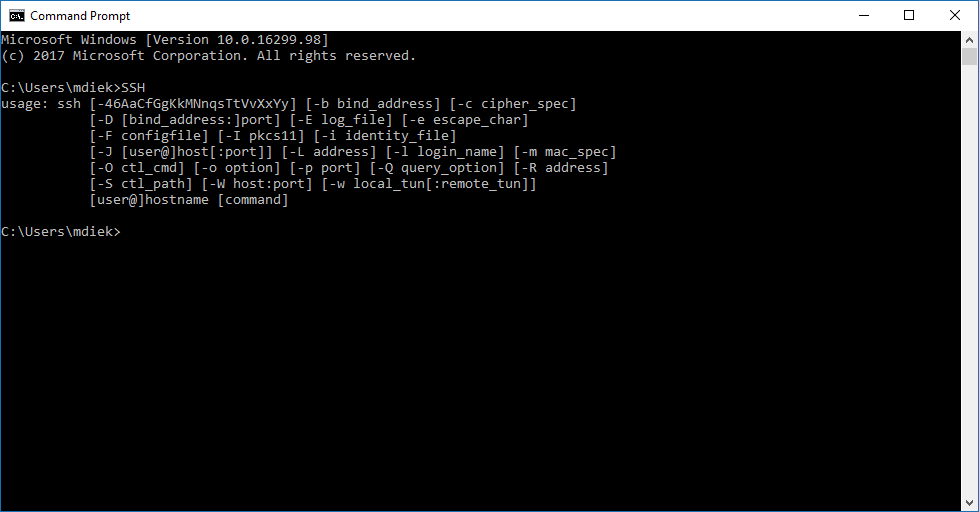
5. After you’ve rebooted, open the Command Prompt the same way you always do and then type SSH as the first command. It’ll then show you the list of command line arguments.
If you’ve tried to use SSH on Windows 10 in the past, you would have had to do some messing around and installing other programs first. Now with the integration coming directly from the Settings application that’s no longer required. All your connecting to remote servers can be done directly from the Command Prompt by entering the required commands into the command line.
Related Tutorials


