Last Updated on December 28, 2022 by Mat Diekhake
There has long been a debate on what the optimal computer screen is concerning the pairing of HD/Full HD/4K displays and their refresh rates. Many gamers prefer a Full HD computer screen with a higher refresh rate than a 4K display with a lower refresh rate. As you could imagine, there are also times when gamers aren’t gaming and want the 4K display on a lower refresh rate. Such dilemmas typically need to be solved before choosing to buy a computer, but you can at least choose to automatically have the refresh rate reduced now to save your computer’s battery. If you want Windows 11 to automatically reduce the refresh rate to conserve power, you need to enable the Dynamic Refresh Rate (DRR). You can find the DRR in the Settings app as well as in the Intel Graphics Command Center.
This tutorial demonstrates how to enable/disable Dynamic Refresh Rate (DRR) in Windows 11.
How to Enable/Disable Dynamic Refresh Rate (DRR) Using Settings App
The dynamic refresh rate is turned off by default in Windows 11. You can enable it from the Settings app (if it is available for your Windows 11 computer). Here is how:
1. Open the Settings app.
2. Click on System > Display.
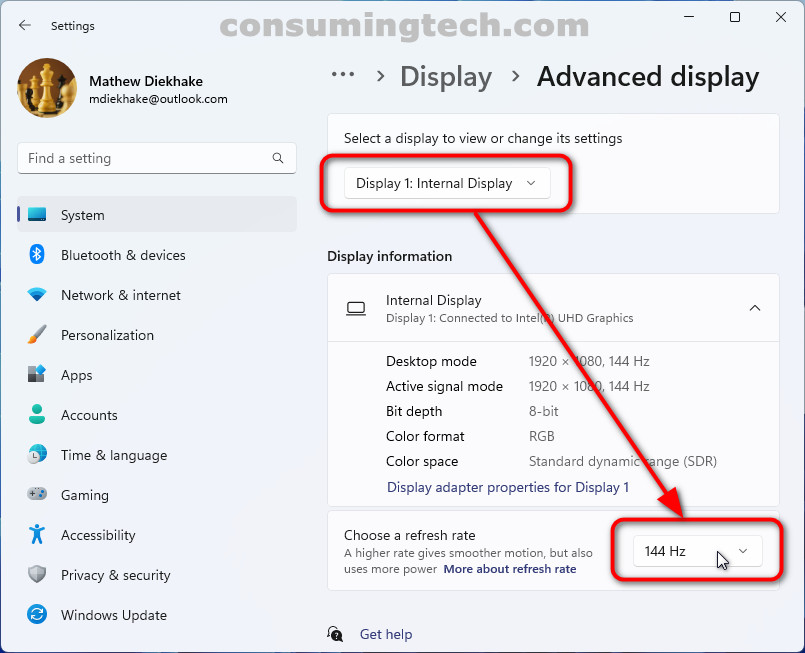
3. Under the Related settings heading, click Advanced display.
4. Select the display, and then next to where it says “Choose a refresh rate,” select the Dynamic option.
How to Enable/Disable Dynamic Refresh Rate (DRR) Using Intel Graphics Command Center
You can also use the Intel Graphics Command Center which comes preinstalled on all computers with batteries and an Intel processor. Here is how:
1. Open the Start menu.
2. Search for the “Intel Graphics Command Center” app and click to open it.
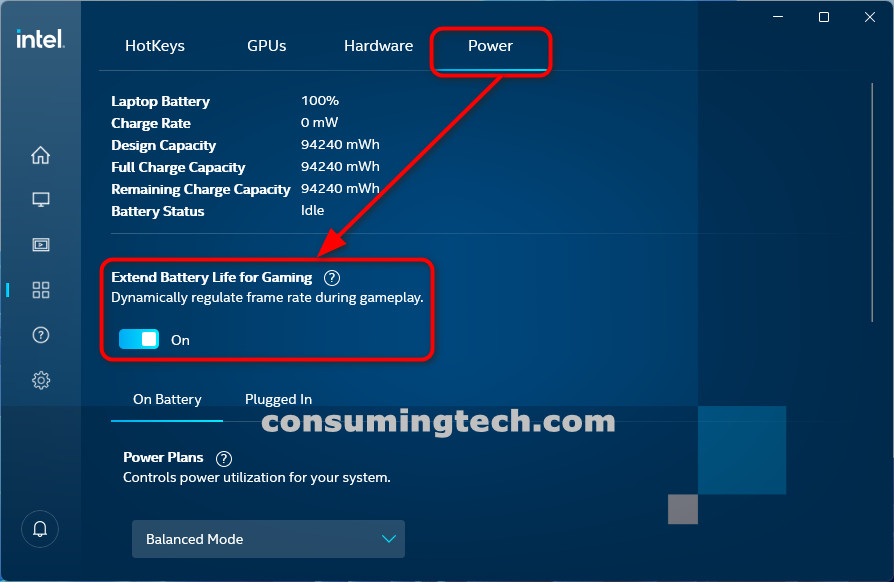
3. From the Intel Graphics Command Center interface, click System > Power.
4. Click the toggle for Extend Battery Life for Gaming.
In conclusion, that is how to enable/disable Dynamic Refresh Rate (DRR) in Windows 11.