The following tutorial demonstrates how to enable and disable Cloud-Delivered Protection, aka Microsoft Advanced Protection Service (MAPS), when using a version of the Windows 11 operating system.
To date, Microsoft Defender antivirus has been reliable real-time protection. Now in Windows 11, Microsoft has included in its antivirus Microsoft Advanced Protection Service (MAPS), which enhances Microsoft Defender by using Microsoft cloud services in addition to the real-time protection. This means Microsoft will use its cloud services to quickly identify new threats and help keep them out of your computer.
Read more: Cloud protection and Microsoft Defender Antivirus | Microsoft Docs
How to Turn On/Off Cloud-Delivered Protection for Microsoft Defender Antivirus via Windows Security
You can turn on and off Cloud-Delivered Protection from Windows Security. Here is how to do that:
1. Open Windows Security. This tutorial shows you all the different ways in which you can open Windows Security when using the Windows 11 operating system: How to Open Windows Security in Windows 11 [Tutorial].
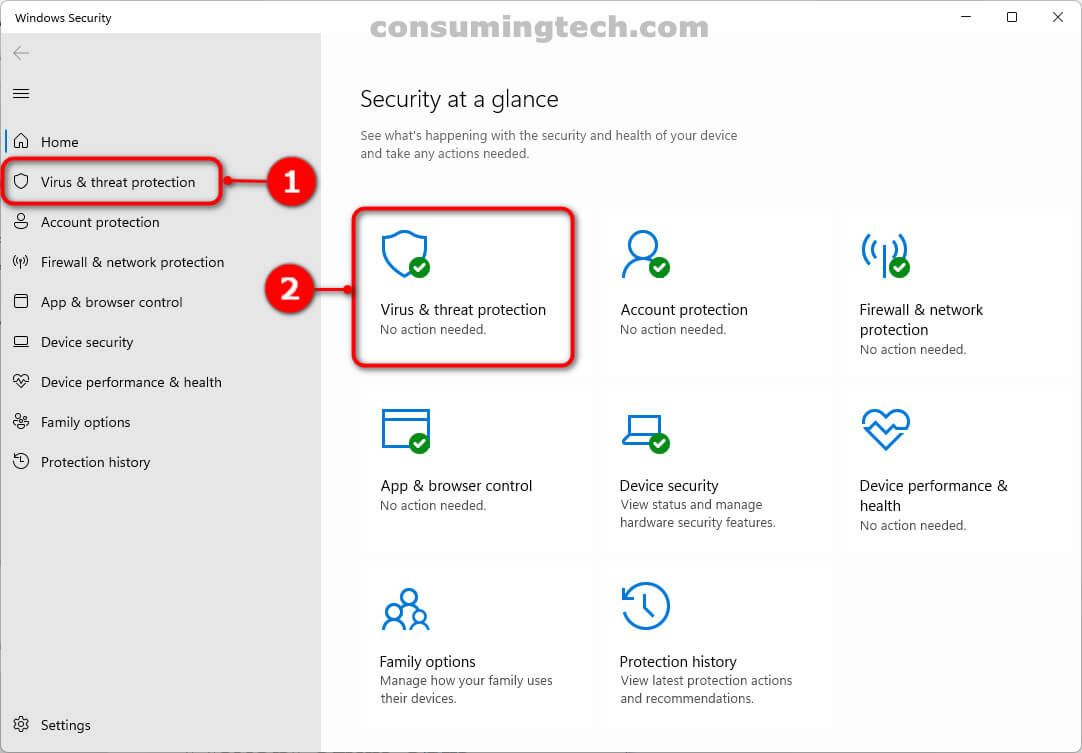
2. Click on Virus and threat protection, either from the left menu or under the Security at a glance section on the right side of the same window.
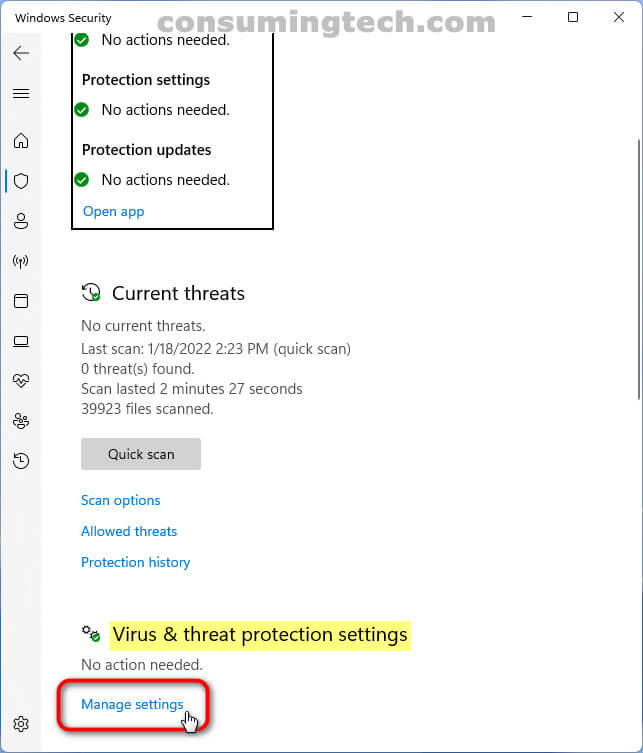
3. Click on the Manage settings link under the Virus and threat protection settings heading.
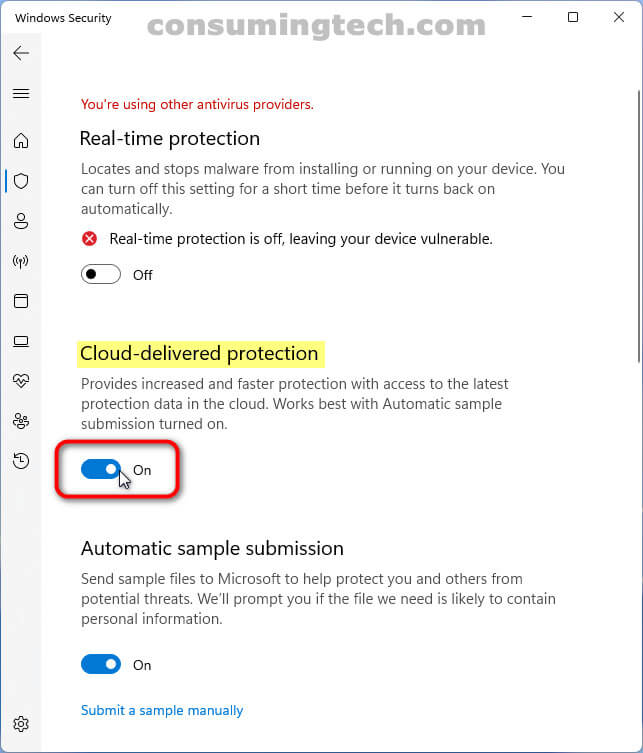
4. Click on the toggle for Cloud-delivered protection to turn it on or off, depending on what you want to do.
Note: If you are prompted by User Account Control, click on the Yes button.
How to Turn On/Off Cloud-Delivered Protection for Microsoft Defender Antivirus via Command Prompt
You can turn on and off Cloud-Delivered Protection from Windows Powershell or the Command Prompt. Here is how to do that:
1. Open the Windows Terminal with administrative permissions and then open either a Windows Powershell or Command Prompt window.
2. Type one of the following commands into the command line depending on what you want to achieve:
a. To Turn On Cloud-Delivered Protection
PowerShell Set-MpPreference -MAPSReporting 2 or PowerShell Set-MpPreference -MAPSReporting Advanced

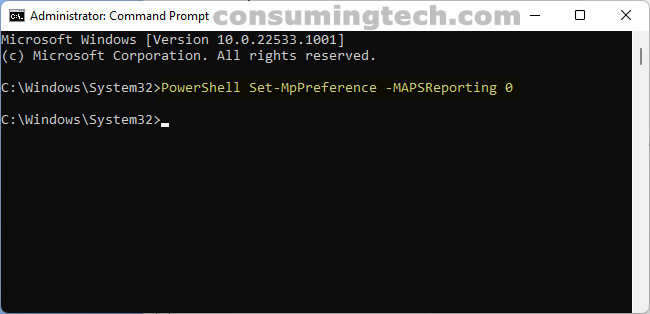
b. To Turn On Cloud-Delivered Protection
PowerShell Set-MpPreference -MAPSReporting 0 or PowerShell Set-MpPreference -MAPSReporting Disabled
How to Enable/Disable Cloud-delivered Protection for Microsoft Defender Antivirus via Local Group Policy Editor
You can enable and disable Cloud-Delivered Protection by making changes to the Join Microsoft MAPS policy via the Local Group Policy Editor. Here is how to do that:
1. Open the Local Group Policy Editor via Search.
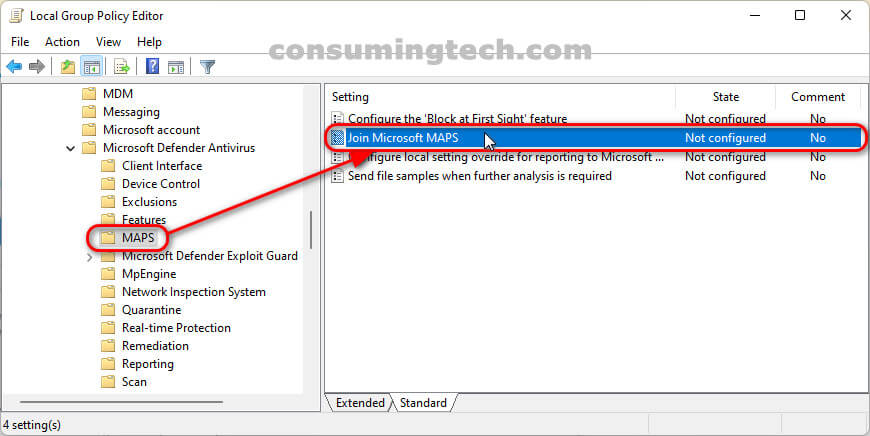
2. Using the Local Group Policy Editor’s left pane, navigate through to the following location:
Computer Configuration, Administrative Templates, Windows Components, Microsoft Defender Antivirus, MAPS
3. With MAPS selected, double-click on the Join Microsoft MAPS setting to open and make changes to its group policy.
4. From the Join Microsoft MAPS policy window, choose between either Not Configured (to enable Cloud-Delivered Protection), Enabled (to enable Cloud-Delivered Protection), and Disabled (to disable Cloud-Delivered Protection), and then click on the OK button at the bottom of the policy window to save the changes.

In conclusion, that’s how to enable and disable Cloud-Delivered Protection for Microsoft Defender in Windows 11.
Related Tutorials
- How to Open Settings in Windows 11 [Tutorial]
- How to Enable/Disable Periodic Scanning in Microsoft Defender Antivirus in Windows 11 [Tutorial]
- How to Open Windows Security in Windows 11 [Tutorial]
- How to Open Quick Settings in Windows 11 [Tutorial]
- How to Turn On/Off Tamper Protection for Microsoft Defender Antivirus in Windows 11 [Tutorial]
- How to Set Up Fingerprint Recognition Sign-in for Account in Windows 11 [Tutorial]