Last Updated on September 19, 2023 by Mat Diekhake
This tutorial demonstrates how to enable or disable the built-in admin account when using a version of the Windows 11 operating system.
Method One: How to Enable/Disable Built-in Administrator in Elevated Command Prompt and PowerShell
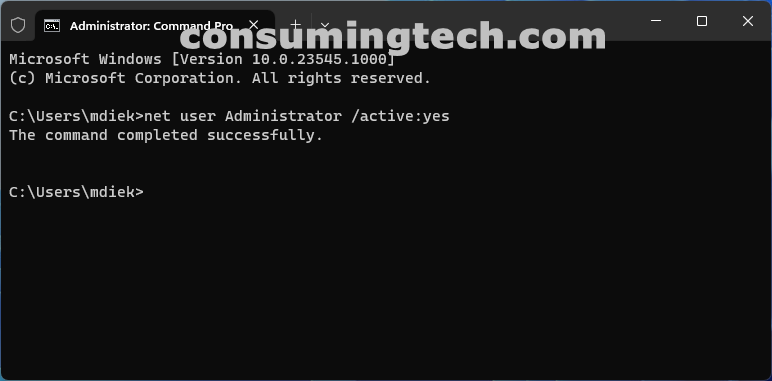
1. Open the elevated Windows Terminal.
2. Type one of the following commands:
2. a Command Prompt
Enable: net user Administrator /active:yes
Disable: net user Administrator /active:no
2. b PowerShell
Enable: Enable-LocalUser -Name "Administrator"
Disable: Disable-LocalUser -Name "Administrator"
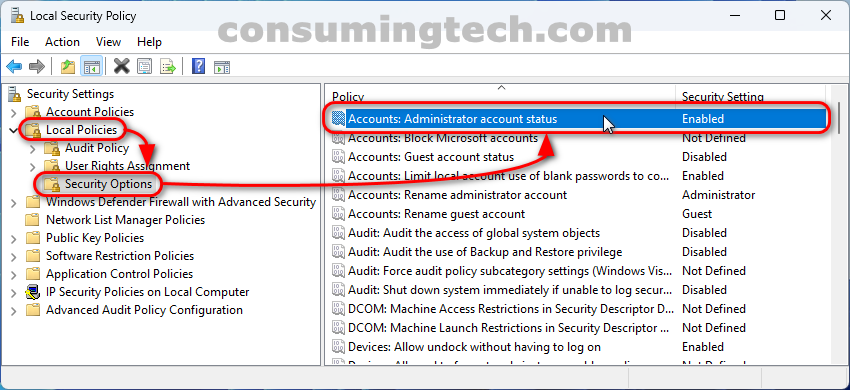
Method Two: Enable/Disable Built-in Administrator in Local Security Policy
1. Open Local Security Policy.
2. Click Local Policies > Security Options.
3. Click Accounts: Administrator account status.
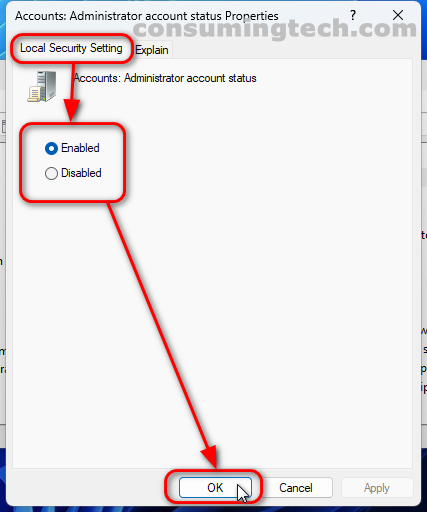
4. In Properties, click the Local Security Setting tab and click Enabled or Disabled.
Method Three: How to Enable/Disable Built-in Administrator in Local Users and Groups
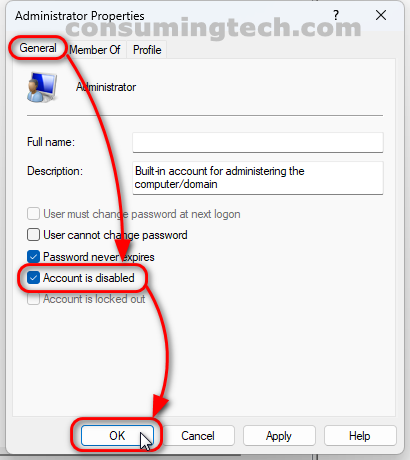
1. Open Local Users and Groups.
2. Click Users > Administrator.
3. In Administrator Properties, click the General tab and then check/uncheck Account is disabled.
In conclusion, that is how to enable or disable the built-in admin account in Windows 11.