Last Updated on December 24, 2022 by Mat Diekhake
The following tutorial demonstrates how to perform a system restore when using a version of the Windows Vista operating system.
Windows Vista comes with a feature called System Restore which allows you to revert the computer back to a previous state in an attempt to remove a problem that had recently developed on the computer. System Restore was a genius idea based on the notion that instead of having to try to solve complicated computer problems, you could simply turn back time on the computer before the problem had begun.
There are significant changes between Microsoft Windows’ System Restore on Windows XP and its System Restore on Windows Vista. With Vista, System Restore takes a snapshot of all volumes it is monitoring whereas Windows XP only monitored the Windows Registry, files in the Windows File Protection folder, Local user profiles, COM+ and WMI databases, IIS Metabase, and other specific file types monitored.
How to Do a System Restore in Windows Vista via System Tools
Part One: Create a System Restore Point
You have to create a system restore point before you can restore a backup of the restore point via system restore. Here is how to do that:
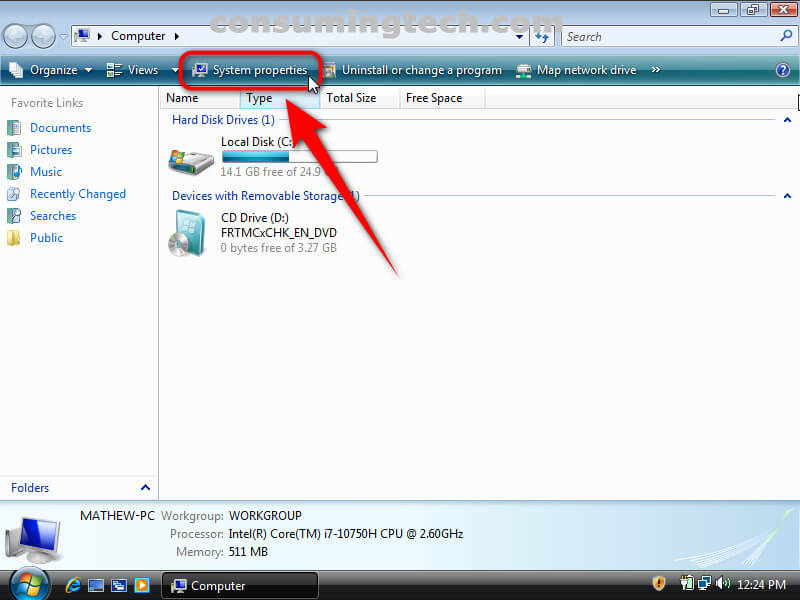
1. Open the System Properties dialog by navigating to Start > Computer > Toolbar > System Properties.
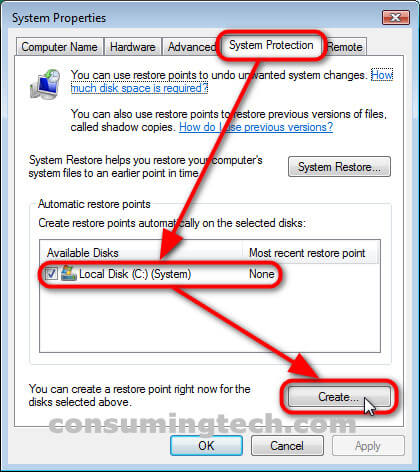
2. From the System Properties dialog, click on the System Protection tab and then select the Local Disk (C:) (System) drive and click on the Create button.
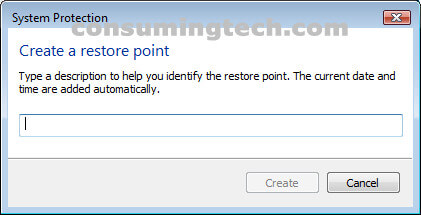
3. Type in a name in the available field underneath where it says Create a restore point and then click on the Create button.
4. Click on the OK button when you see the message letting you know that: The restore point was created successfully.

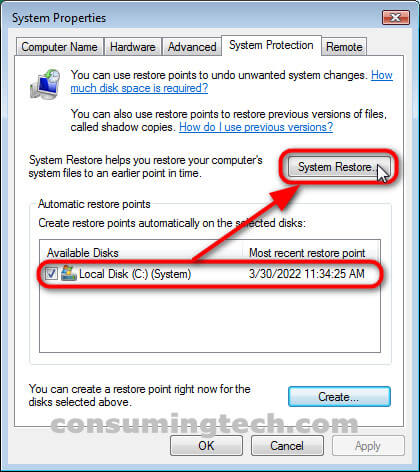
5. From the System Properties dialog, click on the System Protection tab and then select the Local Disk (C:) (System) drive once again and then click on the System Restore button.
Note: You will notice that after having created the restore point that there is now a date listed next to the C:\ drive in the list of available disks. This is how you can tell that the restore point you created was taken successfully and is available to restore.
Part Two: Perform a System Restore
Once you have at least one restore point created, you are then able to perform the system restore of that restore point. Here is how you can do that:
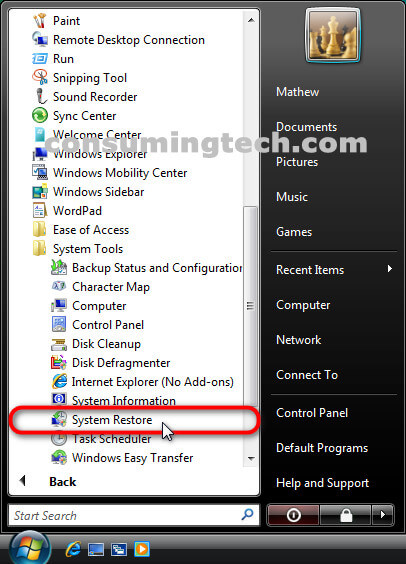
1. Click on the Start Menu and navigate to All Programs\Accessories\System Tools\System Restore.
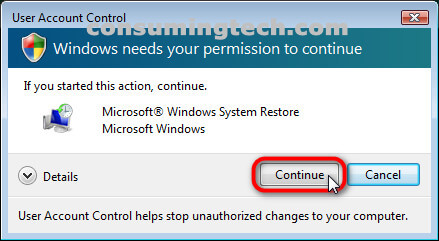
2. Click on the Continue button when the User Account Control dialog requests permissions to continue.
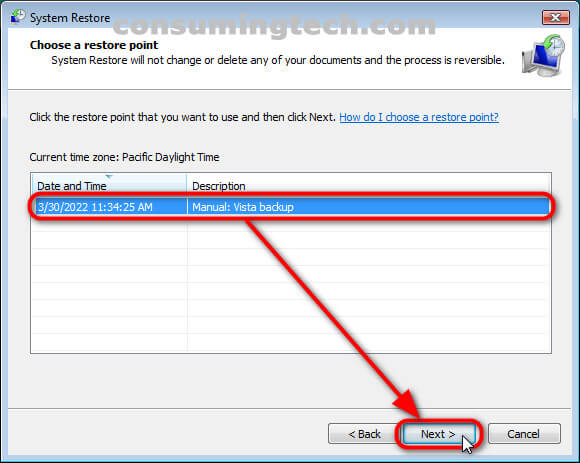
3. From the main System Restore dialog, click on Next.

4. Click on the restore point that you want to use and then click on Next.
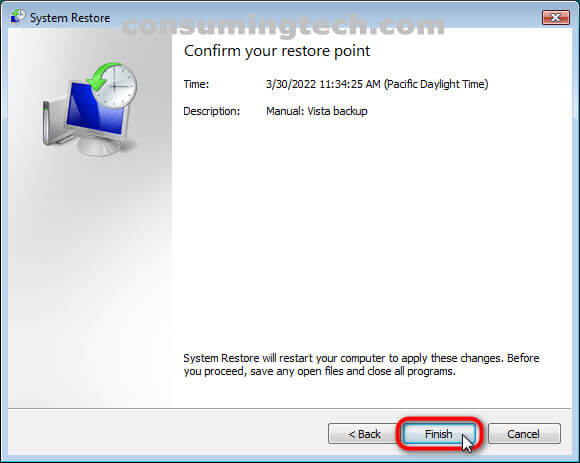
5. Click on Next to confirm that this is indeed the restore point you want to be installed by observing the name of it next to the description.
In conclusion, that is how to perform a system restore when using Windows Vista.
Related Tutorials
- How to Restore Default File Type Associations in Windows Vista [Tutorial]
- How to Use Disk Cleanup in Vista [Tutorial]
- How to Change Menu Show Delay Time in Windows Vista [Tutorial]
- How to Adjust Cookie Preferences in Internet Explorer in Windows Vista [Tutorial]
- How to Check System Uptime in Windows Vista [Tutorial]
- How to Switch Windows Media Player to 64 Bit in Windows Vista [Tutorial]
- How to Select Power Plan and Check Plan Settings in Windows Vista [Tutorial]
- How to Stop XP Dual Boot Deleting System Restore Points [Tutorial]
- How to Fix Cannot Delete a File or Folder Due to Corrupt Recycling Bin [Tutorial]
- How to Get Windows Vista Into Safe Mode [Tutorial]