Last Updated on December 26, 2022 by Mat Diekhake
The future of restore points in Windows 10 is up in the air. Some computers have the System Restore feature turned off by default and some of them have it on. The fact that some computers have it off by default is peculiar, to say the least, if Microsoft is wanting to continue using the feature indefinitely in the future.
Being able to create restore points has been around in Windows operating systems for a very long time now (way back since Windows ME) and many people have been relying it on for backing up. It isn’t advised that you substitute backing up with system restore points, but the chance to roll back the clock on an operating system and use a restore point is a feature that’s almost as useful.
Windows 10 lets you turn on or off the System Restore feature so your computer will save restore points or it won’t. You don’t have to worry about System Restore using too much of your hard drive space either because you can set a limit of the drive that you want to allocate to restore points and Windows won’t go over that set amount. For example, if I set the total allocated amount of System Restore to 4% of the drive, then it will stop taking restore points once it uses up 4% of the drive and so forth.
If you have the max usage set to an amount, then you shouldn’t need to worry about having to delete the restore points since it’s handling them for you. However, if there is a particular update that you want to be removed from the computer, or you want to clear up some space urgently, you can do that by deleting the restore points.
How to Delete System Restore Points From System Protection Settings
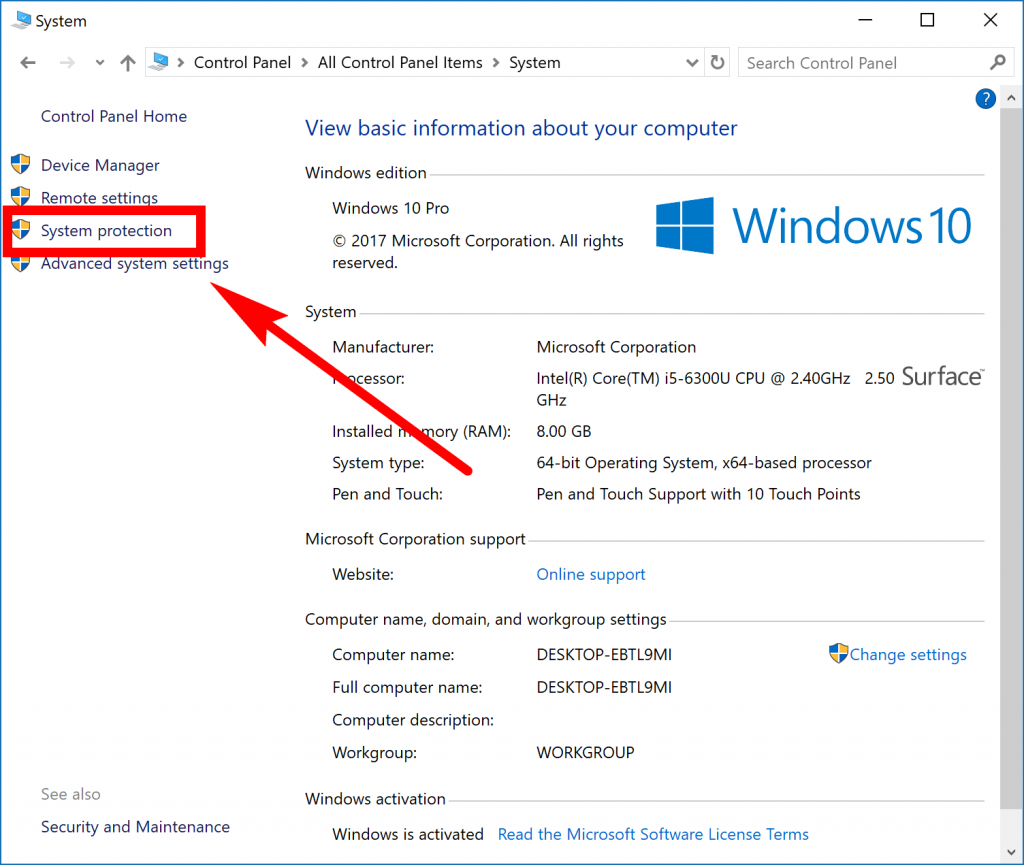
You can delete restore points from the System Protection settings. You can navigate to the System Protection settings a couple of ways: either by opening up the Win+X Quick Links menu or the Control Panel. If you use the Control Panel, make sure you open it up showing the classic view and then click on the “System” link. Next, click on the “System Protection” from the left side pane—you could also click on the “Advanced system settings” if you wanted, and then choose the “System Protection” tab from the top, but the System Protection link takes you there directly instead.
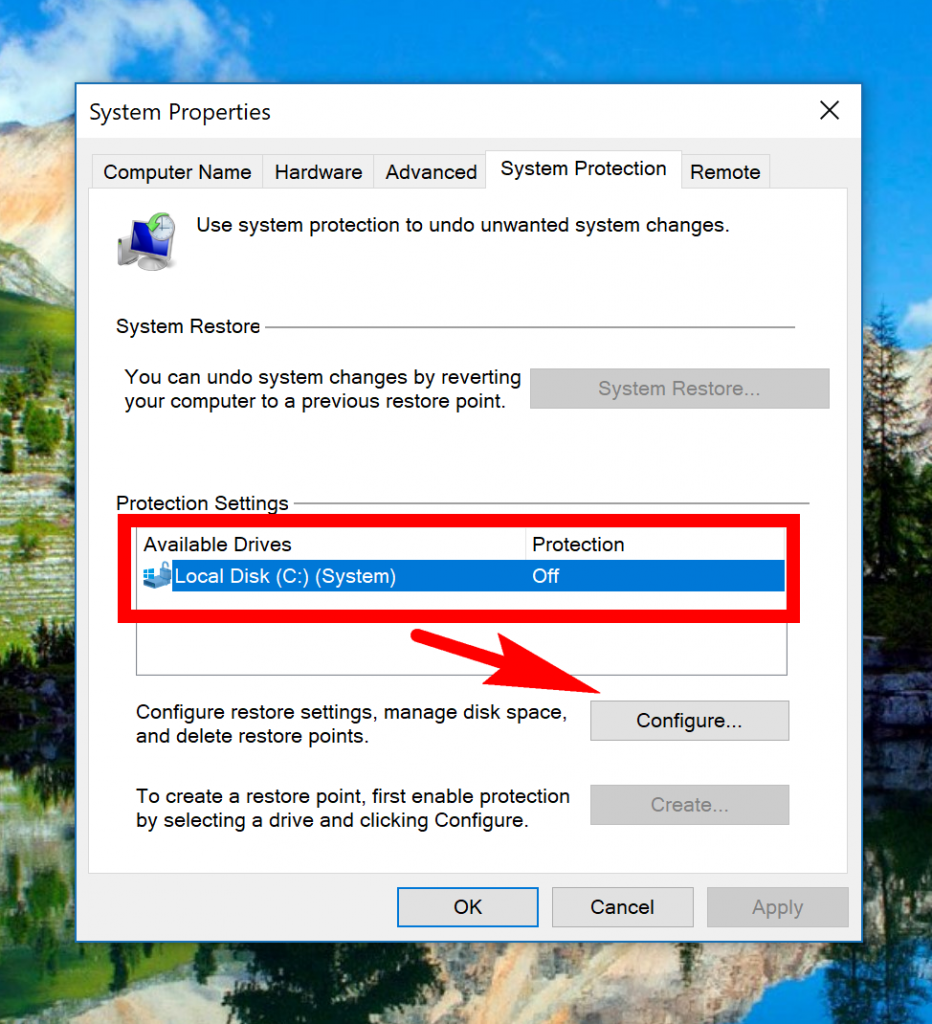
You’ll now have the System Properties dialog box open on the computer’s display with the System Protection tab open. Select the drive that you want to delete restore points from by clicking on it and highlighting it and then click on the “Configure” button.
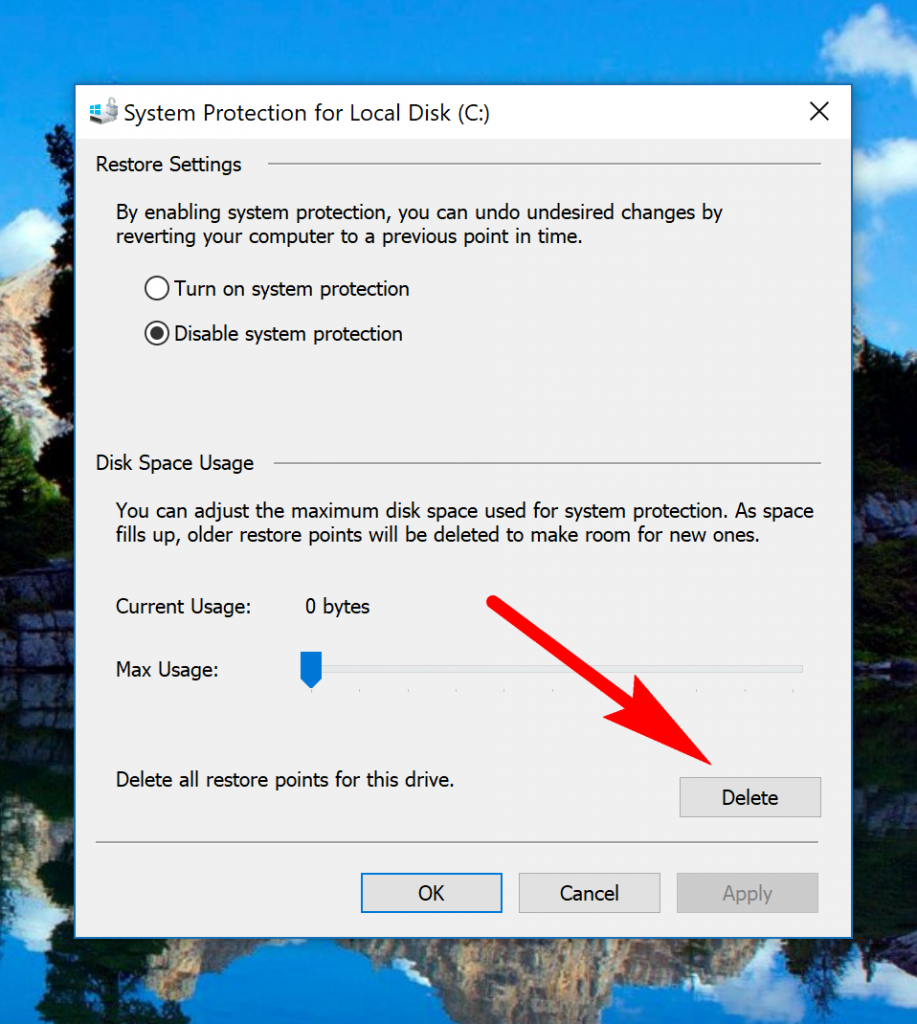
Under the “Max Usage” bar, click on the “Delete” button. (That Max Usage bar you can see is the bar we were talking about earlier where you can set what you want for a maximum usage, and it won’t use up any more disk space than that. It’s the ideal solution for still having some system restore points and them not taking up too much disk space if you are worried about running low on space).
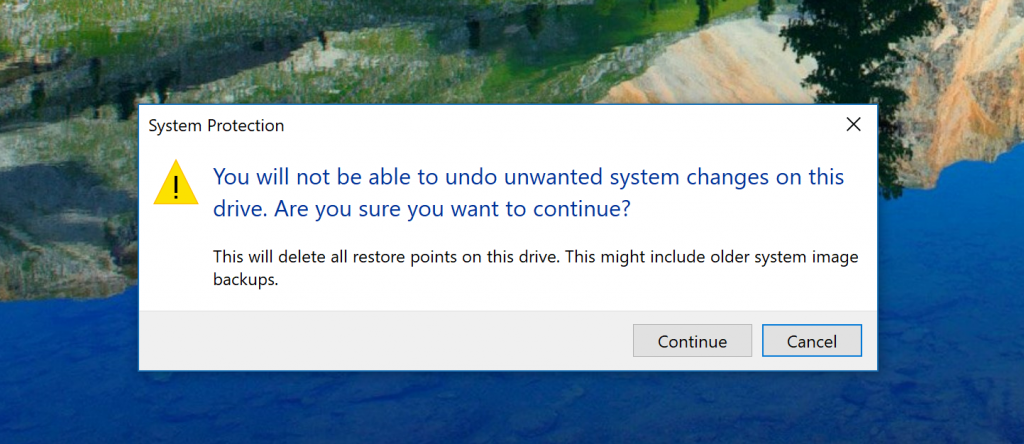
Windows gives you a message letting you know that you “will not be able to undo unwanted system changes on this drive. Are you sure you want to continue.” Click on the “Continue” button when you want to delete it.
How to Delete System Restore Points From Disk Cleanup
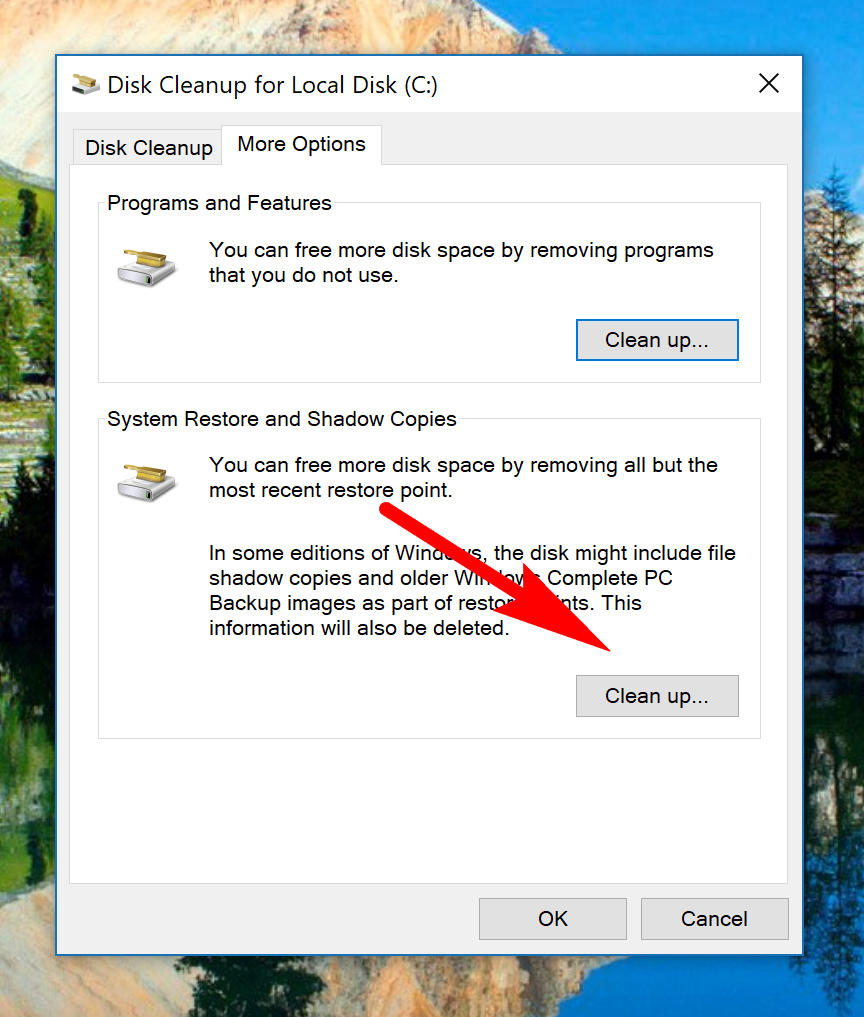
The Disk Cleanup tool also offers a way for you to be able to delete system restore points if you want. You won’t see it from the main window after you open up the tool, but if you click on the “More Options” tab at the top of the window, and then click on the “Clean up” button under where it says “System Restore and Shadow Copies” you’ll find the option for deleting older restore points.
How to Delete System Restore Points From Command Prompt
It is possible to run commands from the command line to delete system restore points as well. You’ll need to be logged in as an administrator—or, at least, know the passwords of an administrators account—to use this method, though, because you need to open the elevated Command Prompt window for it to work. To get started, type the “vssadmin list shadows” command and hit the Enter key on your keyboards. It brings up the list of all of the shadow copies/restore points on the computer. Now all you need to do is run the “vssadmin delete shadows /all” command and hit Enter and then click on the “Yes” button when the Command Prompt prompts you. It then deletes all of the restore points (shadow copies) on the computer.
If you prefer having ample disk space and want to delete the system restore points, we advise following one of the options above and also remembering how you did it so you can continue to do it. More people understanding how to delete the restore points to free up disk space could be something that Microsoft look at when assessing whether to keep the feature going in future versions of the operating system or not. Not being able to use system restore will be sure to shake up the tech industry as it was a convenient method for technicians to fix computers without having data loss.
You might also be interested in:
- How to Open and Use Disk Cleanup in Windows 10
- How to Run SFC Command to Repair System Files in Windows 10
- How to Leave a Homegroup in Windows 10
- How to Create and Join a Homegroup in Windows 10
You can subscribe to our RSS, follow us on Twitter or like our Facebook page to keep on consuming more tech.

