Last Updated on December 26, 2022 by Mat Diekhake
Over time your drives in Windows 10 will build up unnecessary files that you probably don’t need to keep. If you remove these files that are useless, you create a faster computer as well as free up lots of additional space on the hard drive that you can use for more stuff or just to take the pressure off of the hardware, so it doesn’t need to work as hard.
Before you go rushing in and deleting everything in sight though there are some things you should know. Most of what you can see within Disk Cleanup can be deleted, but there are some things you should also consider keeping such as the Windows ESD installation files.
If you were to delete everything inside Disk Cleanup, then you might be stopping your computer from being able to uninstall an update. And if your computer were to have a problem after updating, that’s preventing you from being able to fix it. That’s why files like the Windows ESD are useful to keep around.
If you’re continually building up a lot of files, then you might not think much of Windows ESD, but if you only use your computer now and then, you might feel obliged to delete the Windows ESD file because it usually offers a few GB’s of storage space that could be freed up which would look appealing.
Here’s what you need to open the Disk Cleanup utility and then use it when you’re running on a version of the Windows 10 operating system.
How to Open and Use Disk Cleanup in Windows 10
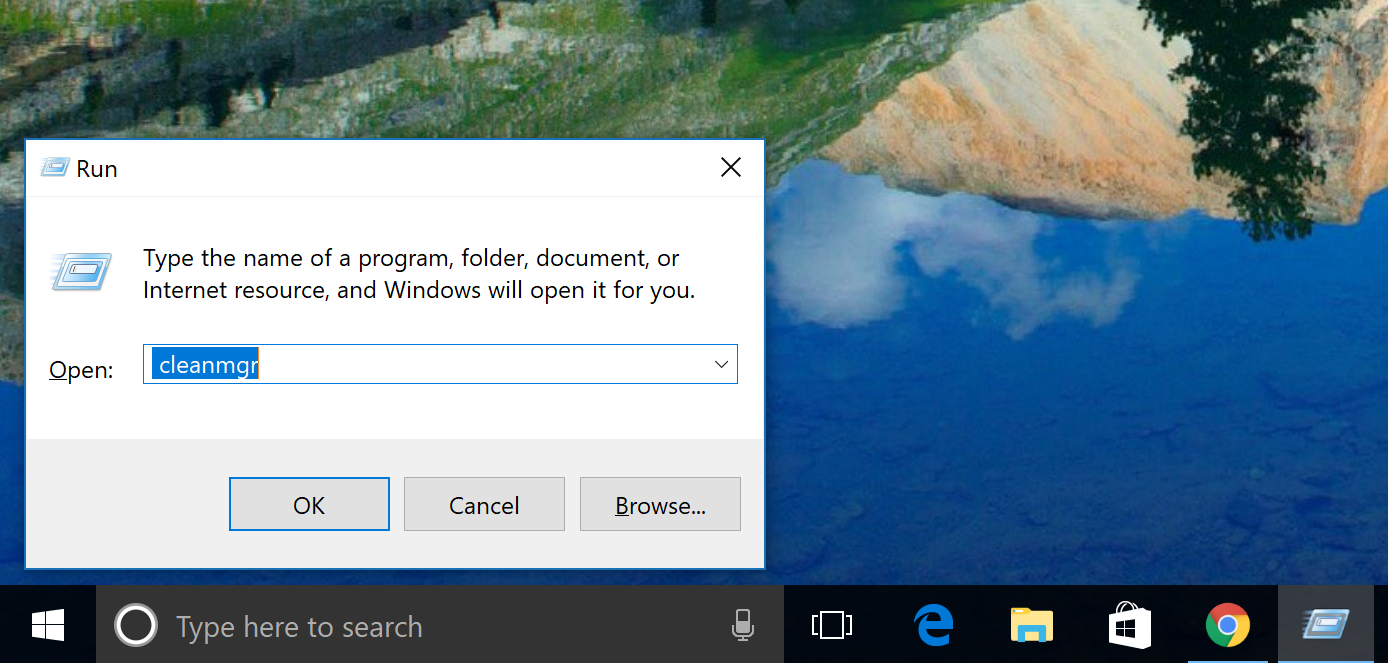
To get started on cleaning up unnecessary files in Windows 10 with Disk Cleanup, open the Run dialog box by pressing the Windows logo + R keys on your keyboard and then type “cleanmgr” and hit the Enter key.
Under where it says “Files to delete” click all of the boxes available that you want to delete to help clear up the maximum amount of space on your hard drive. You can delete all of these things, and nothing will go wrong—just make sure you aren’t deleting something that you think you might need. For example, one of the boxes is for removing everything in the Recycling Bin. It isn’t always safe to assume that you don’t want something out of the Recycling Bin which is why you should look over these things manually with your eyes first.
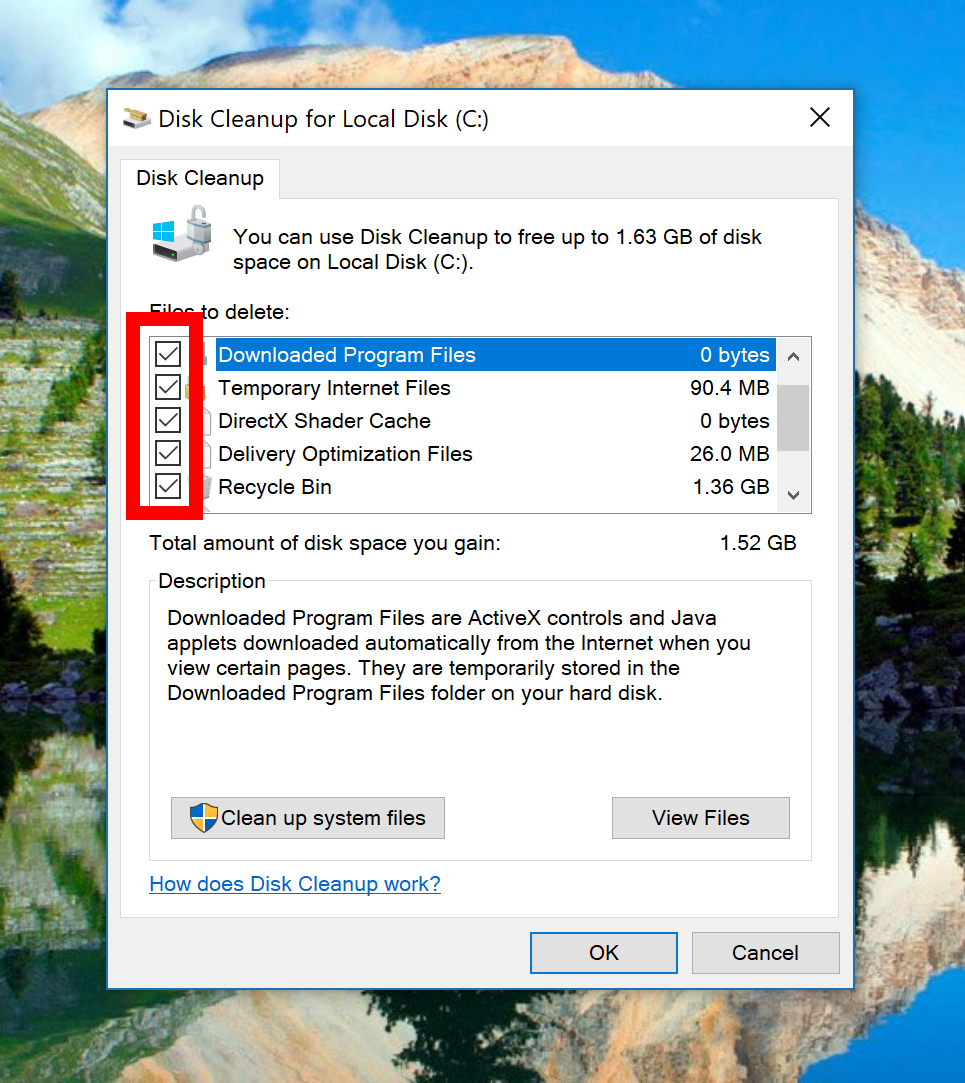
You can also click on the “Clean up system files” button to get more files that you can delete. Note that you’ll need to be signed in as an administrator before you’ll get the option to click on this button, though.

Once you are inside the part for system files, check all the boxes that you want to be deleted and then click on the “OK” button.

Windows will make you confirm that you do want to delete the files permanently before allowing you to do so. Just click on the “Delete Files” button to continue with the deletion of the files that you selected.

The Disk Cleanup tool then cleans up the local disk C: drive.

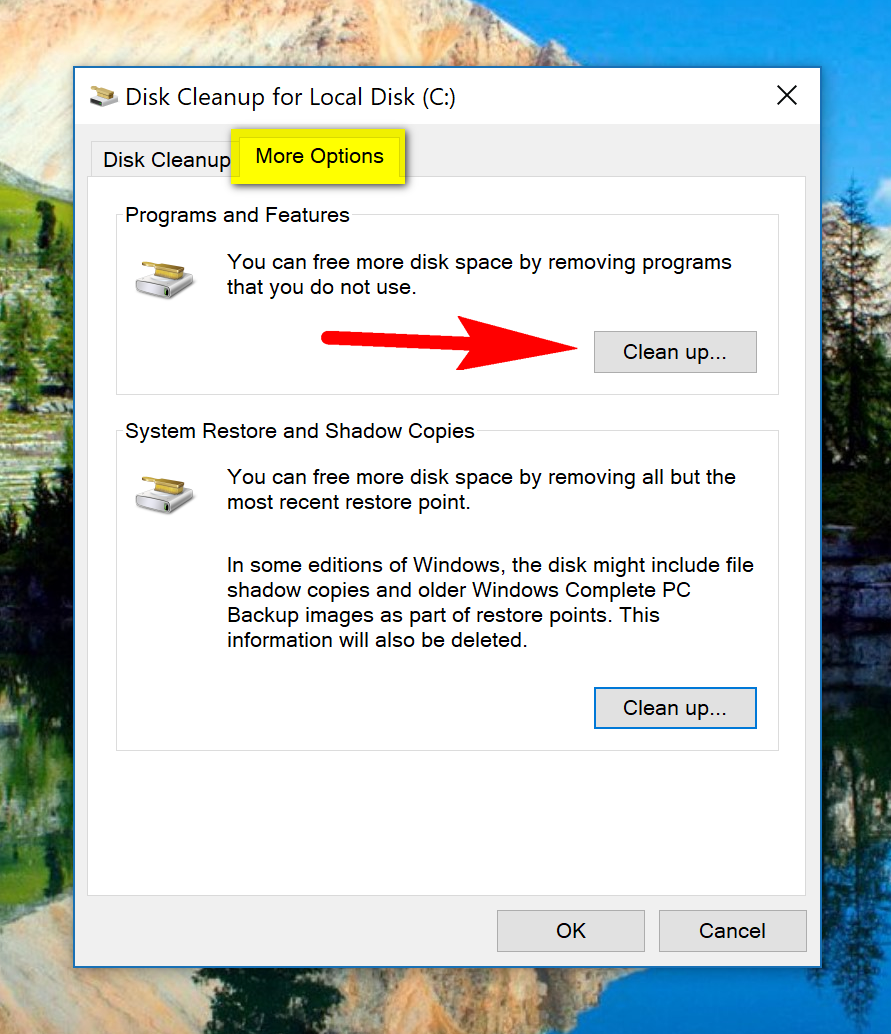
If you still want to do some more spring cleaning, you can open up the Disk Cleanup again from the Run dialog box and then click on the “More options” tab at the top of the window. In here is a couple of more options for you to choose. The top option is going to allow you to remove programs and features that are installed on the computer. To do that, just click on the “Clean up” button.
Next, choose what you want to delete from the list out of all the applications and programs that are installed on your version of Windows 10.

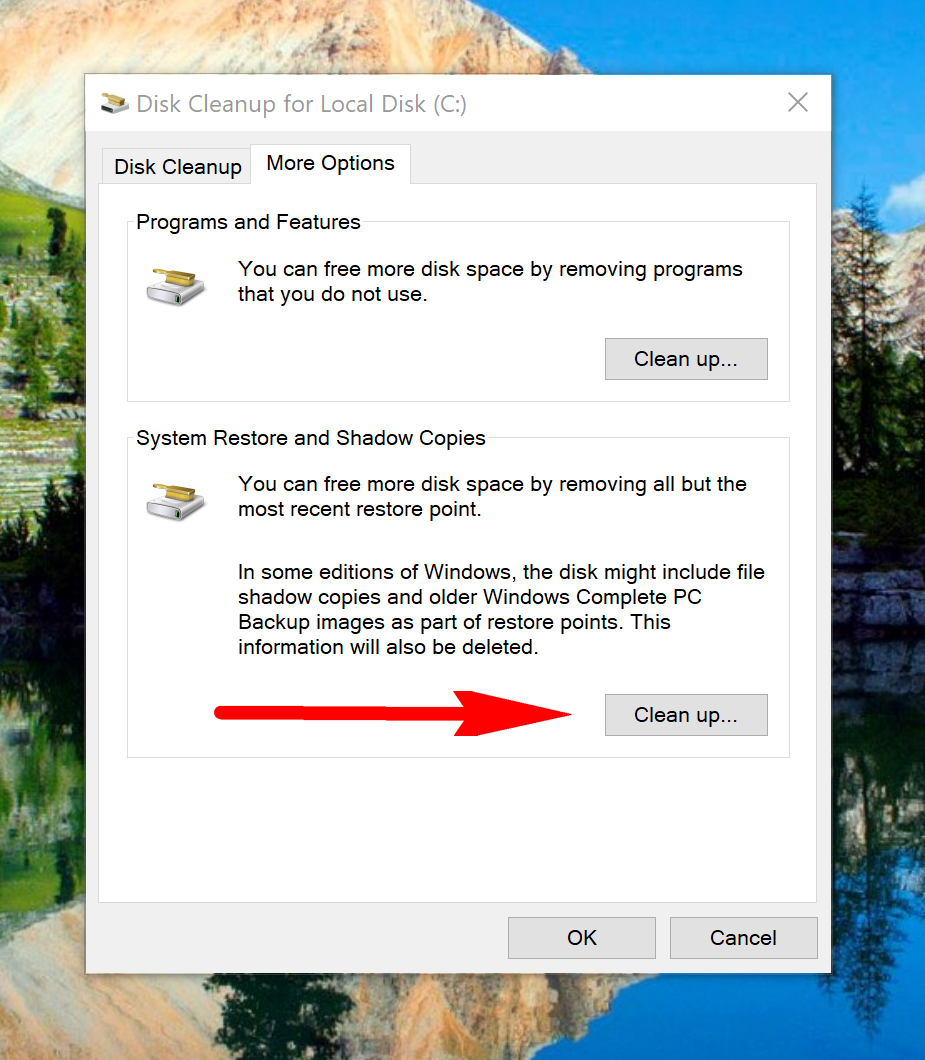
From the same More Options tab, look where it says “System Restore and Shadow Copies” if you want to create even more space by removing all of the saved system restore points. The System Restore feature is apparently being phased out by Microsoft—we know this because some computers come with System Restore turned on and others have it turned off by default in Windows 10—but if you have it turned on then it is going to be saving restore points. By default, Windows 10 saves a restore point on the computer every week so if you ever want to roll back the clock on the operating system, you can. Each time it takes one of those system restore points, it takes up some more space. You’ll want to delete them every so often if you can eliminate ever wanting to restore the computer before a particular time. For example, I haven’t had any issues for about a year now, so there’s no reason why I want any restore points any earlier than in the last month or so.
Removing most of the stuff that is available from the checkboxes when you open up the Disk Cleanup tool should be safe to do. However, some other features are stemming from the Disk Cleanup window such as the “System Restore and Shadow Copies” that could cause you problems if you ever need to roll back the time on the operating system. So, feel free using the Disk Cleanup tool that’s built into the Windows OS, but make sure you are paying attention what you are choosing to delete. And if you don’t recognize something from the list, err on the side of caution and keep it instead of wanting to delete it.
Related Tutorials