Last Updated on December 26, 2022 by Mat Diekhake
A homegroup makes it easy to share all of those things that are connected to the homegroup, as long as they are all on the same home network. If you have quite a few computers on a home network and think you might want to share printers, pictures, music, videos, documents, and other stuff and each computer is running on Windows 10, then you ought to consider setting up a homegroup.
A homegroup is protected with a password after it has been created, so only the people known to the homegroup can share the stuff associated with the other computers on the network. You get the password for the homegroup when you set the homegroup up for the first time. The password is issued by Windows 10 and is not something you can choose yourself when you are setting it up for the first time, so you’ll want to store the password somewhere you can easily find it again later like in your Microsoft OneNote accounts. If you forget to do that, then you’ll need to go back to the Homegroup’s settings page and click on the link for changing the password.
It’s possible to continually add more devices to the homegroup at a later date by using the same password. As soon as you join the homegroup with a new device, you are officially a member of the homegroup. Each member can choose which files they want to share in the homegroup. Likewise, each member can also choose what devices they want to share the files within the homegroup.
Here’s what you need to create and then join a homegroup when you’re using a version of the Windows 10 operating system.
How to Create and Join a homegroup in Windows 10
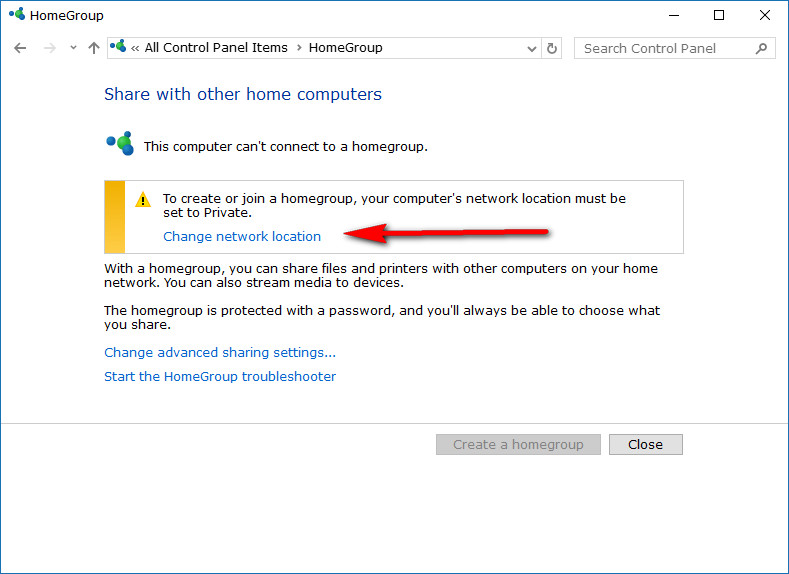
If there is no homegroup created on your network yet, then you’ll need to run through some quick steps to set one up. On the other hand, if a homegroup already exists and you want to connect to it, you’ll be asked if you want to join it instead. We’ll go ahead and assume you haven’t created one yet. To get started, open the Control Panel and make sure it is set on the small icons view. Next, click on the “Homegroup” link from the Control Panel. When done, it opens up to the same window as you can see in the picture below. Click on the “Change network location” link to set it to Private. It’s a must before Windows 10 lets users create and join a homegroup.
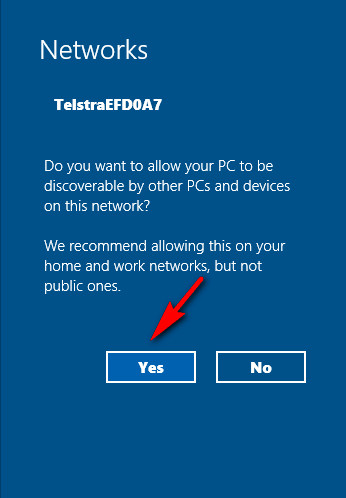
When you get the message asking if you want to “allow your PC to be discoverable by other PCs and devices on this network” click on the “Yes” button.
It then automatically searches for any homegroups on the network. If it finds any, then it will offer you the step to join that network. If it doesn’t then that’s how you proceed to create the homegroup instead.
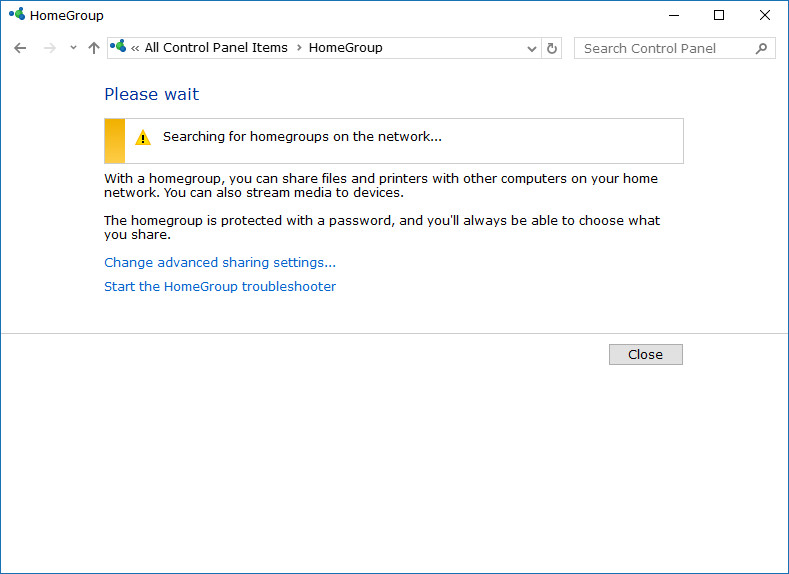
When you get the message letting you know that there is currently no homegroup on the network, click on the “Create a homegroup” button.

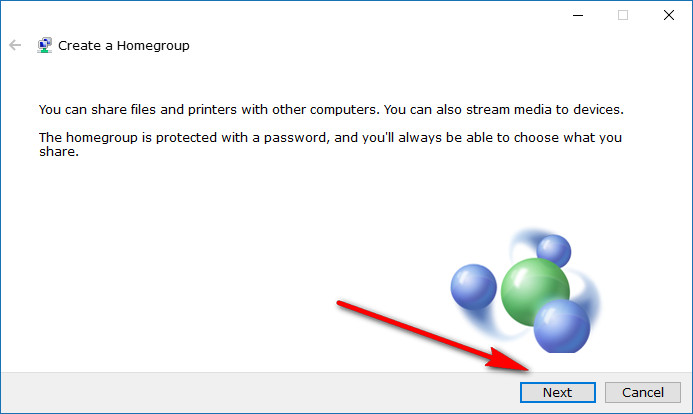
The next window gives you information regarding the homegroup, what is allows you to do and what is required to do it. Click on the “Next” button once you have read what it says.
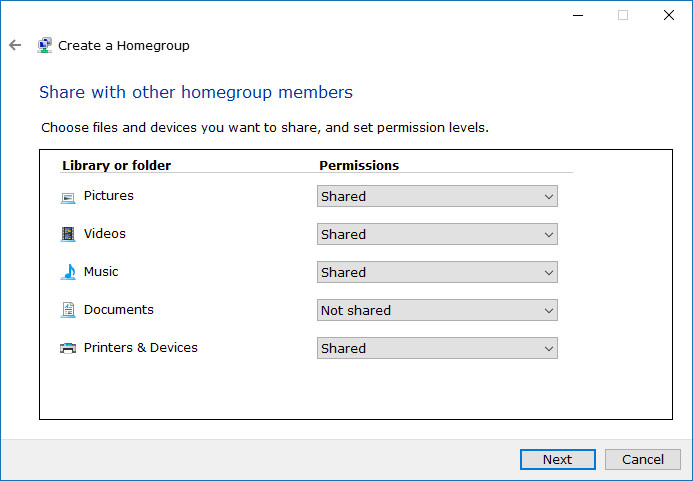
You now get to choose what you want to be shared from your device to the other devices on the homegroup. For instance, you’ll notice that the “Documents” option is set on “Not shared.” That means nobody on the network will be able to see the documents coming from your device. If you want other people in the homegroup to be able to see documents, then change the setting over to “Shared” instead.
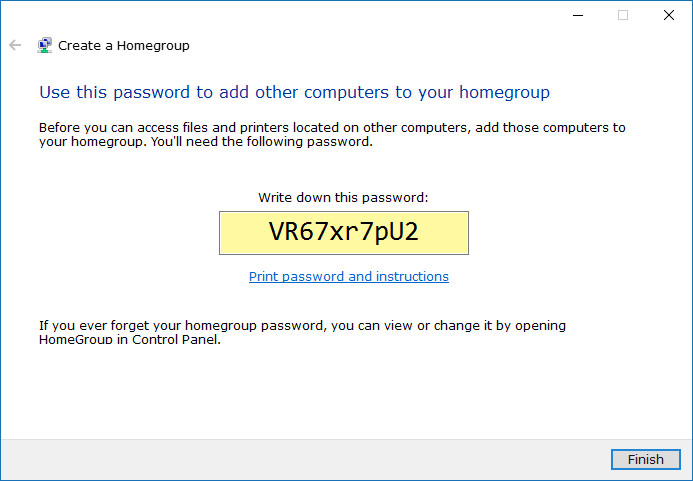
Windows 10 now shows you the password that it has generated for your homegroup. Any other devices that want to join the homegroup that you just set up need to input this same password when they attempt to join the homegroup. Since nobody can join the homegroup that you just created without the password, it stops people you don’t know joining your homegroup and being able to see everything that you have chosen to share, so it’s important you don’t let others around you see what the password is unless you plan on allowing them on your homegroup.
Homegroups are ideal for small businesses and home networks to quickly and efficiently share files across multiple devices. The homegroups have been around since Windows 7, and don’t look like being taken away from Windows operating systems anytime soon. They remain the simplest ways to share files and printers between computers. The homegroup feature doesn’t get as much use as Windows probably would have hoped, and part of that reason is that people don’t know how to set it up. Hopefully, now that you do, you’ll start enjoying its benefits the way Windows intended.
You might also be interested in:
- How to Leave a Homegroup in Windows 10
- How to Run SFC Command to Repair System Files in Windows 10
- How to Open and Use Disk Cleanup in Windows 10
- How to Delete System Restore Points in Windows 10
You can subscribe to our RSS, follow us on Twitter or like our Facebook page to keep on consuming more tech.