Last Updated on December 26, 2022 by Mat Diekhake
One of the best built-in features that most good operating systems have these days is the ability to connect to a device that the OS is running on by using a WiFi hotspot or otherwise known as a mobile hotspot.
The feature was first brought up in mobile operating systems and is commonly used when your computer internet connection goes down, but you need to get online.
Not everyone knows it, but a modern computer operating system is also packed with the same technology that allows for the creation of a WiFi hotspot.
If you haven’t given one a go yet, I highly recommend it. They are not nearly as difficult to set up as a first time user might expect. In fact, in just a few quick clicks—both from a mobile operating system and a computer operating system—you can have the mobile hotspot set up and ready to share the internet connection. What’s more, getting the device to connect to it is probably easier than you were anticipating too.
Creating a WiFi Hotspot With a Device Running On a Version of Windows 10
The first thing you need to do is update your computer to the Windows 10 Anniversary Update because while there was a way to run the WiFi hotspot in earlier editions of the OS that required running commands from the command prompt and didn’t come built into the settings from Windows like it is available post-Anniversary Update.
Click on the “Start” menu followed by the “Settings” gear icon from the left-hand side pane.
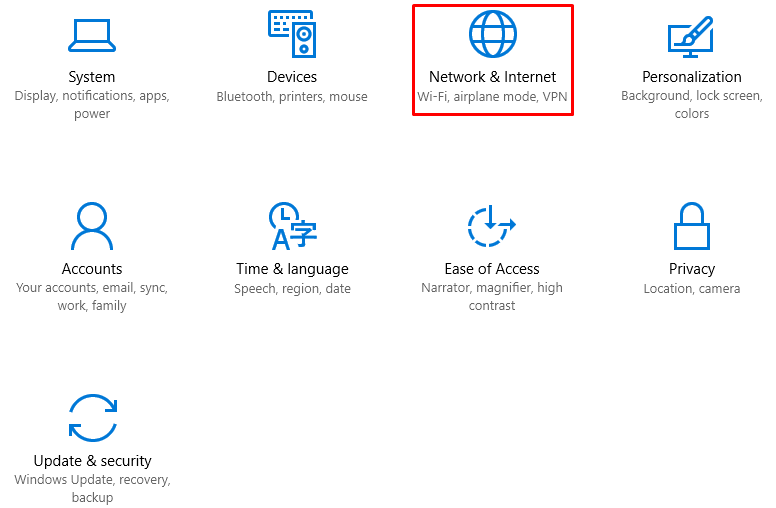
Click on the “Network & Internet” button from the “Windows Settings” page.
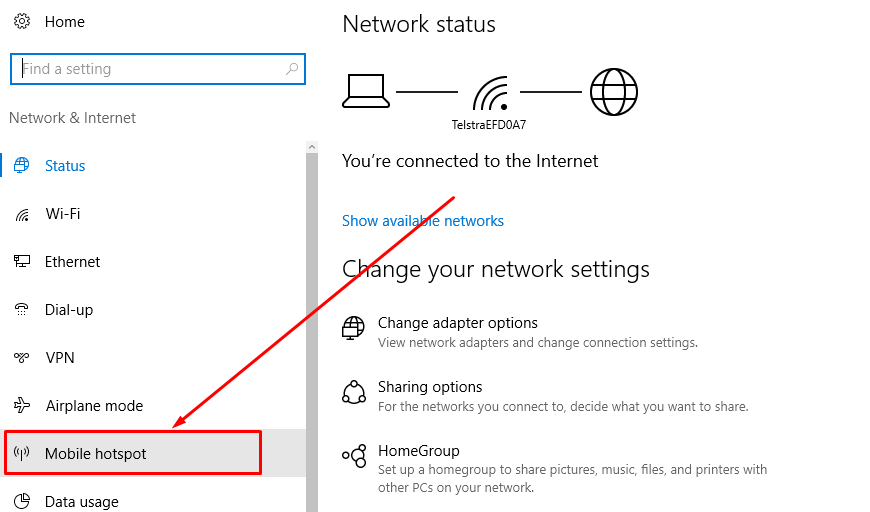
Click on the “Mobile Hotspot” link from the left-hand side pane.
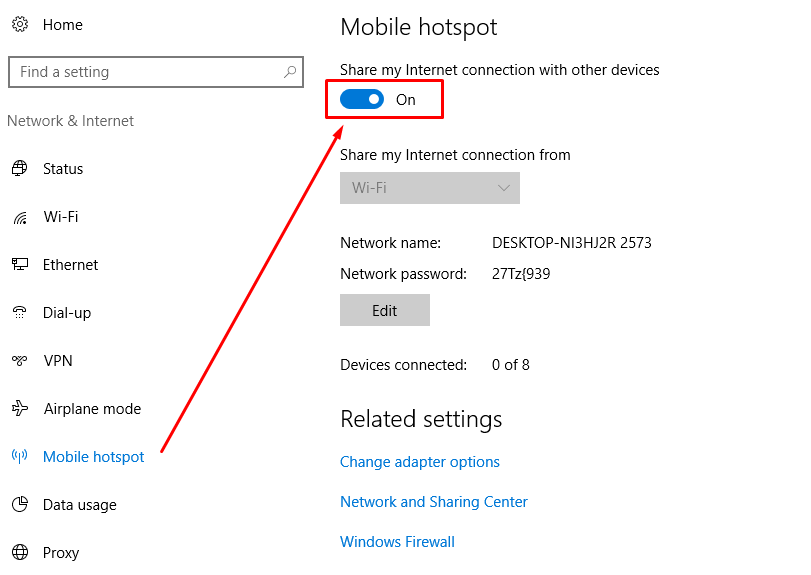
Doing so reveals all of the options related to the Mobile Hotspot from the right-hand side pane.
Click on the toggle that is available under the “share my internet connection with other devices.”
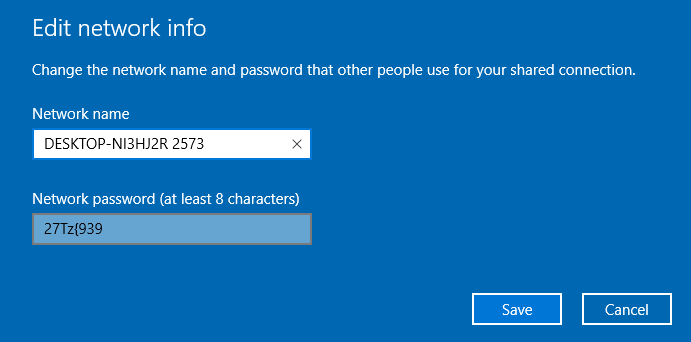
If ever you need to adjust the network settings, you can get that done by clicking on the “Edit” button that is available underneath where it shows the network name and the network password.
There is no need for you to make many changes to these details to get the hotspot working. The network name and the password are assigned to you by Windows, and those are the details you will want to enter into the device that you want to connect to the hotspot. The network name is just there so you can identify it when you see the list of available networks from the device that you want to connect. The password is the thing you might need to enter the first time, so it starts working.
That is everything you need to create a WiFi hotspot by using the Windows 10 operating system that is running on your computer.
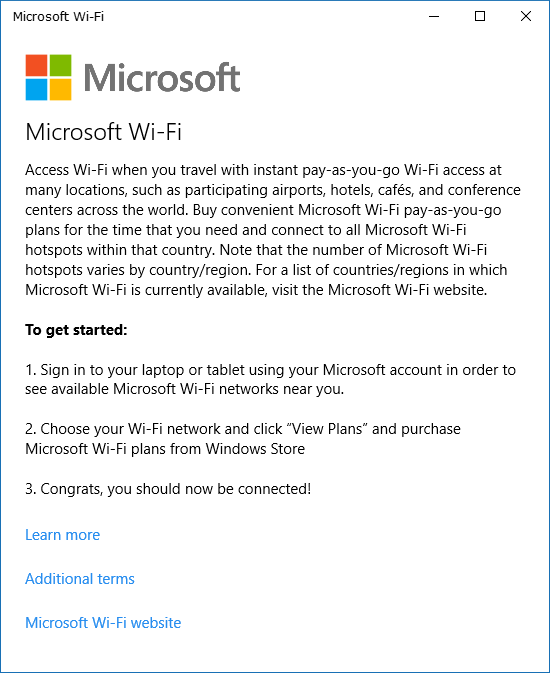
Microsoft WiFi
Another way you can use hotspots is by taking advantage of the hotspots that Microsoft offers all around the world. Sometimes when you go to travel, it can be daunting trying to work out how on earth you are going to get a WiFi connection working. It’s not always because you are conscious of spending money and wanting only to do things incredibly cheaply. You could have all the money in the world and still just struggle to comprehend how to get it done.
The number one reason for the confusion is because there are so many different companies offering you things. For instance, when you go to an airport, it is the airport itself that often gives you the free WiFi so you can connect your device to the internet and do things like text your friends. Then once you leave the airport, it becomes your destination that offers the WiFi instead–not always for free this time, but the WiFi now gets accessed by your accommodation or wherever you are.
Each time you change your WiFi networks—i.e., each time you go from using the airport WiFi to the hotel WiFi—you need to use a different password to get access to that WiFi. It’s a bit silly that the airport makes a password a requirement since it’s being offered for free, but often you do need to come up with these password before you can connect. And you most definitely will need a password when trying to connect to a more private network that you are paying for like in an apartment.
Microsoft WiFi won’t solve all of those problems, but if you like to have your WiFi as hassle-free as possible, then you might want to always connect to Microsoft WiFi when it is available. That way you get familiar with the connecting to Microsoft WiFi and not have to continually search for the different networks wherever you are around the world.
You might also be interested in:
- How to Erase the Data on Microsoft Surface Tablets Without Booting into the Operating System
- How to Change the Desktop Wallpaper in Windows 10
- How to Set a Web Page as a Desktop Background in Windows 10
- How to Install the Windows 10 Anniversary Update
- How to Change the Default Web Browser and Apps in Windows 10
Have something to say? You can contribute to this tech article by leaving a comment below.


