Last Updated on December 26, 2022 by Mathew Diekhake
Fonts play a significant role in how we perceive what is on our computer screens. You might not realize it, but web developers rely on a bunch of different fonts to help them apply some critical touches to design. If you pay attention when you browse the web, you’ll notice that many websites have a different font as the main text. That font is typically one that suits the design of the website. Designers are exquisite at doing this, and they can make a font suit a website correctly. Conversely, people who play with their own web design often struggle to pull it off because it takes knowledge before you can pull it off.
The Windows 10 operating system comes with its own unique font that you see too. This font by default is the Tahoma font. The Tahoma font was created by Microsoft to be used for Microsoft software. However, it’s not the only font that Microsoft has created either. The font that we use here on our website is called Verdana, and it too is based on the work by Microsoft—which is the reason why we are using it. There are heaps of websites that do a similar thing where the font they use has meaning. One of my favorite sites, RedmondPie also uses Verdana because the Redmond company is Microsoft. Likewise, another site I enjoy reading, OSXDaily, uses a font that is only available on OSX devices.
Here’s what you need to change the default font that you see when you’re using the Windows 10 operating system.
How To Change Default Font In Windows 10
Download the ChangeFont zip file and click on the file after it completes downloading above the taskbar.
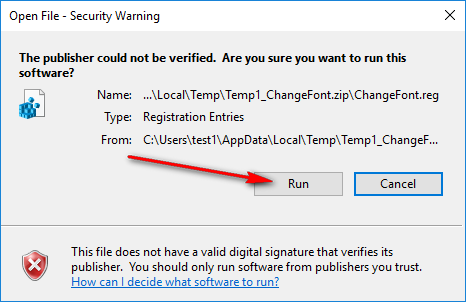
Click on the “Run” button when you get the message that says the publisher could not be verified.
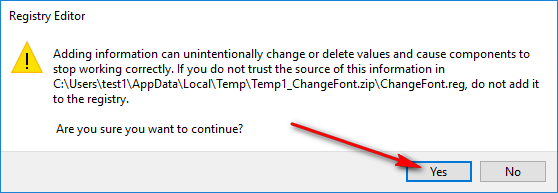
Click on the “Yes” button when the Registry Editor warning message pops up on the display about adding new information to the Registry Editor can change or delete values by accident. It always shows this same warning message every time you install a tool that needs to make changes to the Registry Editor, so it’s nothing to worry about.
Click on the “OK” button after it shows you that the new values and keys for the path ending in “ChangeFont.zip” are now successfully added to the Registry Editor.
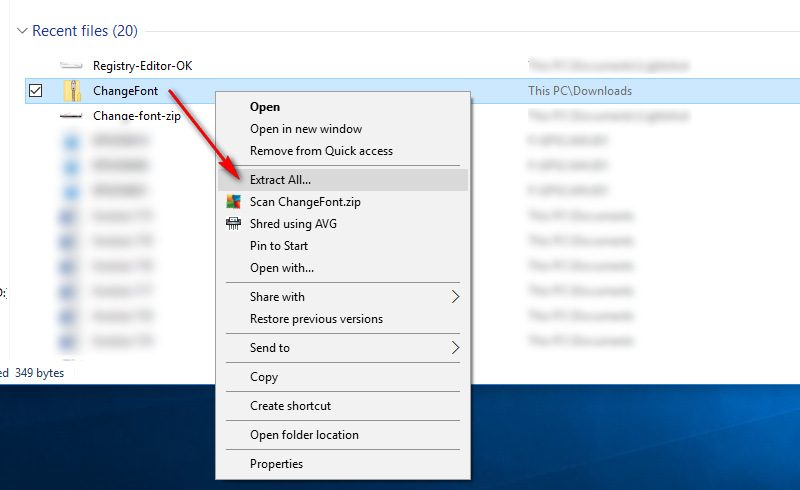
Navigate to the Start menu > File Explorer and then right-click on the “ChangeFont” zip file and choose to “Extract All” from the menu.
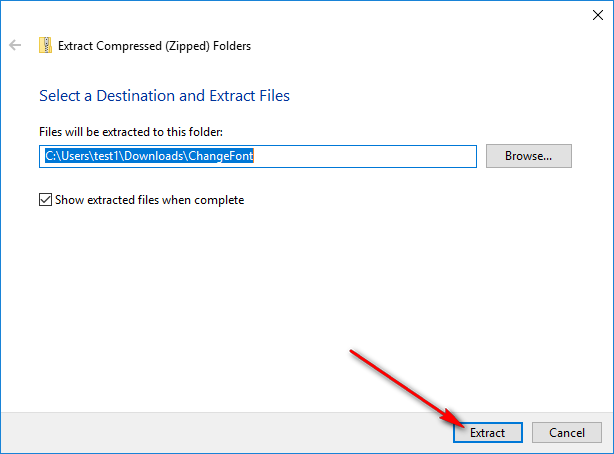
Click on the “Extract” button after you have chosen your folder destination for the extracted contents.
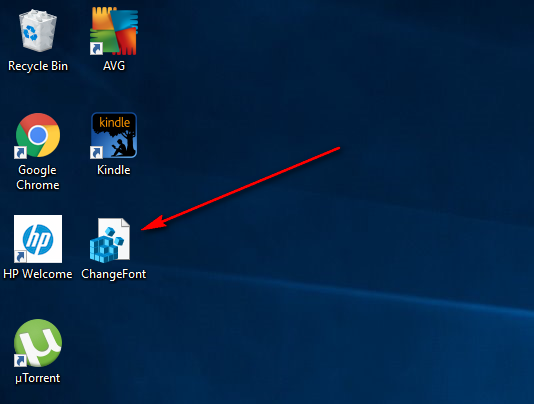
Once it shows you the applications in its folder, click and drag it over to the desktop of the computer. Once there, right-click on it to bring up another menu.
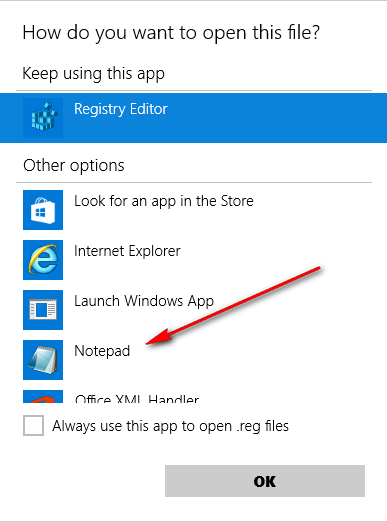
Click on the “Open with” option from the menu to choose what application you want to open it with.
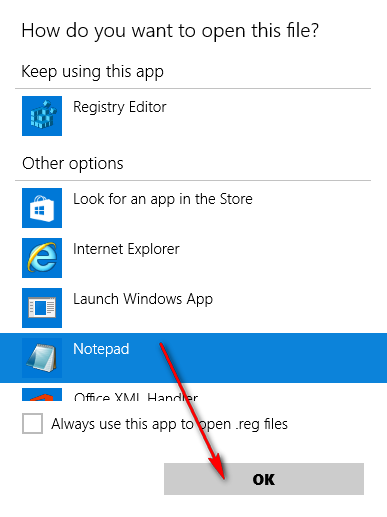
Click on the dots available to extend the menu, and then find the “Notepad” entry.
Click on the “Notepad” entry and then click on the “OK” button at the bottom to open it up with the Notepad application on the Windows 10 computer.
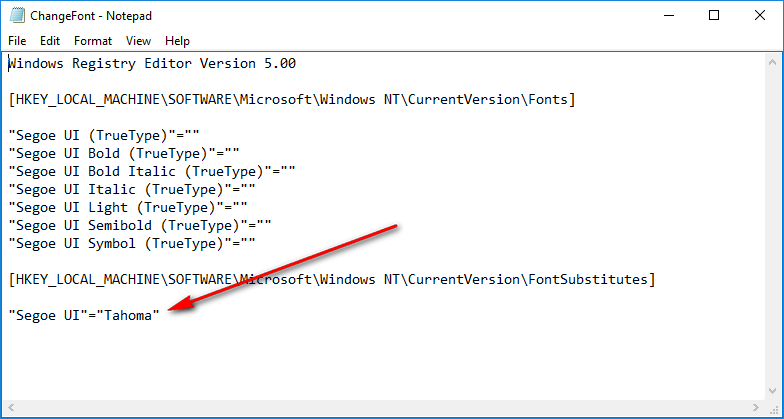
At the bottom of the text is a line that shows you the current font name.
In between the two quote marks, click the mouse cursor inside and then delete the Tahoma letters and replace them with the font name of your choice. In the screenshot below, you can see we have chosen to swap Tahoma with Verdana. You can choose any font that you like.
Once you have changed the name of the font, save it and then log out and back into your Microsoft account again. After you have logged back in, you should see the new font working. If you are finding that your font is not showing up, it might be that you have chosen a font that is not compatible with the Windows 10 operating system, so don’t get too fancy with your selections. You’ll need to stick to the main fonts that are web safe and approved by Microsoft. It’s not going to support the hundreds of fonts that are now available from Google fonts and developed by third-party users with only a small amount of downloads. The Windows 10 font is now changed to the font of your choice. Hopefully, the font you wanted is supported by Windows 10.
Related Tutorials
- How to Add a Search Box to the Start Menu in Windows 10
- How to Change the Look of Windows 10 Icons
- How to Hide a Username and Email from the Windows 10 Login Screen
- How to Add the Standard Full Keyboard to the Touch Keyboard in Windows 10
- How to Rename a Microsoft Account or a Local Account in Windows 10


