Last Updated on February 25, 2024 by Mat Diekhake
The following tutorial demonstrates how to change the default Downloads folder from “Downloads” to an alternative such as “Documents” in the Microsoft Edge browser when using a version of the Windows 10 operating system.
When you download a file from the internet, the file by default will end up in the Downloads folder. This Downloads folder is created by default and found within File Explorer to try to make things as simple as possible for you. That said, there will be times when some people may wish to change the default download location—for instance, if you deal with a lot of work-related documents and you’re always dealing with the Documents folder only, you may wish for the Documents to become the default downloads folder as well.
Microsoft Edge is a cross-platform web browser developed by Microsoft. It was first released for Windows 10 and Xbox One in 2015, then for Android and iOS in 2017, for macOS in 2019, and as a preview for Linux in October 2020. Edge was initially built with Microsoft’s own proprietary browser engine EdgeHTML and their Chakra JavaScript engine, a version now referred to as Microsoft Edge Legacy.
The Chromium version of Edge, often just referred to as the “new Edge” now, has replaced the Legacy version since March 9, 2021, when it was discontinued for good. This is most certainly for the better as the new Edge is an obvious choice over the Legacy variant. Edge is now a lot like Chrome. That is a good thing because Chrome was the undisputed king of web browser performance. We don’t use Edge as much as the Chrome we have bonded with for so long now but still do use it as a secondary browser and almost daily.
How to Change Microsoft Edge Download Folder via Download Settings
Since the files you download from the internet are downloaded through the browser, the browser can change the location of where the file will be directed on your operating system. The way Edge does it is via the Downloads Settings. Here is where you can find it:
1. Open the Microsoft Edge browser by clicking on the Edge icon in the taskbar.
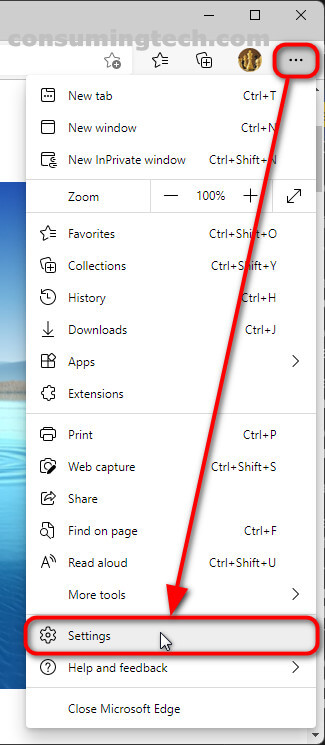
2. Open Edge and click on the three-dotted Settings and more button in the top right corner of the browser window and then click on the Settings link. (Click to enlarge the screenshot below.)
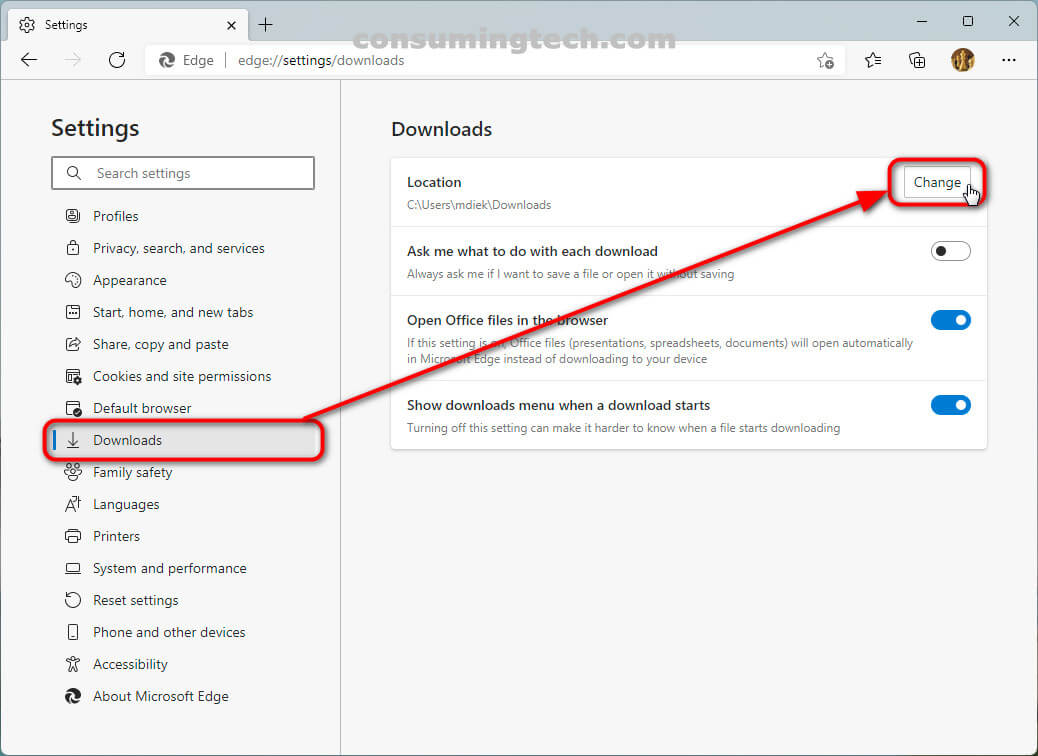
3. Click on the Dowloads link from the left menu and then under the Downloads heading in the right side of the window, click on the Change button next to the Location.
4. You will then be directed through to File Explorer, the location where all files flow through. From File Explorer’s left menu, click on the folder you want the files to be directed to instead of the Downloads folder (i.e., the Documents folder), and then click on the Select Folder button at the bottom of the File Explorer window.

How to Change Microsoft Edge Download Folder via Registry Editor
It’s also possible to change where files end up on the computer by making the change within the registry editor. If you do it this way, it does not matter if you have not made any changes to the browser settings using the method above; the files will end up in the location you choose from the registry. Here is how you can do it this way:
1. Open the Registry Editor app. Here are all the ways in which you can open the Registry Editor in Windows 10: How to Open and Use Registry Editor in Windows 10 [Tutorial].
2. Navigate through to the following location:
HKEY_CURRENT_USER\Software\Microsoft\Windows\CurrentVersion\Explorer\User Shell Folders
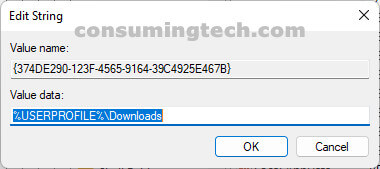
3. With User Shell Folders selected, double-click on the name that is on the same line as the %USERPROFILE%\Downloads data (highlighted in yellow).

4. In the Edit String dialog box, you will see the Downloads folder currently selected. Delete it.
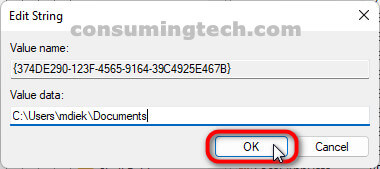
5. Replace the Downloads folder with the location in File Explorer that you want to be the next downloads location for your files.
In conclusion, that is how to change the location of the Downloads folder when using Microsoft Edge in any version of the Windows 10 operating system.
Related Tutorials
- How to Delete Cookies in Microsoft Edge in Windows 10 [Tutorial]
- How to Enable/Disable Extensions in Microsoft Edge [Tutorial]
- How to Hide/Show Search Box in Internet Explorer 11 [Tutorial]
- How to Install/Uninstall Internet Explorer 11 [Tutorial]
- How to Add/Remove ‘Open Microsoft Edge’ Tab in Internet Explorer 11 [Tutorial]
- How to Import Bookmarks from Chrome to Microsoft Edge in Windows 10 [Tutorial]
- How to Import Bookmarks from Firefox to Microsoft Edge in Windows 10 [Tutorial]
- How to View Microsoft Edge Downloads in Windows 10 [Tutorial]