Last Updated on February 25, 2024 by Mat Diekhake
Windows 10 gives you direct access to the Microsoft Store from an icon in the taskbar and by searching for it with the search box in the taskbar at the bottom of your screen. The Microsoft Store allows for people who are signed in to the Windows 10 operating system with Microsoft accounts to download and install apps onto their computers very quickly and with little fuss.
You can configure access to the Microsoft Store app from the Local Group Policy Editor, from AppLocker, and from the Registry Editor.
The following tutorial demonstrates how to allow or block access to the Microsoft Store application when you’re using a version of the Windows 10 operating system. The tutorial applies to users of Windows 10 and Windows 10 mobile
Method One: How to Allow/Block Access to Store App in Group Policy
Here is how you can allow and bock access to the Microsoft Store application from the Local Group Policy Editor in Windows 10:
Note: The Local Group Policy Editor is only available to those who have a computer running on Windows 10 Pro, Windows 10 Enterprise or Windows 10 Education.
1. Type gpedit into the search box in the taskbar and then click on the Group Policy result that appears under the Best match section.
2. In the console tree of the snap-in, navigate through to the following folders:
Computer Configuration\Administrative Templates\Windows Components\Store
3. In Store’s right pane, double-click on Turn off the Store application policy so you can edit it. (click to enlarge screenshot below)
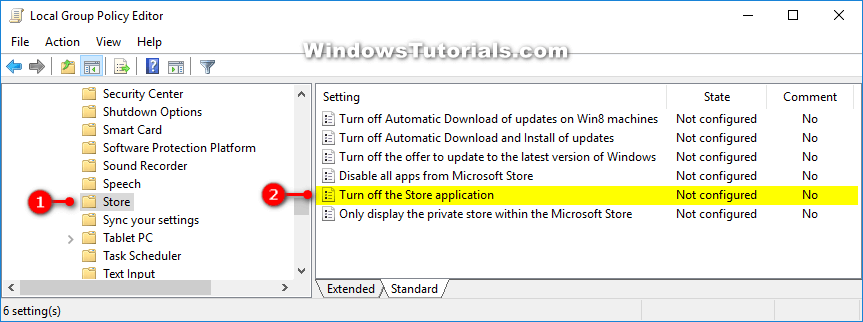
4. Choose between Not Configured (to allow access to the Store app), Enabled (to block access to the Store app) and Disabled (to allow access to the Store app), and then click on the OK button at the bottom of the policy window to save the changes.

You can now close the Local Group Policy Editor window.
Method Two: How to Allow/Block Access to Store App from AppLocker
Here is how you can allow and block access to the Microsoft Store application from AppLocker in Windows 10:
1. Type secpol into the search box in the taskbar and then click on the Local Security Policy desktop app when it appears under the Best match section.
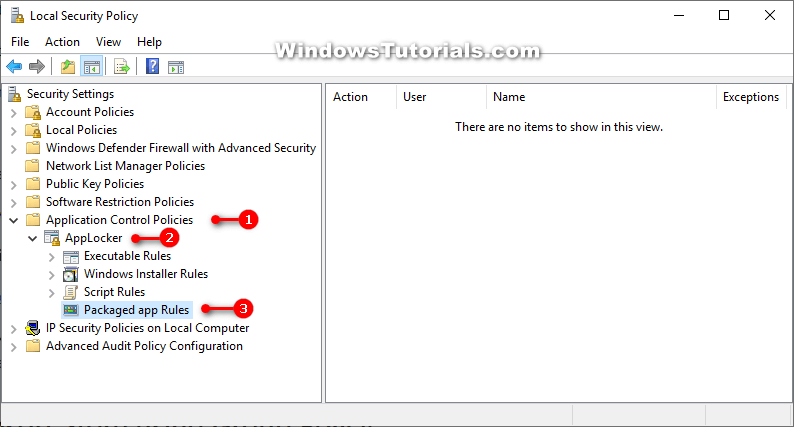
2. In the console tree of the snap-in, click on Application Control Policies, click AppLocker, and then click Packaged app Rules. (click to enlarge screenshot below)
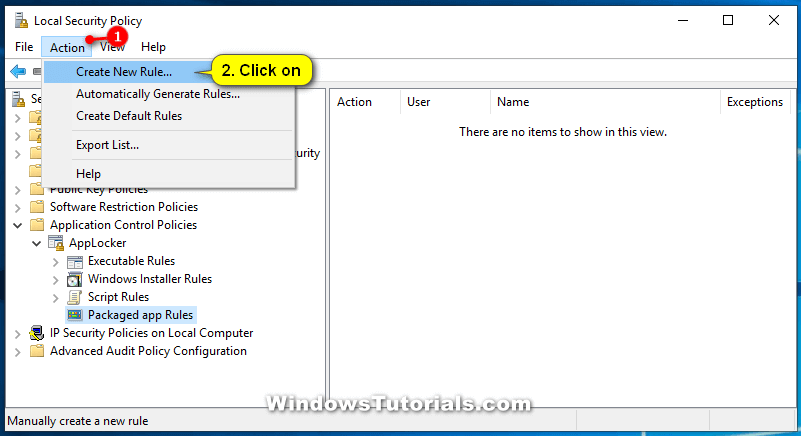
3. From the Action menu, click on Create New Rule… or right-click on Packaged app Rules and then click on Create New Rule…. (click to enlarge screenshot below)
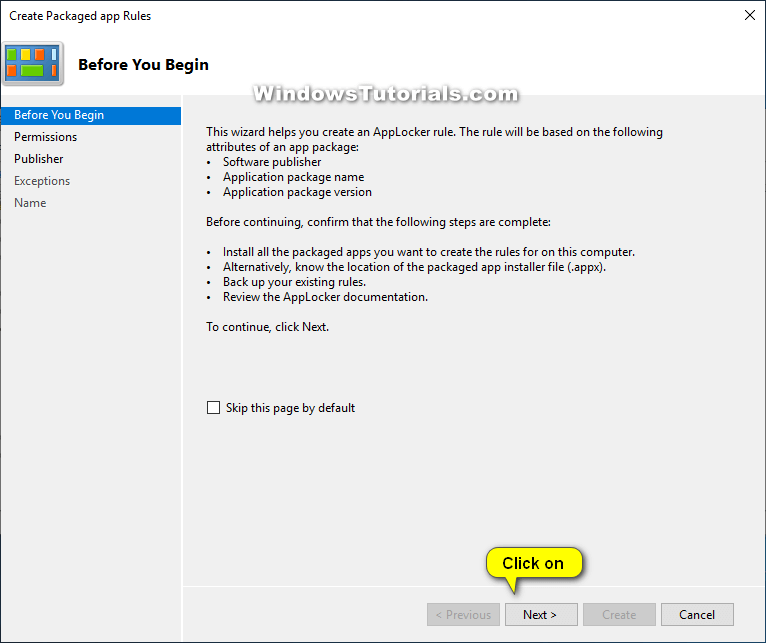
4. From the Before You Begin screen, click Next.
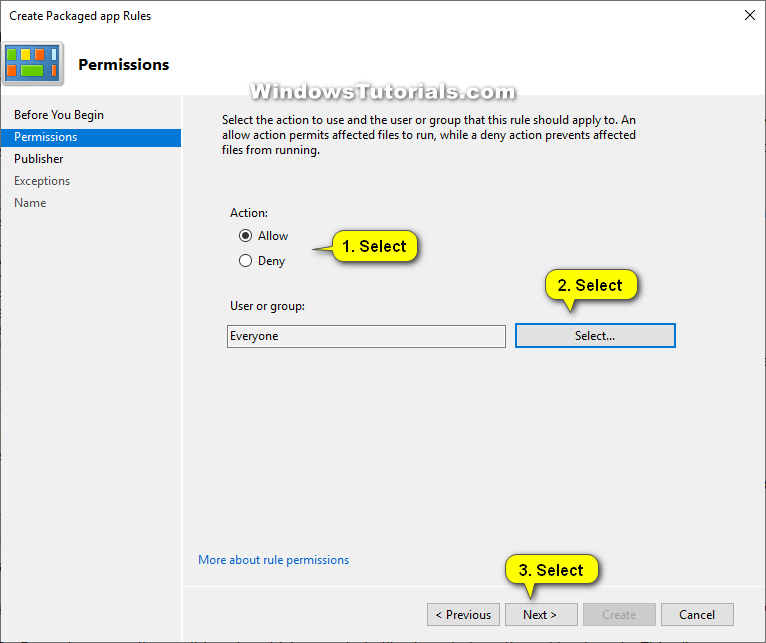
5. From the Permissions screen, choose between Allow or Deny based on what you want to do with the Microsoft Store app and then click Select.
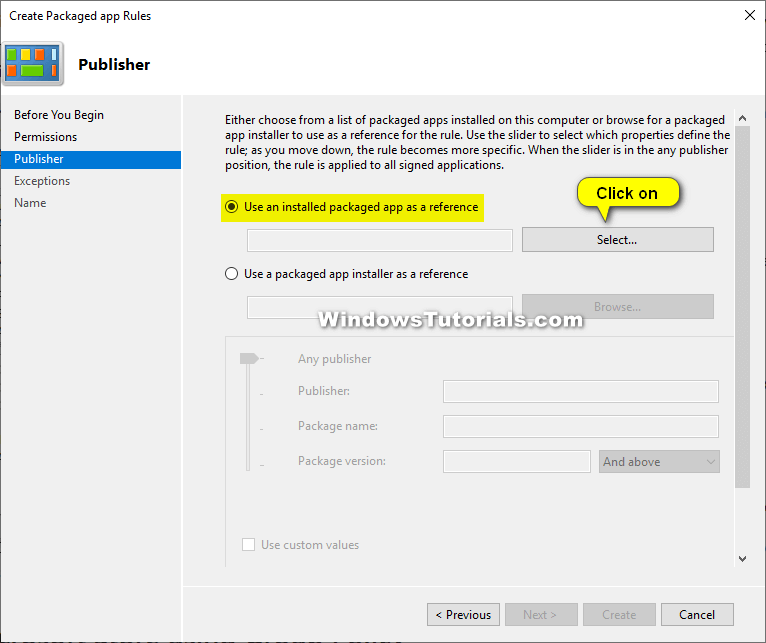
6. From the Publisher screen, select Use an installed packaged app as a reference and then click Select.
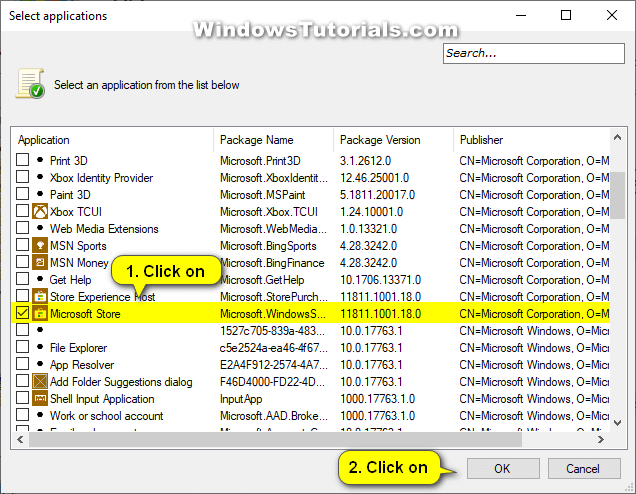
7. Scroll down the last of applications (expanding the application column if you need to) and then select the Microsoft Store before clicking OK.
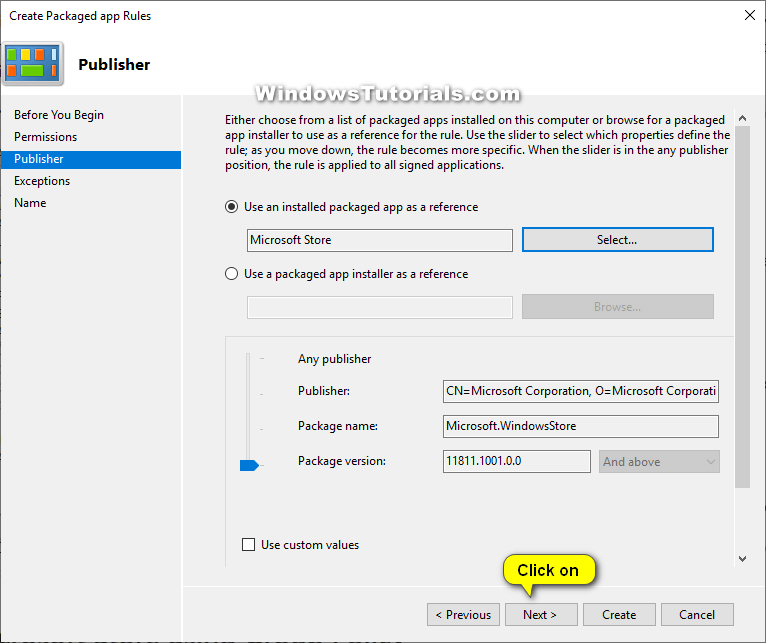
8. From the Publisher screen, you should now see the Microsoft Store app selected. Click Next.
From the list of exceptions, you can choose to specify the conditions you want to exclude files from being affected by the rules that you have applied. This is an optional feature; you don’t have to add any exclusions if you don’t want any.
You can now close the Local Group Policy Editor if you like.
Method Three: How to Allow/Block Access to Store App in Registry Editor
Here is how you can allow and block access to the Microsoft Store application from the Registry Editor in Windows 10:
Note: The option to allow or block access to the Microsoft Store application is only available in some of the older versions of Windows 10. The option has since been removed.
1. Open the Registry Editor app by typing Regedit into the search box in the taskbar and then clicking on the Registry Editor desktop application.
2. From Registry Editor’s left pane, navigate through to the following registry keys:
HKEY_LOCAL_MACHINE\SOFTWARE\Policies\Microsoft\WindowsStore
3. In the right pane of the Windows Store key, create a new DWORD value and name it RemoveWindowsStore.
4. Open the new RemoveWindowsStore DWORD by double-clicking on it and then change the value to 1 if you want to disable the Microsoft Store or 0 whenever you want to re-enable it again.
5. Restart the computer for the changes to take effect.
That’s all.