Last Updated on December 26, 2022 by Mat Diekhake
A search index is basically anything that is indexed by the Cortana search field, found in the bottom lefthand side of the taskbar, not far away from the Start button. Google search has an index of its own that most people are familiar with, after opening a web browser, which is like a search index for the internet. Windows 10 has one as well—though only for searching for files on your computer and not the internet this time—when you use its search box at the bottom of the screen to pull up stuff that’s installed on the computer, like applications, for instance.
Much of the hassle of having to navigate an operating system is quickly taken away when you use the search index that it comes with. It seems as though the people behind Windows 10 feel the same way since the search field is available right from the taskbar for the first time in Windows’ history.
Most people use the search index in Windows 10 for apps, but you can also pull up lots more—it offers you the chance of pulling up queries from a lot of locations. Windows 10 also allows you to add and remove locations from its search index. This process is often referred to as rebuilding the search index. When you choose to remove something, it is then taken away from the search index so if a user was to try searching for it, it would no longer be seen. It’s also possible to bring back what you took away from the index should you change your mind again in the future.
It’s not all that common for people to remove stuff from the Windows 10 search index just for the sake of not being able to browse for it. More often than not when someone is choosing to remove something from search, they are doing so to rebuild it and increase the search speed. Just like anything to do with websites and operating systems, there more things you have the slower it loads, and that’s why people sometimes choose to optimize the search index that Windows has.
Additionally, at times people want to rebuild the search index because when they browse for something, it isn’t retrieving the right results. If you ever find yourself in a situation like that, then you can follow this guide for adding and removing the locations as well, and it will help you rebuild that index so the right results should start showing up when you search for files from locations.
How to Add/Remove Locations for Search Index in Windows 10
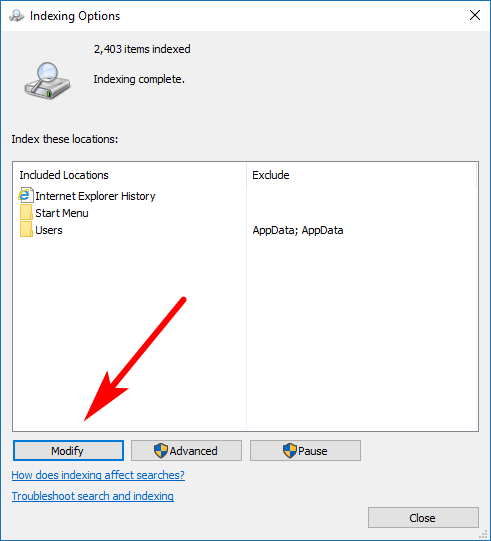
You can add or remove locations to be included in the search index by using the Indexing Options from the Control Panel. To get there, open the Control Panel so that it is showing the classic view with the small icons and then click on the “Indexing Options” link. You’ll then see the same picture as below where you can then click on the “Modify” button.
Under the Change selected locations heading is a bunch of different drives and folders that are on your computer. Click through to the one where you know the location is that you are looking to have included in the search index. For example, if you wanted to include something from your File Explorer, you would click on the “Windows C: drive” to find those folders.
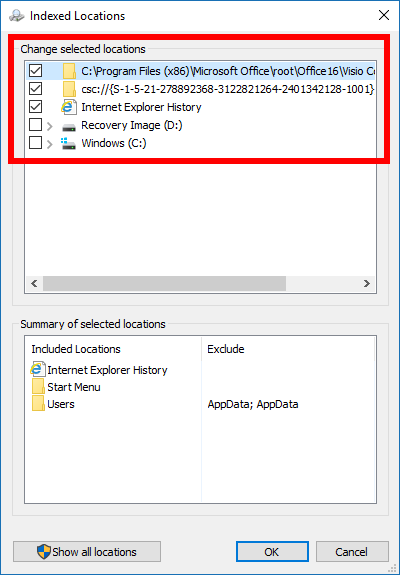
Scroll down the list of folders until you find the ones you want to be included in the search index and then click on the checkbox that’s to the left of them, so there is now a checkmark applied to each of the boxes. Click on the “OK” button at the bottom of the Indexed Locations window to apply the changes and head back to the Indexing Options page.

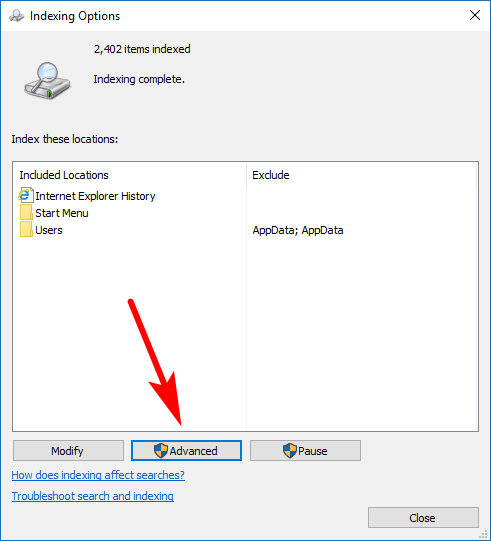
You’ll notice another button down the bottom, just to the right of the Modify button called “Advanced” that you can click on to get to the advanced features. It’s in here where you’ll likely find the things that you weren’t able to find from the Modify button.
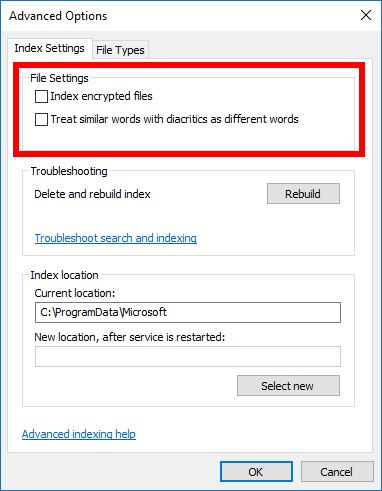
For instance, you can choose to get the encrypted files indexed by looking under the File Settings heading. You will also find stuff for rebuilding the search index entirely—that’s something of use to you if you play around with the search index and have noticed that it has now got some problems that need fixing, almost as if you were to be resetting it and starting fresh again. You’ll also notice the File Types tab at the top of the window which is there for you to select other files types to be included if you wish.
In its default state, the search index is designed to load incredibly quickly and offer what it thinks you’ll mainly need at the same time. For it to be able to load so quickly, it needs not to include a lot of the extras that some people might actually want to be included, and those are the times you might want to head into the Indexing Options area and make some changes to suit your needs. You can always use the button from the Advanced Options to rebuild the search index again which will reset the clock on it and have it back the way it first was before you played with it if you ever want to get back to the Windows default search index as well. That same rebuilding button is also handy if you ever need to troubleshoot the search index.
You might also be interested in:
- How to Open Context Menu for Taskbar Icons in Windows 10
- How to Set Up Local Domain Controller in Windows Server 2016
- How to Set CPU Process Priority for Applications in Windows 10
- How to Encrypt Single Files and Folders in Windows 10
You can subscribe to our RSS, follow us on Twitter or like our Facebook page to keep on consuming more tech.