Last Updated on November 5, 2016 by Mat Diekhake
People residing in India that own the Duos 2 S7582 received the DDUAND1 Jelly Bean update over the air recently and now we have the file that allows users to update it manually instead. What we have here is the preferred method for several reasons. Two of the most popular ones are because they are not currently running official firmware and, therefore, they do not see the OTA updates or they are currently outside of India and want the same firmware on their devices. Both of those methods will work for you again here because it does not matter whereabouts in the world you are as long as you have the correct device it can be installed by following the instructional guide below.
We have been issued some key information if you like to look at the fine print details. The product code is INU, the PDA is S7582DDUAND1 and the CSC is S7582ODDANC1. As I previously mentioned the country release is India and the build date is Mon, 21 Apr 2014.
Checklist
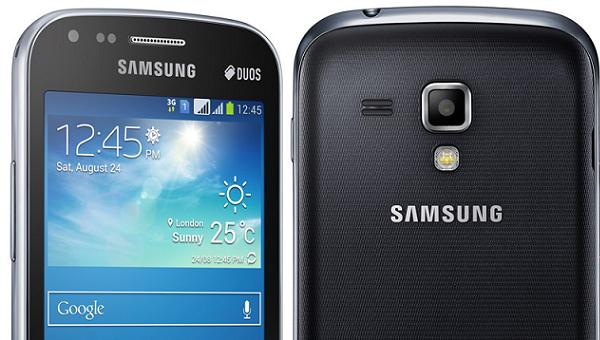
This new official Android 4.2.2 Jelly Bean is only available for the Galaxy S Duos model number S7582. With that in mind, it is important you do not try and install it on any other device or model number because it will brick the device.
Backup all of the data before starting the flashing of the file below. The quickest and easiest way to do this is by syncing with your Samsung Kies account if you have one already. if not, go and check it out. If you find what I said confusing the next best thing is to navigate using the buttons and backup to the device’s internal storage. Alternatively you can buy external storage up to 64 GB with a MicroSD card. For many people, this will be better than the internal option because it only comes with 4 GB of internal space and that is not much. Anyway, we do not expect data to be corrupt or missing during the guide, it is just to take precautionary measures and do things safely.
Keeping the previous step in mind, we are not liable for any damages or loss of data that might occur during the following of this tutorial. If something does go wrong you have only yourselves to blame for making the decision to follow it. We do out best to create great information and want to help the best we can and take extensive amounts of hours in learning all the new technologies so we can be experts in our assistance. However, we do not give a written guarantee with our work.
This new update is fine to use on rooted and unrooted Android devices. However, if you do have root access already, that will be revoked.
The new DDUAND1 build has been released with confidence and it is safely declared available for daily use for all owners.
To install this firmware, we will be using the ODIN application. This program has been made for Windows PC’s and won’t work on Apple Mac OS X or Linux-based machines so do not try and run it on them.
Navigate to Menu > Settings > Developer Options. In Android 4.2, the develop option tab is hidden. If this is the same for you go to the Settings > About Phone and tap on the build number seven to 10 times to unlock it. It will start counting you down and let you know how many “taps” are required still before it is unlocked when you get close!
Turn off antivirus or any other security software that might be running in the taskbar. It is rare for somebody to be using the Windows OS and not be running antivirus programs so double check this if you are on a friends PC and not your own. Hovering the mouse cursor over the tray and icons will let you know if there is antivirus installed. If it is a different brand name compared to the one you use at home then the icon will look different. We recommend temporarily disabling these because they can interfere with our production for the time being.
Make sure you have up to date Samsung USB drivers to make a clean connection. If you do have any issues with ODIN registering the device then this will likely be the reason. If you used Kies then you can skip this because the drivers are included!
How To Install Android 4.2.2 S7582DDUAND1 JB On The Samsung Galaxy S Duos 2
1. Verify your device by going to System Settings >About Phone. Now you can make sure it is the correct model number.
2. Download ODIN 3.09 here.
3. Download the DDUAND1 firmware file here.
4. With the smartphone turned off already, boot it in Download Mode by pressing and holding Volume Down + Power + Home.
5. Start the ODIN program so it is running. Make sure it is working with administrator permissions by right-clicking on the icon.
6. If you charge the phone up daily you will likely use the USB cable for this. Get the same cable and plug one end into the phone and the other end into the PC.
7. Look for a message appearing inside of ODIN that says “Added.”
8. Now that we know it has been successful we can start uploading the files.
9. Click PDA and upload the “Code” file.
10. Click the Phone button and upload the “Modem” file.
11. Click the CSC button and upload the “CSC” file.
12. If you found a pit file inside then upload it to the pit area.
13. ODIN will already have default settings running. Check that the F. Reset Time and Auto reboot is marked and that it is representing the “on” position.
14. Click Start when you are ready. It will now start flashing the file. Wait patiently until it is finished without touching the computer or handset.
15. When done it will say “pass” on the screen.
16. Shut down ODIN and disconnect the device from the PC properly by clicking the “safely remove hardware” icon in the taskbar. It is usually in the bottom right corner. Then click USB mass storage and proceed to stopping the process. The next screen will say it is now safe to disconnect. Now unplug the device from the PC and it is finished.