Last Updated on December 26, 2022 by Mat Diekhake
If you are one of those people who finally said goodbye to the old Internet Explorer web browser once you found out that there are other portals to the internet like I did several years ago now, then you might have made the switch to the Google Chrome web browser as your browser of choice.
If you are used to using Google Chrome, then you will notice some differences with browser extensions. The Google Chrome browser shows the extensions (or plugins) that are installed in the top right corner of the screen so that they are visible there at all times.
![]()
The Microsoft Edge browser, on the other hand, does not show them until you click on the three dots and then look under where it says extensions in the menu. So, you could have fifteen Microsoft Edge extensions installed, open the Edge browser and not see any symbols for any of them. That’s a good way of doing things, because if I had more than the handful that I used for my Chrome browser it would be overcrowded. And perhaps that is a reason why I haven’t bothered to install more.
Anyone who isn’t sure how to install the extensions in Edge yet can check out or guide that demonstrates how to install Microsoft Edge browser extensions in Windows 10. Once you have those extensions that you wanted to be installed, then there might come a time when you either would prefer disabling them or completely uninstalling them. This guide shows you how to do that.
For the most part, there isn’t much difference in turning them off or uninstalling them. You don’t need to completely uninstall the Edge browser extensions to reap the benefits of better performance when using the browser. Moreover, any problems that might be caused by conflicting extensions will be fixed when you disable the extension. Thus the only real reason to uninstall a browser extension is if you want to hide the fact that you ever had one installed i.e. you decided to install an ad block extension and then needed to delete it before you father uses the computer next because he works in advertising.
Turning off the extensions in Microsoft Edge in Windows 10
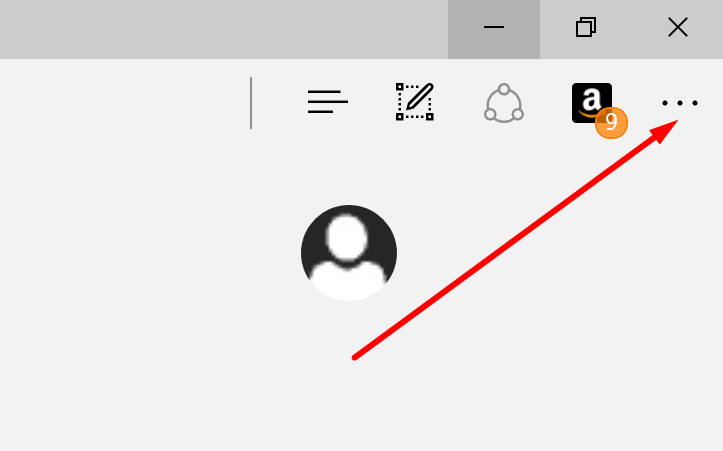
Open the Microsoft Edge web browser and then click on the three dots available from the top left side.
Hover the cursor over the extensions that you want to turn off and then click on the gear icon that becomes available.
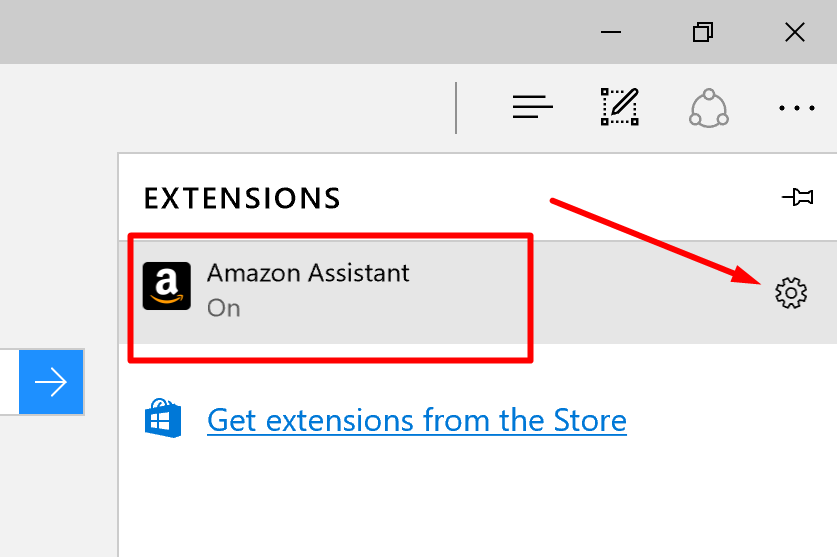
Click on the “Extensions” option from the drop-down menu.
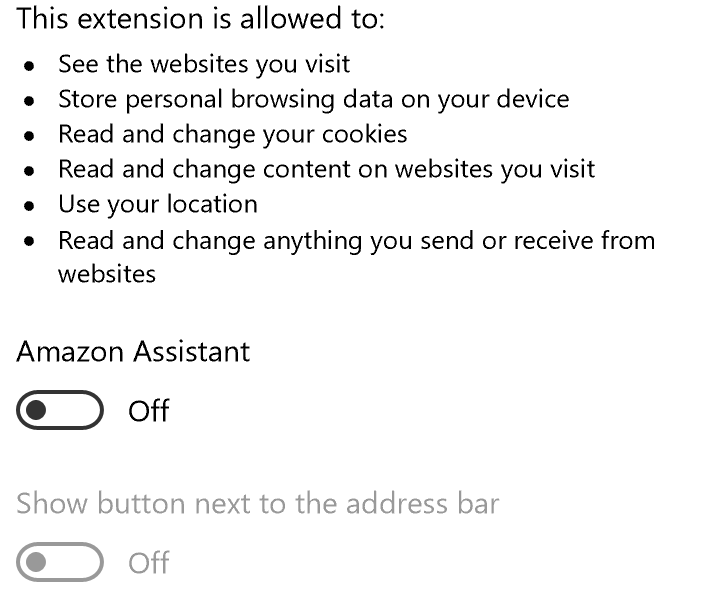
Look toward the bottom for the toggle switch.
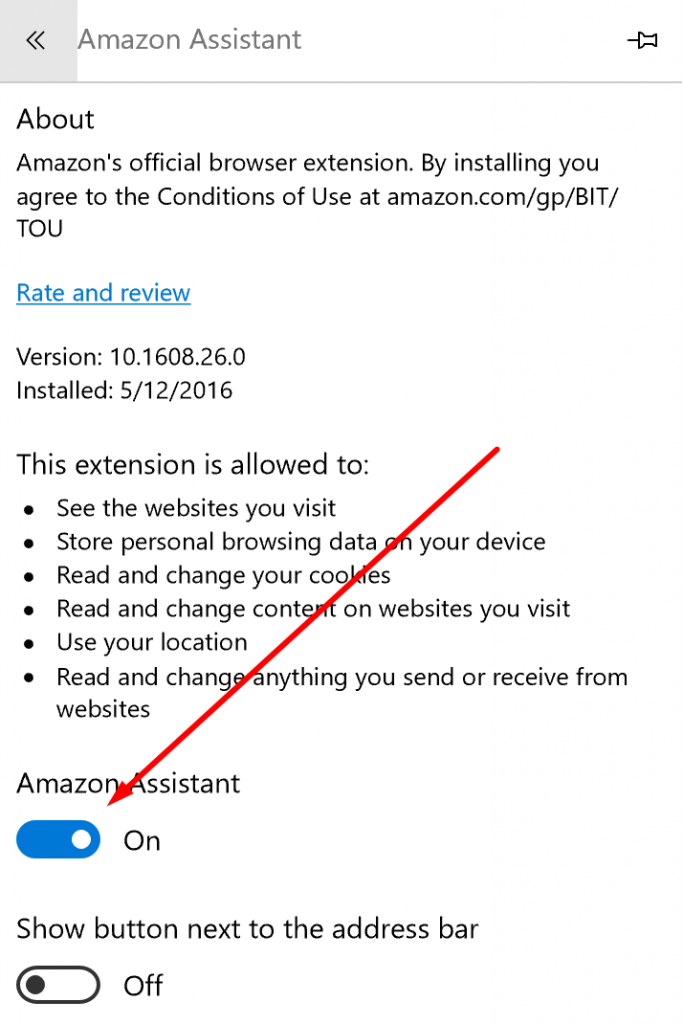
Switch the toggle to the “Off” position and then the extensions is turned off.
Uninstalling the extensions in Microsoft Edge in Windows 10
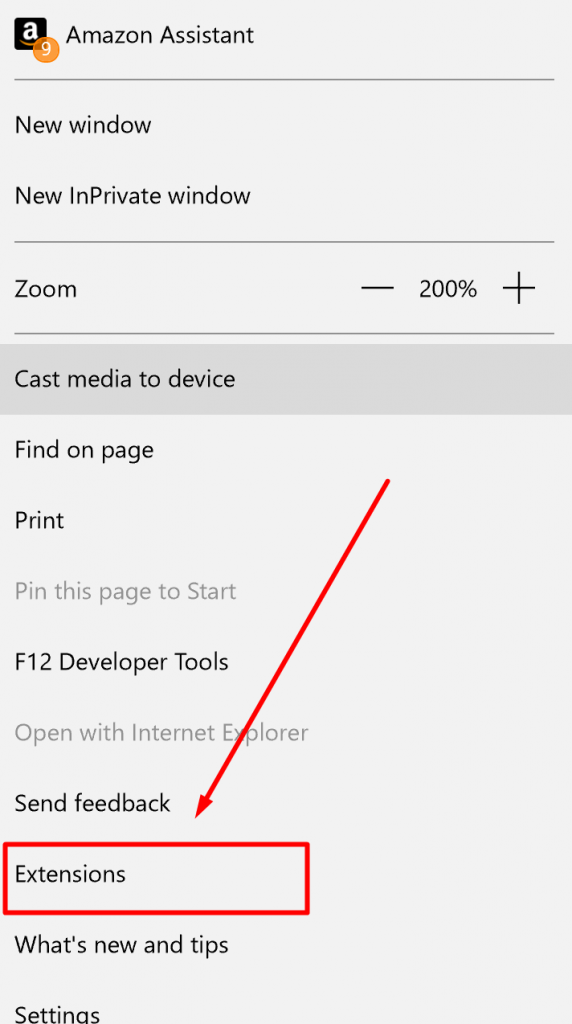
Open the Microsoft Edge browser again and click on the three dots that is available from the top right corner of the display.
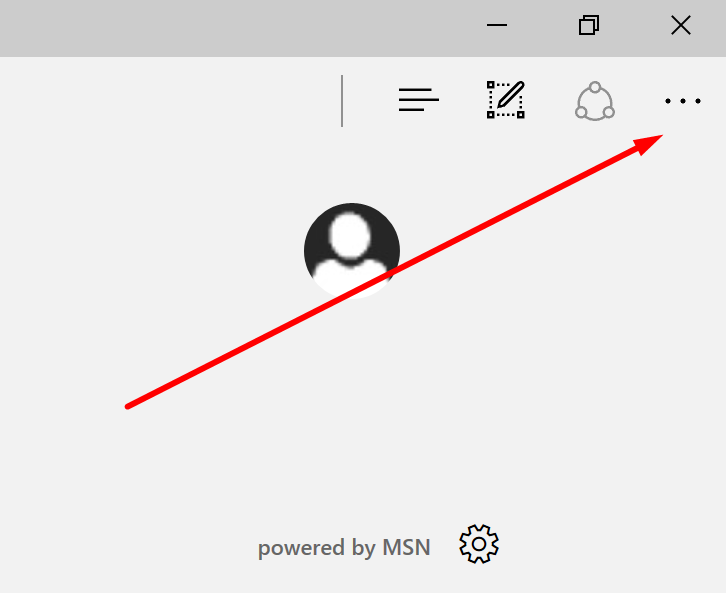
Hover the cursor over the extension that you want to be turned off and then click on the gear icon that becomes available.
![]()
Click on the “Extensions” option from the drop-down menu to open up the option for the extensions again.
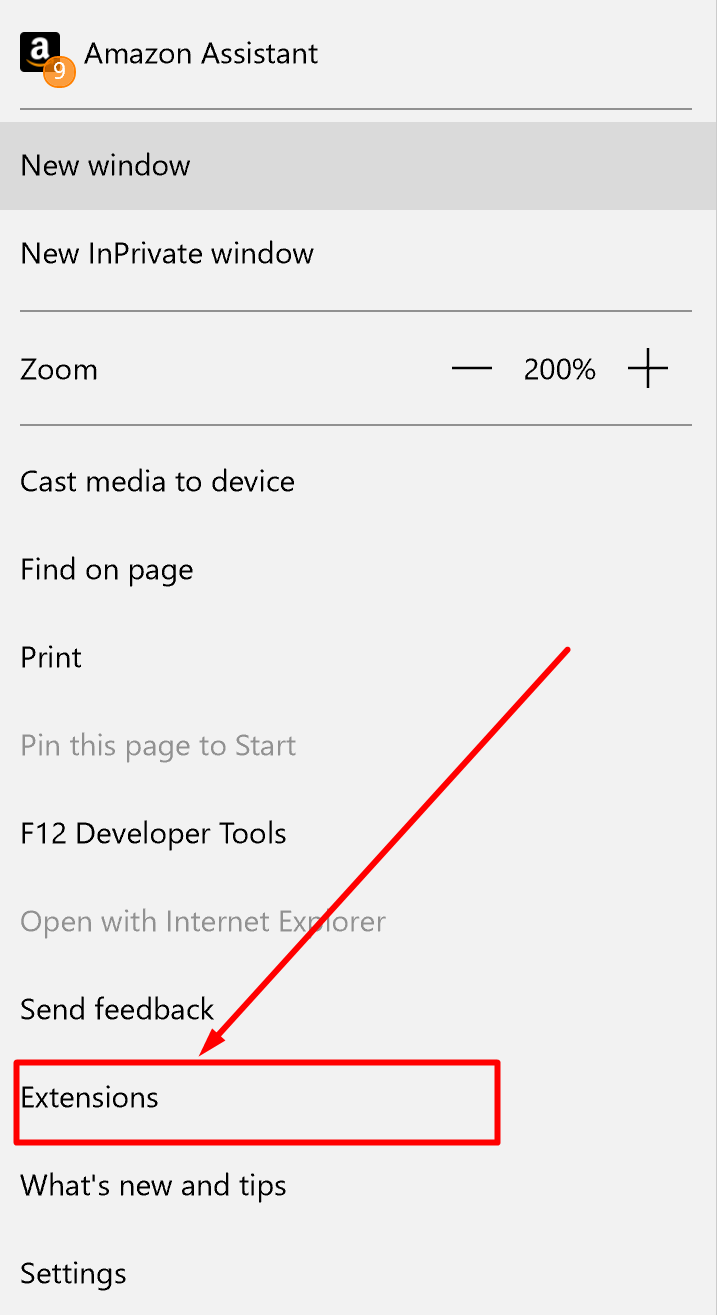
Look all the way to the bottom of the menu for the “Uninstall” button. That button is there for every extension, and if you click on it, it uninstalls only the extensions that you initially clicked on to enter the settings for the extension—in my case, that is the Amazon Assistant extension.
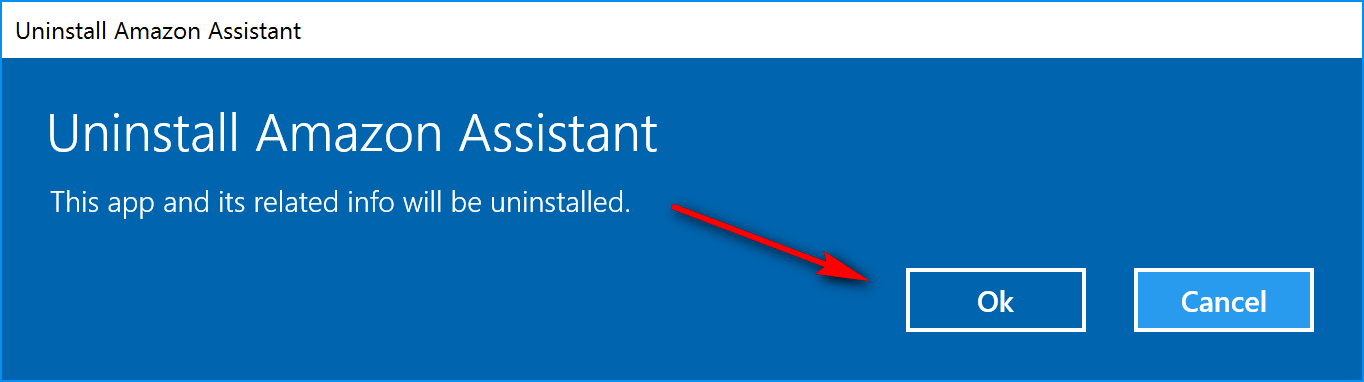
 Click on the “OK” button from the Uninstall option that comes up on the screen.
That is everything you need to completely uninstall or just temporarily turn off the Microsoft Edge browser extensions.
You might also be interested in:
- How to Stop Apps from Accessing the Webcam in Windows 10
- How to Turn on the New Mail Notification Banner so Opening the Mail App is No Longer Required
- How to Clear the Windows Update Cache in Windows 10
- How to Change the Default Web Browser and Apps in Windows 10
- How to Install the Windows 10 Anniversary Update
Have something to say? You can contribute to this tech article by leaving a comment below.