Last Updated on March 27, 2017 by Mat Diekhake
macOS Sierra brings some enhancements regarding managing storage on the Macs. One of the newly introduced features in the Sierra is that you can now upload all of your Documents and Desktop files to your iCloud storage and the process happens automatically. You don’t need to manually upload the documents as they are automatically synced between your Mac and your iCloud Drive account.
Since all those files are uploaded to the iCloud storage, you can access those files from any device and any part of the world. All you need is a web browser and your iCloud login details, and you’re ready to go.
The feature that enables auto upload of Documents and Desktop files to the iCloud storage doesn’t come turned on by default, so you’ll need to go into the system preferences panel and turn on the option from there manually to begin syncing your Mac files.
The following guide should teach you how you can enable the feature on your Mac:
Syncing Desktop and Documents Folders to iCloud Drive in macOS Sierra
To do the procedure, all you’re going to need is access to your Mac.
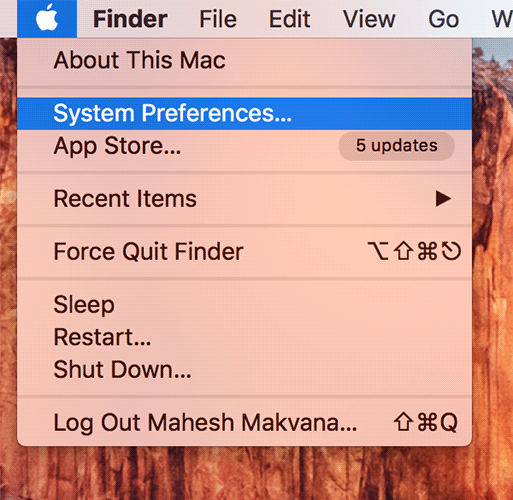
1. Click on the Apple logo in the top-left corner of your screen and select the option that says System Preferences. It will take you to the settings panel for your Mac.
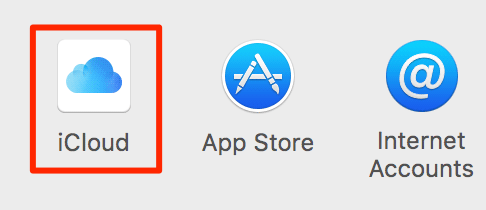
2. When the settings panel opens, click on the option that says iCloud. That’s where all of the iCloud related settings are located.
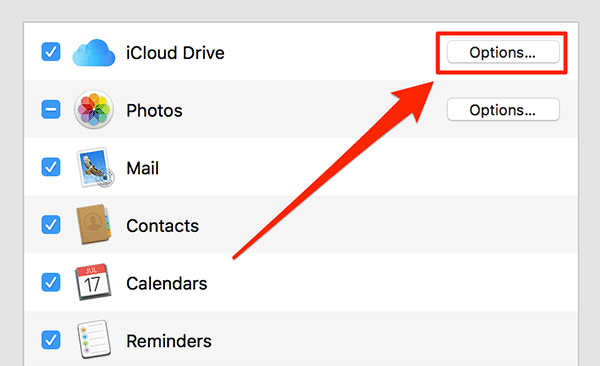
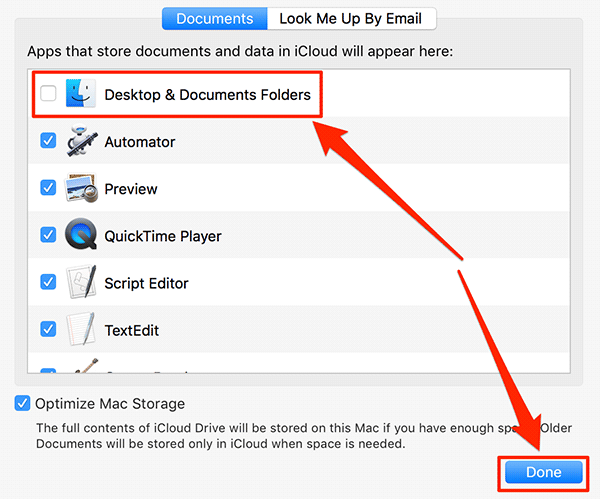
3. On the following screen, you’ll see a list of the tools integrated with your iCloud account. What you need to do here is click on the button given next to iCloud Drive and labeled as Options. It will take you to the iCloud options panel.
4. On the screen that follows, you’ll see all the data that is synced to your iCloud account. From the options available to you, checkmark the checkbox for Desktop & Documents Folders. That’s the option that auto-uploads your Documents and Desktop files to the iCloud account.
When the checkbox has been enabled, click on Done at the bottom to save the changes.
Your files should now begin to sync with your iCloud Drive account and those files can then be accessed from your other Macs, Windows computers, iPhones, and even iPads.
If you are not sure how you can access those files on your other Apple devices, here’s how:
Accessing Desktop and Documents Folders on Apple Devices
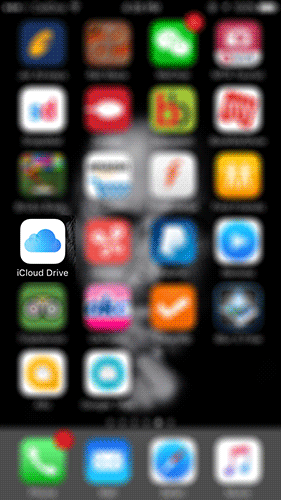
1. Launch the iCloud Drive app on your iDevice by tapping on the app icon on your Springboard.
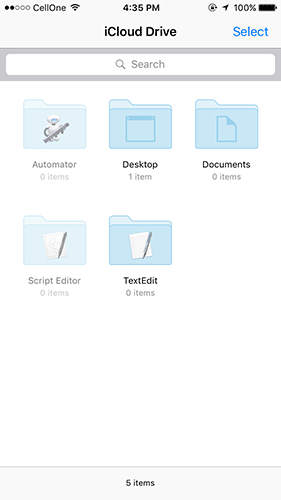
2. When the app launches, tap on either Desktop or Documents folder to access the synced files.
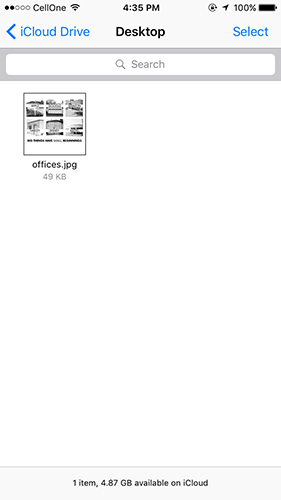
3. When you launch either of the folders, you will see their contents. In the below example, I have opened the Desktop folder where I have a file called offices.jpg. I can now tap on the file to view its content.
4. You can now edit and even remove these files from the iCloud Drive.
So, that was how you could enable syncing between Desktop and Documents folders and iCloud Drive.
Let us know if this helped you place your documents and desktop files on the iCloud Drive!