Last Updated on December 26, 2022 by Mat Diekhake
Windows allows for you to manually make any file of your choice hidden by setting the hidden attribute for them. It also hides other files by default—these are referred to as hidden files by Windows and they’re usually hidden for good reason.
The hidden files are often Windows protected system files, and system files are not files that you should modify or delete (hence why they’re hidden).
There may be times when you want to at least view these hidden files. When you do view them, they are shown in a lighter color so you can see a difference between the files that were hidden are your usual files that were not.
Finding the option to show hidden files has become easier to do in Windows 10 compared to Windows 8 and Windows 7. There are a few ways you can show hidden files in all versions of Windows 10. The tutorial below runs through each of them.
The following tutorial demonstrates how to show the hidden files that don’t get shown by default in Windows because Microsoft deems them to be too sensitive for everyone to gain access to without granting themselves the access first.
How to Show Hidden Files in File Explorer Options
By default the Windows 10 operating system is set to hide certain system files, folders and drives that is deems sensitive to modification and deletion. To unhide these, follow the steps below.
Here’s what you need to show the hidden files when you’re using a version of the Windows 10 operating system:
1. Open the Folder Options dialog. See this tutorial to read all the different ways you can get access to the Folder Options dialog in Windows 10: How to Open and Configure Folder Options in Windows 10
Note: Folder Options is now also known as File Explorer Options in Windows 10.
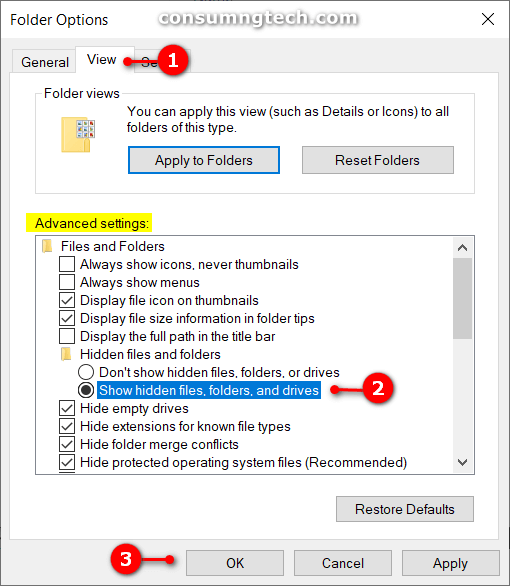
2. Click on the View tab and then click on the option for Show hidden files, folders and drives from the Advanced settings window. (click to enlarge screenshot below)
How to To Show Protected Operating System Files
1. If unhiding the files, folders and drives didn’t help, then you might want to try unhiding the protected operating system files as well and see if that helps.
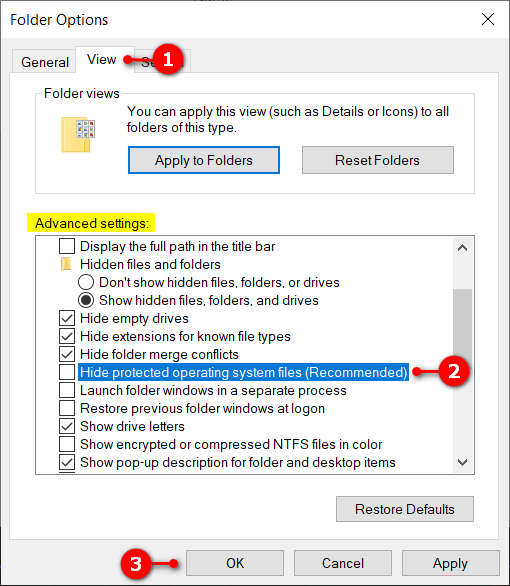
2. From the same View tab, scroll down the list of Advanced settings and uncheck the box where it says Hide protected operating system files (Recommended). (click to enlarge screenshot below)
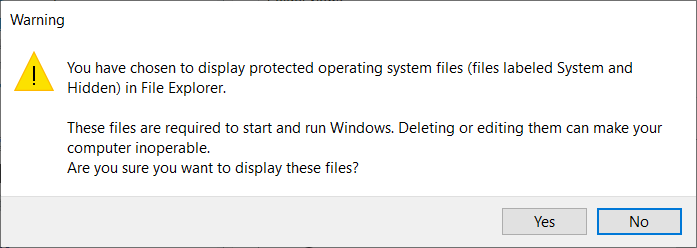
3. Click on the Yes button when you receive the warning box. (click to enlarge screenshot below)
4. Click on the OK button at the bottom of the Folder Options to save your changes and close the dialog box.
That’s all.
Related Tutorials
- How to Clear Cache in Google Chrome
- How to Reset DNS Cache in Windows 10
- How to Open Folder Options in Windows 10
- How to Create Bootable USB Flash Drive to Install Windows 10
- How to Move Location of Game DVR Captures Folder in Windows 10
- How to Create System Information File in Windows 10
- How to Exclude Folders from File History in Windows 10
- How to Turn Windows Features On/Off in Windows 10
- How to Turn On/Off ‘Show All Folders’ in Windows 10 Navigation Pane
- How to Open Control Panel in Windows 10