Last Updated on April 12, 2017 by Mat Diekhake
The Active came with an Android 4.2.2 Jelly Bean Touch-wiz Nature UX UI out of the box. Many users have hung out for the new stuff that gets them onto the chocolate software and up to date again just like they were at the beginning. We can safely say that today your wishes are about to come true. It was an OTA release first that went out to the Netherlands region in Europe with more countries expected to see it soon. Nevertheless, we have the opportunity to bypass the waiting time and install it manually for those with no patience. There are also loads of other humanities who only cannot see over the air software because they are running a custom ROM or have root. Therefore, they do not arrive and it is only with a savvy device owner that keeps up with the news that they can know a manual file is under way like we have here. Just remember if you are in that boat that the root will be revoked. Two good things come of that. The first is you will get OTA release once again and the second thing is your warranty will be good again if you have any remaining. Remember that all warranties only come for a particular period.
Sammy does a great job of looking after customers right around the world and the straightforward way to do this is by calling the US version by standard name and the rest of the world get in “international’ model. Of course these are distinguished with different model numbers, in this case we are talking about the i9295. If you own the i9295 edition of the S4 Active then this guide will help set you up with the latest Android 4.4.2 KitKat build namely XXUCNE5.
If you are already an expert in updating, and by that, I mean you have done it many times before and already know the drill then you can skip ahead and go straight to the tutorial. However, if you are a newbie in this field there are some important things we would like to point out that ensures you know everything you need to know and finish this task without any regrets. Believe me, there can be some when we talk about things like lost data. It is an official firmware, make no mistake about it, but even when the real developers issue the software OTA and manual things can go wrong. We do not expect anybody losing contacts or any other personal data along the way, but it can happen and, therefore, we always recommend people backup their information and saved pictures, video and music files so nothing is lost.
Checklist
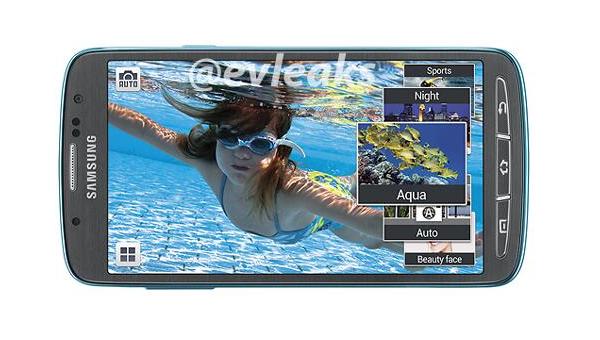
- The Galaxy S4 Active came with lots of positives such as a big 5.0-inch display, high-resolution set at 1080 x 1920 pixels. a high-resolution camera with 8 megapixels and a quad-core processor namely 1900 MHz, Krait 300. When combined with the Qualcomm Snapdragon 600 APQ8064T system chip it was a device to be reckoned with compared to the competition. With the memory things were a bit different. It came with 16 GB of built-in storage but by the time the OS was finished with all of its programs that only left roughly 11 GB of space for the end-user to have. With that knowledge and knowing this devices age, we are sure that many users are quickly running out of space. That is important now because we need to backup the files and if that isn’t possible you need to delete old files. Something like a simple video can clear a good amount of space. For some, however, that is not an option as they want to keep everything they have. For you people I suggest going out and buying one of the storage expansion options such as the microSD, microSDHC, microSDXC up to 64 GB.
- Make sure you are using a Windows OS PC for this procedure because the developers have not issued it for Mac OX S or Ubuntu-based systems such as Linux OS.
- Download the updated Samsung USB Drivers if you do not have them yet. Most of you will breeze through this without the need of updating, especially if you connect the device to the computer on occasions. However, if you come across any issue with the device not being picked up during the installation process this is going to be the number one reason to come back to. Also, the Samsung developers have been wise enough to make drivers for most Sammy based smartphone and tablets these days so don’t be alarmed if the link doesn’t say the device name specifically you are looking for this time.
- Don’t neglect to allow USB Debugging Mode by visiting the Develop options menu. It is hidden in Android 4.2 and if you are running that software still then I will fill you in on how you can unlock it with ease. With your hand, go to Settings > About Device and scroll all the way down to the build number. Once there, tap on the build number seven times. On the sixth time, it will warn you that you are about to unlock the Developer options! tap it once again and it will now be a menu. To access it go back to the About Device menu and it will be in the list.
- Sometimes the security can play the role of a villain. In this case, it will with the Odin tool we are about to use because it isn’t recognized as coming from a trusted source. To counter this we need to disable it temporarily for now and until finished. Always re-enable it once again before opening a web browser and looking at webpages because we cannot guarantee you won’t pick u pa virus then. In fact, you likely will if you browse through complete sites. now, though, we fully trust this source and have no problem turning it off for now. You can do the same for the firewall and, any security running on the Android phone you may have running as an app that was downloaded from the Google Play Store.
- OK, now we have said all of that you guys are probably sick of reading and want to get on with the guide so here it is.
How To Update The Samsung Galaxy S4 Active With Android 4.4.2 KitKat XXUCNE5 Official Firmware
1. Download the firmware from here. It is linked on the page.
2. Download the latest version of Odin namely Odin 3.09.
If you are running Windows Vista and above and would like to keep these files then download them to the C: Drive. From the Start menu type, the name in the search box and the zip file will come up on the screen. Double click to execute the operation. Download the both to the desktop and delete them once you are leaving here so it doesn’t clutter the desktop if that is too difficult. A minimalist desktop means a faster loading computer!
3. Enter Download Mode by turning off the device and rebooting it with the following command: Press Volume Down + Power and Home at the same time and hold the buttons in until the Android logo comes up.
4. Open the Odin application so that it is running on the PC.
We do this before plugging in the handset so that it can be picked up. That way we know we are in business.
5. Plug the smartphone into the PC system unit where the USB outlet is. If you cannot find a USB cable try looking at your phone charger. Often people use it here without even realizing what it is. The cable will disconnect from the charger pack.
6. Upload the firmware file to the AP button in Odin.
7. Do not adjust any of the default settings inside Odin. There are two boxes marked as on already called Auto reboot and f reset Time. We keep it like this.
8. Click the Start button and it will flash. Do not touch anything until it is finished.
9. When it says, “pass” and the ID: COM port changes colour it is done and you can close the program.
10. Remember to disconnect the device from the PC properly by finding the “Safely remove hardware” icon in the taskbar. This icon is visible after you first plugged it in. By right-clicking this icon now it gives us the right way to stop the USB Mass Storage device and that way we don’t run the risk of corrupting data files. Doing so will make sure the memory provides optimal output.