Last Updated on November 5, 2016 by Mat Diekhake
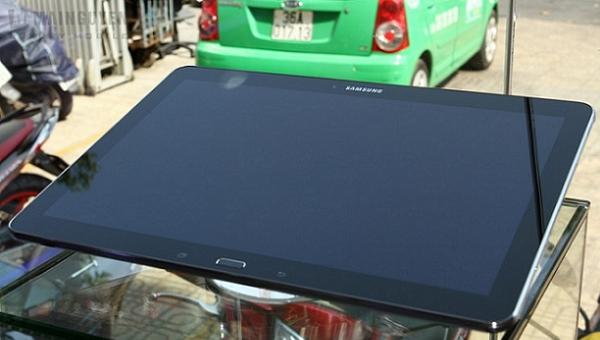
The Samsung Galaxy NotePRO 12.2 released as the largest tablet to come with an S-Pen from Samsung’s mobile range and it is proving to be popular with many people that I know about wanting to buy this. Furthermore everywhere I look there is nothing bad said about it and that is a good thing.
It is relatively new after only being released in February of 2014 and first announced in January. Being a Sammy product that is expensive it was treated to some fine firmware out of the box in Android 4.4 KitKat. That has now become outdated and if the owners want to try out the new 4.4.2 KitKat you can and we will show you how to set it up so that it is fully installed for you.
It will be your first firmware installation if you have not used any other Android-based devices before because it starts on Android 4.4 and this is the next build up from that. If you think there is no point upgrading because it already came with the Multi Window Mode you would be mistaken because 4.4.2 comes with a lot more features that you will be interested to learn. I will run through them now.
Android 4.4.2 Features Worth Noting For Tablets
As you may know this certain firmware is available for smartphones and bigger mobile devices such as tablet as what we have here. I prefer it on the tablet to start with because from the lock screen is a feature that can be used better and that is putting widgets on the left side. It leaves nothing but the unlock icon on the right side. You cannot change the widgets from the lock-screen unless you allow the mode first. Top do that head over to the Settings > Security > Activate Widgets.
Still on the lock-screen is a small arrow icon on the bottom. If you perform a swipe with your finger up it will allow Google Now. If you do not know what that is yet, in short, it is Android’s version of Siri and its goal is to be a virtual assistant. Microsoft has come up with a similar thing now too with Windows where they made Cortana. Now all three big companies have a rival for each other which should hopefully enhance future developments in that area because the competition will push each other to try to be best.
The app drawer is used for applications only and there are now widgets in there. If you hold your finger on the background it will bring up a distinct screen that presents three new options near the bottom. The middle option is called widgets and this is how you can add some in you wish.
From settings, you can click on Develop Options and inside the menu look for Delvik or ART. Many people believe that by switching over to the ART it is even faster. The downside with this is that some apps that haven’t been updated to work with the new firmware do not like being used in ART mode. If swapping back and forth between modes is something you will find difficult because you are not as tech savvy as some then you might just want to forget about playing with this until a later date. Apps will work better with this build as time goes on and you can try your luck then.
That leads me to my following point: Speed. Right from the inception of performing your very first swipe you will notice how fast this new software is.
My favorite part is going to Settings > firmware Version > Click lots of times and wait for the letter “K” to appear. It resembles Kitkat. Click the K and it will spin around. Then it will lead into a cool looking screen showing a rip-off of the chocolate bar logo and their name inside instead. It does not do anything, but if you are into graphics and that thing you might also enjoy seeing this. It is more creative that just having the numbers listed inside and I thought it was a nice inclusion to have some fun.
Checklist
Enable USB Debugging Mode by navigating to Settings > About Phone and tap on the build number around 7-10 times until it is unlocked. It has now enabled the Develop Options so you can visit Settings > Developer Options and Enable Debugging from here.
This XXUANC4 build has been made for the 2014 Samsung galaxy NotePRO 12.2 only and is not for installation on any other. It is important we only install firmware on the device that it is made for to avoid causing any damage. Moreover, it likely will not work even if it does not cause harm.
If you have root it will be revoked. The good news is that the warranty will now be back because this does not void the warranty but doing the root did.
Backup all the data to internal memory if you have any left. Hopefully, there is some because this device comes with 32 GB of it. If you are running low you can make a trip to the shops and buy an external MicroSD or MicroSDHC card and insert it into the slot. It now provides extra storage space up to 64 GB and it also handy for backing up the device. I like it because it will backup everything and not just part of your stuff so there isn’t any need to use other apps from Google Play just to try to get your applications stored. If you do not like those two options you can sync using Samsung Kies.
This tablet comes with automatic USB charging. That means when it starts charging the battery when it is plugged into the Windows-based PC. It means there is no point wasting time on building a certain level of charge before starting.
Download the latest Samsung USB drivers.
The NotePRO should be factory unlocked. Make sure that it is not locked to any carrier.
Verify the model number before starting so you know it will work by visiting Settings > About Phone > Model Number.
How To Set Up XXUANC4 Android 4.4.2 KitKat On Samsung Galaxy NotePRO 12.2 P901
1. Download the P901XXUANC4 firmware file to Windows. First you will need to sign up to Sam Mobile.
2. Download ODIN 3.09 zip here.
3. It will say “your download will start in” and count down from about 30 seconds. Wait until it finishes.
4. A green button will appear that says “Click to download.”
5. It will now begin downloading to your browser after you click.
When attempting to open the files after extracting them your security may ask if you trust this source. Click yes and it will open up.
6. Turn the device on in Download Mode by pressing and holding Volume Down + Home + Power at the same time. Release when the logo appears on the screen.
7. Right-click the ODIN and double check it is run as administrator. If not enable this option.
8. Now double-click the ODIN icon and open the program.
9. Look for the “added’ message appear in ODIN. If unsuccessful you need new drivers and try again.
10. leave all ODIN default settings. It will have ticked boxes for Auto reboot and f reset Time.
11. upload the firmware file to the PDA button. The correct file will mention “Code” in the extension.
12. Click the Start button at the bottom and it will start flashing the firmware.
It is important to not touch anything on the computer or the tablet until it finishes. Certainly do not touch anything inside ODIN.
13. It will say “pass” when finished.
14. Click the red “X” in the top right corner and close ODIN.
15. Right click the Safely remove Hardware icon in the taskbar and Stop the USB Mass Storage device. Wait until it says it is now safe to remove the device.