Last Updated on August 15, 2024 by Mathew Diekhake
As of Windows 10 build 17093, Microsoft has created a new graphics settings page where you can see details for multi GPU systems.
One of the upsides of having multiple GPUs is you get to choose which programs will utilize which GPUs and tweak things, so they’re just right for your setup. The new graphics settings page in Windows also allows you to make some tweaks including setting a preferred GPU for applications. More specifically, you can select which GPU you’d like to use for classic apps and universal Store apps.
Adjusting the GPU selections can help you eke out more performance as well as improve battery life when done correctly, although it should also be noted that Windows does a pretty good job of divvying up these jobs by itself as well. It’s not so much that everyone should worry about unnecessary power consumption and not enough performance when at the helm of Windows automatically choosing which GPUs to use for you. Instead, some professionals may prefer tweaking things when they know of situations that it can help them get more out of the GPUs.
By default Windows uses the main integrated GPU on a system for power consumption and the discrete or external GPU will aid in better performance when it’s dealing with multiple GPU systems.
How to Add Apps to Set Preferred GPU for in Settings
1. Open the Settings application and click on the System icon from the main Windows Settings menu.
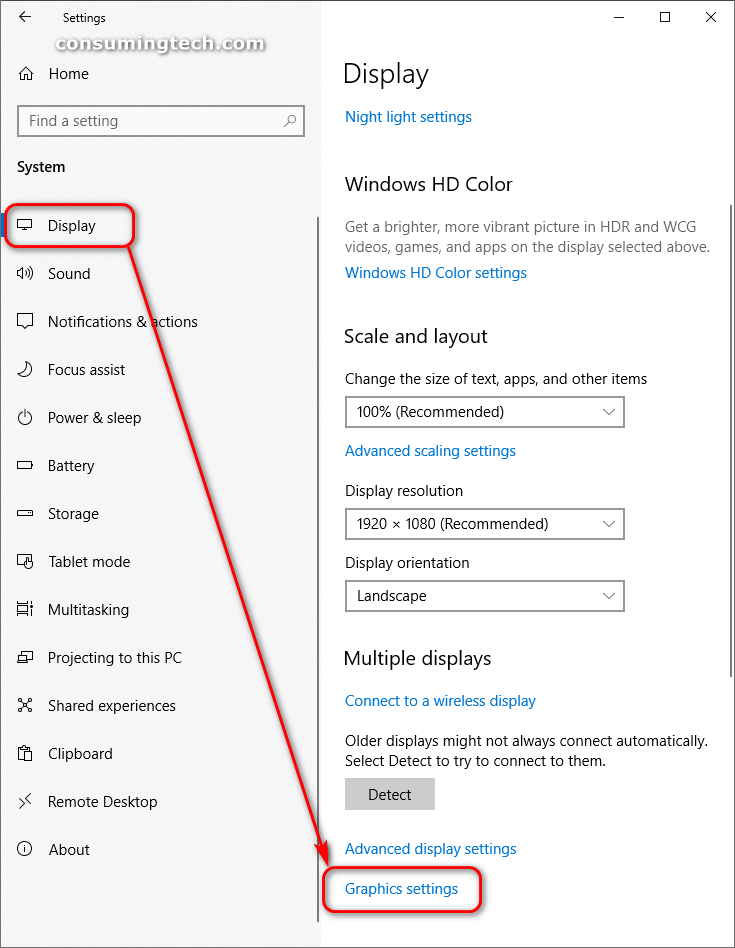
2. Once inside System, select Display from the left side pane and then scroll down until you get to Graphics settings and click on it.
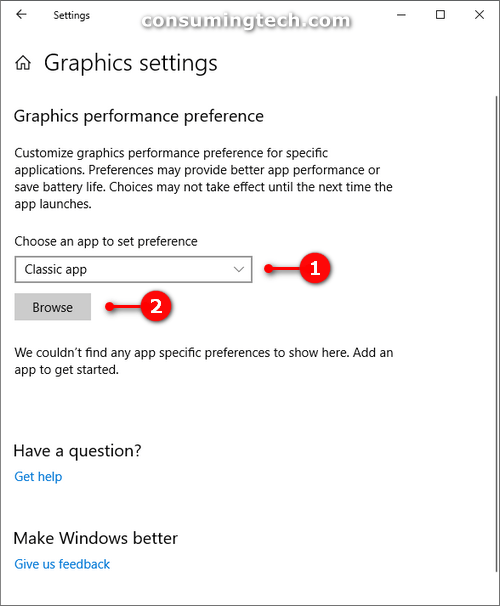
3. To add a classic app to GPU performance preferences, select Classic app from the drop-down menu and then click on the Browse button to navigate to where you have classic apps stored on your hard drive and then upload it to this location.
For instance, if you wanted to upload Microsoft’s paint 3D application, you can find it by clicking on the Browse button and then navigating to This PC > Windows C: drive > Windows > System 32 > paint 3D. from there you upload the app as you would any other, by clicking on the Add button at the bottom of the window.
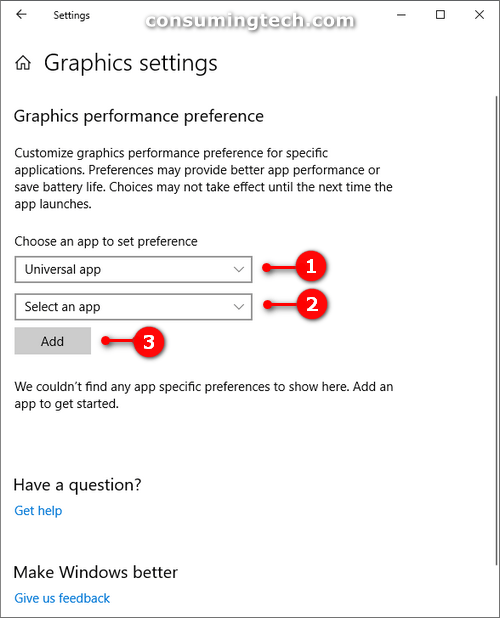
To add a universal app to GPU performance preferences, select Universal app from the drop-down menu and then choose the app from the Select an app drop-down menu, followed by clicking on the Add button.
How to Set Preferred GPU for Apps in Settings
1. Open the Settings application and click on the System icon from the main Windows Settings menu.
2. Select Display from System’s left side pane and then click on the Graphic settings link after scrolling down the right side pane of the same window.
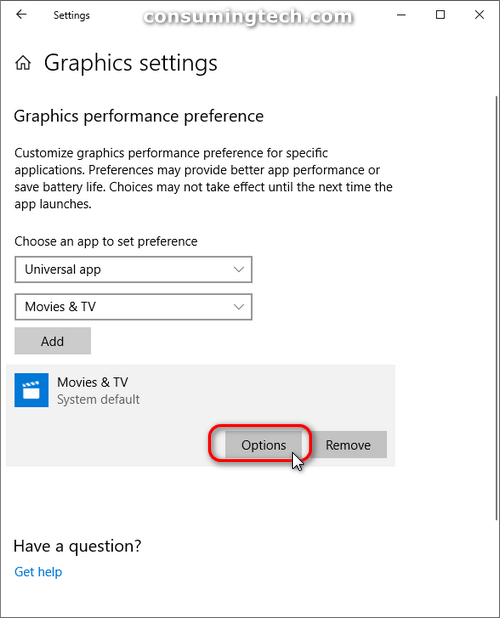
3. Where you’ve added your application to the list, click on it once so that it is highlighted and then click on the Options button.
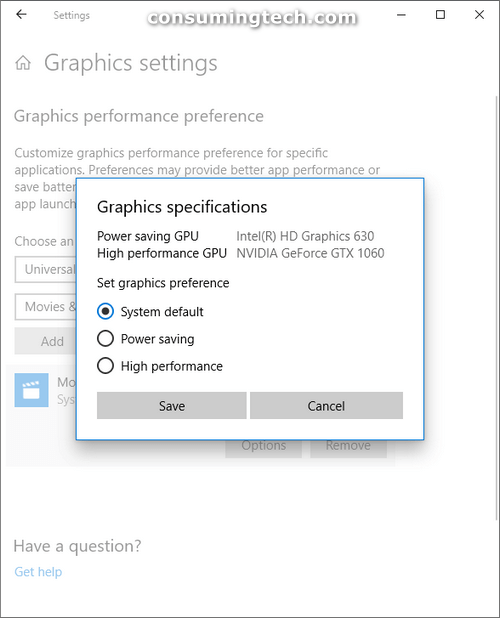
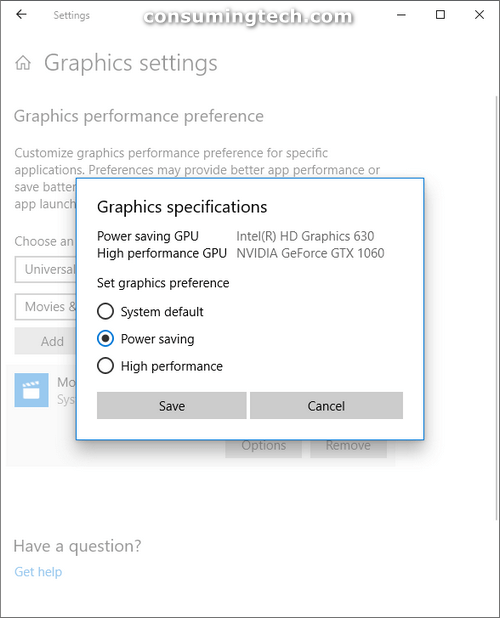
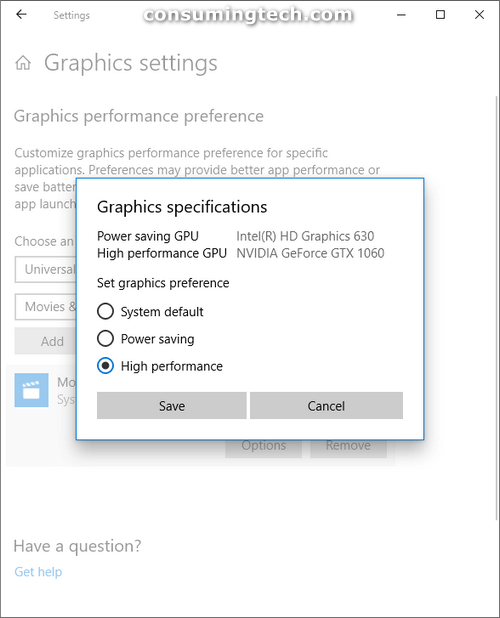
4. Here you will find the chance to select three different options: its default settings, the power conscious setting or the setting that gives high performance to the chosen app.
a. To use the default settings, select the System default and then click Save.
b. To use the power saving settings, select Power saving and then click Save.
c. To use the high-performance settings, select High performance and then click Save.
How to Remove Apps from Preferred GPU List in Settings
1. Open the Settings application and then click on the System icon from the Windows Settings menu.
2. From System’s left pane, select Display and then scroll down the right side pane of Display and click on the Graphics settings link.
3. Highlight the application you would like to remove by clicking on it once and then click on the Remove button.
That’s all.
Related Tutorials
- How to Change Default Sound Input Device in Windows 10
- How to Turn On/Off Allow Pen to Act as a Mouse in Windows 10
- How to Open Elevated Command Prompt in Windows 10
- How to Enable/Disable Automount of New Disks and Drives in Windows
- How to Choose Default Operating System to Run at Startup in Windows 10
- How to Change Windows To Go Startup Options in Windows 10
- How to Upgrade Windows 10 Pro to Windows 10 Enterprise
- How to Change Operating System Name at Startup in Windows 10
- How to Change Account Used to Get Insider Builds in Windows 10
- How to Change Time to Display Operating Systems at Startup in Windows 10


October 4, 2022 @ 13:27
Computers can be complicated things these days: laptops are becoming increasingly more popular to own and even they can now cater to the most hardcore of gaming enthusiasts.
Gaming on computers can be a lot of fun if you can find the spare time to do it, but it’s also going to require an expensive set up. As graphics improve, the hardware requirements rise up to try to provide for the extra graphics that you can see.
These days it’s not uncommon for a high-end laptop that wasn’t designed for gaming to come with two CPUs. If it is a high-end gaming computer you’ve got your hands on, then it’s likely going to come with two GPUs either instead of as well.
Just like you can set CPU process priorities for applications, you can set a preferred GPU for apps in Windows 10 as well. If your laptop has more than one GPU, then it’s likely going to mean that you have one of those graphics chips waiting around for when you start using graphic intensive tasks such as games and that GPU will solely cater to those demands while your other graphics chip handles everything else so you get the best possible performance from the other more every day tasks.
When you buy a multiple GPU computer, you wouldn’t usually have to learn about how they work because the Windows operating system will automatically designate the tasks to the graphics chips. However, if you know you want a certain GPU to handle a tasks that Windows is giving off to the other, then you have the chance to manually change that from the Settings application.
Here’s what you need to set preferred graphics chips from the Settings app when you’re suing a version of the Windows 10 operating system.