Last Updated on August 3, 2022 by Mat Diekhake
Chainfire is highly valued for his One-Click-Root solutions that are readily available for countless devices. We can’t praise them enough for being simple to use and delivering users with an experience as close to the stock Android as possible.
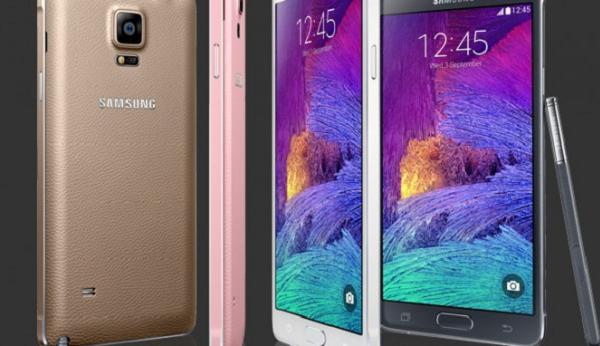
Firstly, you should understand that the Note 4 from Samsung comes in many model numbers. These numbers are dependent on which part of the world you are from. It doesn’t need to be confusing. You can check and identify yours easily by turning the tablet or phone on and navigating to the ‘Settings,’ followed by ‘About device.’ Now the model number is presenting itself on the screen. Always check that the number matches up with the corresponding number on the guide you are using. In this instance, that number is N910W8. We know this number is the Canadian edition, therefore all people residing in Canada have this code. That’s where the Note’s differences stop. Nothing else is any different from this Note 4 compared to any other.
Why would you look to unlock the OS? Root will officially unlock the system internals of any Android device. Follow the instructions listed below to remove the default factory restrictions in place by the manufacturers. We know Android 5.0 Lollipop is rolling out for the Nexus range as we speak thanks to the OTA service. We also know that Lollipop has added restrictions in place by Google to make rooting even harder. The large smartphone we have here is still running Android KitKat at the time of writing this. However, it isn’t long until the newfangled candy dessert is making its way to many of Samsung’s feature smartphones and tablet including this one.
The rooting operation is custom and unofficial. That means we are implementing steps against the manufacturers wishes and they are risky. They do void the warranty of the device. Given that this phablet is still relatively new, we know that most people’s warranties are still working. The great news is that you can return back to stock software versions later and take the root access away again. By doing so you are returning the flash counter back toward zero. Nobody can tell you tinkered with the system internals in the past after that happens. Therefore, you can send it away once again for repairs and they will look at it.
Details of Note
- The most important step now is backing up the device’s data. All data is vulnerable since opening it up out of the box. That’s why we suggest backing up the EFS folder, call logs, MMS and SMS texts, videos, pictures, music files, market applications and anything else you have installed on the device that you don’t want to risk losing. Countless people have their own way of backing up. You can go ahead with your own way or take some of our advice. We prefer to use Helium for Android available from the Google Play Store for syncing the contacts and backing up the apps. SMS backup+ is a great way to make copies of the text messages you don’t want to lose. There are many other options out there for you to explore to make copies of the rest of your data. Since this is a Samsung-based device, we know a popular way is using Samsung Kies. After Downloading Kies you can sync much of the device. Additionally, it doubles as a great way to install the latest USB Drivers.
- Remember to disable Kies before starting the steps if you are choosing to use Kies for the USB Drivers. Otherwise you can install the USB Drivers from the official Samsung website or several other sources for the files.
- The Odin tool we are using today is popular for flashing files with Samsung-based devices. It is made by the official Samsung Developers. However, it only works for Windows PCs ranging from Windows XP through to Windows 10. A new version is available for Windows 10.
- Furthermore, you must stopover at the Developer Options menu and enable USB Debugging Mode. The menu is hidden in past version of Android operating systems. If it’s hidden for you, stopover at the build number and tap it seven times until it unlocks. The messages will count down the remaining tries on the screen.
- Although there are countless guides using the tool under the same Chainfire name, it’s important to understand that the files diverge. That means this file is only for the Canadian model and no other. Do not try installing it on another model since it can soft-brick the device.
How To Root The Canadian Samsung Galaxy Note 4 SM-N910W8 Using The One-Click Solution
1. Turn the computer on and log in to your user account.
2. Download the CF-Auto-Root package here.
3. The Odin version you need is also inside the file.
4. Extract the contacts to the desktop of the Windows computer.
5. Fetch the USB cable for connecting the phone to the computer.
6. Boot the phone into Download Mode by pressing volume Down + Power + Home buttons.
7. Plug the note 4 into the computers USB slot.
8. Click the PDA button and upload the root file.
9. Leave all other settings as default.
10. Do not check the re-partition box.
11. Click the Start button to begin the flashing.
12. Do not touch any buttons until it finishes. Wait for the rebooting process.
13. If you get stuck in a boot-loop you must enter the recovery mode. Now select the wipe data factory reset” and “wipe cache partition” options.
You can install the root checker application from the Google Play Store and verify the operating system is unlocked internally. Once verified, it’s time to start installing custom ROMs and apps that you otherwise couldn’t use. Examples of apps you may wish to look at include ADB Wireless, Move2SD Enabler, Market Auto Update Bulk Toggle, LEDs Hack, Theft Aware, Droid Wall, Button Savior and more.