Last Updated on July 22, 2022 by Mathew Diekhake
The first action to take when looking forward to modifying and tweaking the OS of the Android device is rooting and installing a custom recovery image. Thankfully, we are presenting both today and it’ll replace the stock recovery tool. Since rooting is an unofficial operation, it voids the manufacturer’s warranty. The XE is getting old now and many of you won’t find any warranty remaining anyway. That’s means you have little to lose.
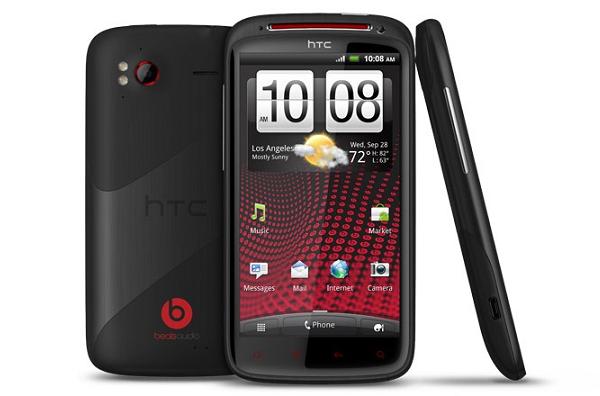
The HTC Sensation comes in three variants: the HTC Sensation 4G, XL and XE. The following is only made for the XE variant. You can check your model number by looking on the back of the box or navigating to Settings > About Device. Do not try installing the steps on any other as you risk soft-bricking the smartphone.

Details of Note
- You need a Windows PC, notebook or laptop to complete the steps. The toolkit is developed with Windows in mind and no other operating system including Linux or Mac. Moreover, you must stop the security programs running on the Android smartphone and the computer. They come as apps on the mobile and you can temporarily disable the antivirus protection by visiting the system tray from the Windows task bar.
- Check the battery level on the phone before starting the steps. You want at least 505 battery power or else you risk it shutting down. You don’t want it shutting down while the flashing is taking place or else you may need a factory reset. It does come with USB charging as a default feature, and since we are connecting to the computer for the duration of the guide, you will find the battery charging automatically for most of the time. That’s only if you have the USB charging feature working.
- Toolkit’s make life easier, but you still need to back up the data before starting. As far as we know, Hasoon’s work doesn’t need automatic factory resets as you would when installing a custom ROM. However, sometimes the unexplained happens in technology and you can find boot loops and other problems that require you wiping the data and starting again. If you are forced into a factory reset the data is wiped and you cannot get it back. It’s essentially a brand new phone again just like it was after you opened it up out of the box.
- You ought to back up the phone contacts, music files, SMS text messages, videos, pictures, EFS folder and any other data you think you need. use applications such as helium. Helium is available from the Google Play store and will make copies of your messages, sync the phone contacts and market apps. Those of you with root access already and wanting to unchain the device away from the default factory restrictions another way will want to use titanium. Titanium is the greatest backup experience but those without the system internals unlocked cannot use the app.
- We are connecting the phone to the computer for much of the guide. For that to happen successfully we need to allow the devices to talk to each other. We do this through USB Debugging and updating the drivers. Enable USB Debugging mode from the Developer Options menu. Now find the up-to-date USB drivers from third-party file sources or visiting the official HTC website. many of you already have the proper drivers. If you are accessing the phones data from the computer you know the drivers are working.
- Toolkits are easy to use, but they still need advanced Android users. It’s not easy understanding everything that’s involved; therefore rookies must find someone with more experience to help them along the way. The consequences are costly if you make a mistake. The worst case scenario is bricking.
- You must unlock the bootloader before starting. Do it from the HTC Developers website where you will find complete step-by-step instructions.
How to root the HTC Sensation XE with Hasoon’s All-In-One Toolkit
- Start with turning the computer on and logging into the user account of your choice.
- Download the SuperSU file here.
- Download CWM touch recovery here.
- Download Hasoon’s Toolkit here.
- Use the desktop for all three files.
- Find the USB cable.
- Connect the XE to the computer using the USB wire.
- Transfer the SuperSu zip file to the internal memory or the SD card.
– do not extract the folder yet. - Do not disconnect the phone from the PC.
- Extract the Toolkit and find the X.exe file.
- Click the file and the front page of the toolkit opens on the monitor.
- Look for the top left box and select “install these drivers” by clicking “Go.”
- Go to the desktop and find the CWM image and rename the file CWM 5827.
- Copy the new file to the Toolkit and replace the existing file with the same name.
- Go to the main window from the toolkit and look at the top-right box.
– you will see the new file. Click the file so it’s highlighted and select the “flash recovery” option. - Wait several minutes for the flashing to finish.
- It will reboot automatically in recovery mode.
- Select ‘install zip from sdcard’, followed by‘choose zip from sdcard.’
- Upload the SuperSU file.
- Go back to the main recovery screen and select “reboot system now.”
Repeat the steps if it fails the first time. Furthermore, you may wish to apply a ‘factory reset.’ Apply the apply the ‘format /system’ option after the factory reset.
You can download the root checker app from Google Play online and verify if it’s working.
